- Where to buy a laser level profitably and reliably?
- Technical parameters
- Housing laser level
- Construction and disassembly of the body
- Battery compartment and accumulator
- Compensator Huepar B03CG
- Control elements
- Blocked compensator
- Unlocked compensator
- Functional
- Comparison table with competitors
- Laser line thickness at different distances
- Accuracy check
- How to do calibrate at the laser level Huepar B03CG
- Delivery set
- Pros and cons
- Video review
An interesting version of the green laser level Huepar B03CG. This device definitely deserves attention. Since the quality of materials and Assembly, it is not inferior to other high-quality laser levels, but it is slightly cheaper.
Plus, it is easy to understand and can be easily configured if necessary. Read more about everything in the review.
Where to buy a laser level profitably and reliably?
This model was included in the rating of the best laser levels of 3×360 degrees.
Technical parameters
- Accuracy: ± 3mm at 10m (± 1/9 in. at 33 ft)
- Working distance: 40m * without receiver (* 100 LUX)
- Distance with receiver: 60m / 120m in diameter (197/394 ft)
- Leveling range: 4º ± 1º
- Installation time: ≤ 3 seconds
- Laser wavelength: 505-520 nm
- Laser class: 2 (IEC / EN60825-1 / 2014), <1mW
- Power supply: Li-ion battery 3.7V / 5200 mAh
- Charging port: Type-C / adapter 5V = 1A
- Operating time on a single charge: ~ 8 hours (all planes)
- Dust and moisture protection: IP54
- Tripod thread: 1/4 “
- Working temperature: -10°C ~ + 50°C
- Storage temperature: -20°C ~ + 70°C
- Dimensions of the device with towers: l / w / h – 11.4 x 8.7 x 11.4 cm
- Set weight in case: 1533 grams
- Minimum distance from the horizon:
- to the floor – 10.5 cm
- to the ceiling – 0.9 cm
- Minimum distance from vertical to wall: 1 cm
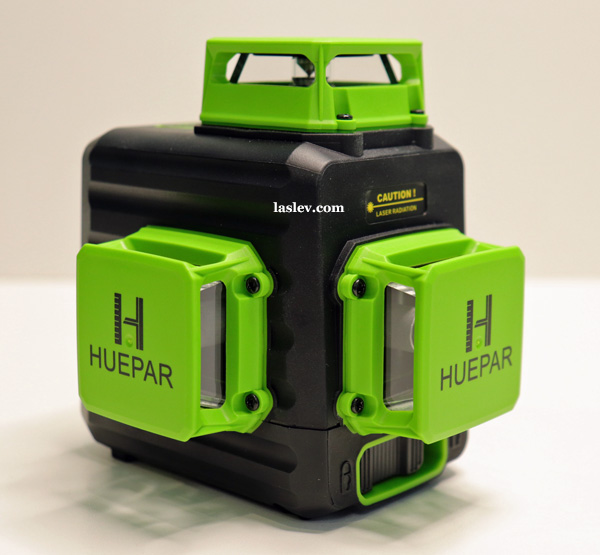
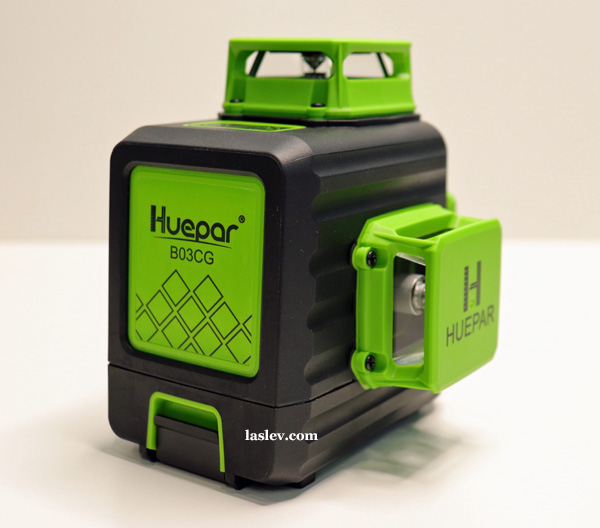
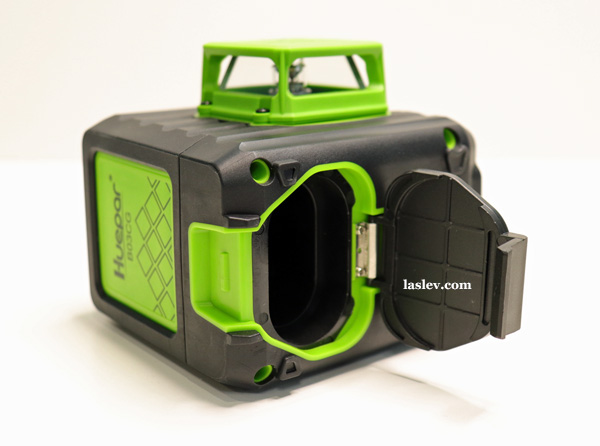
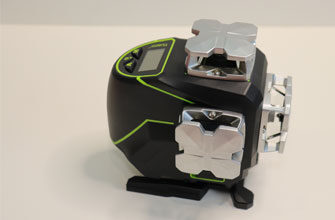
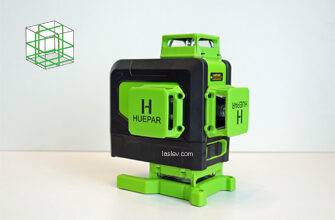
Housing laser level
The Huepar B03CG laser level has a compact housing that is almost completely covered with rubber.
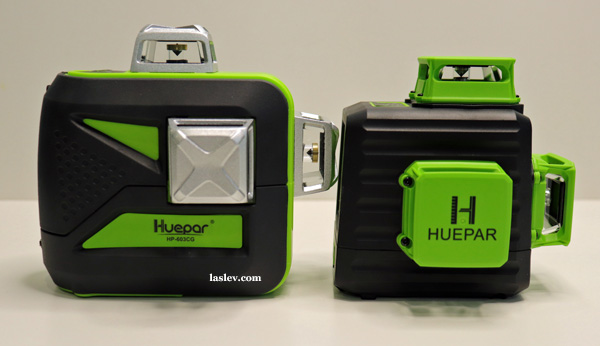
If you compare its size with the older popular and very high-quality model Huepar 603CG. As you can see in the photo, the size of the B03CG is really smaller.
The case itself is made at a high level. All the details are clearly interfaced with each other. The gaps are all smooth. There are also no complaints about the quality of materials, excellent ABS plastic and good thick rubber are used.
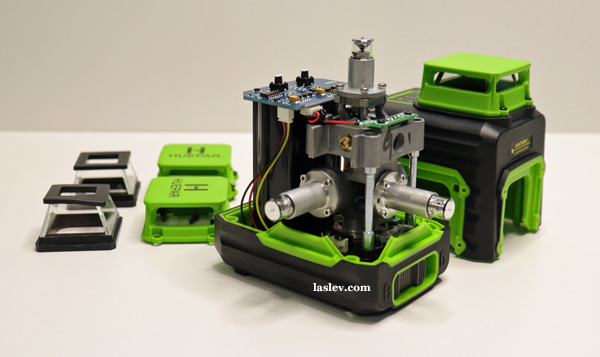
Construction and disassembly of the body
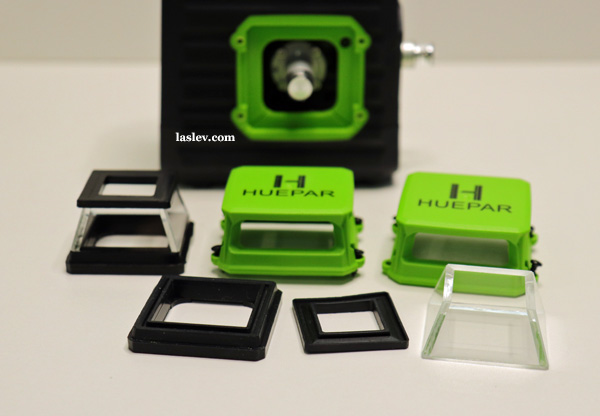
The protective towers are attached to four screws through a thick rubber gasket. To be more precise, the top and bottom of the glass are rubber gaskets, and all this is pressed by the tower to the body of the device.
This is an excellent solution that fully meets the declared protection against dust and moisture – IP54.
Another big plus in the Huepar B03CG laser level is the convenient disassembly of the case for subsequent configuration (we will consider it below).
To disassemble the case, it is enough to remove two towers from the verticals and Unscrew the four screws from the bottom of the device. After that, the upper most part is removed without any problems. And you can access all the adjustment screws
Moreover, it should be noted that the device remains in working order, since the battery remains in place. This is really much more convenient than disassembling the case of the Huepar GF360G.
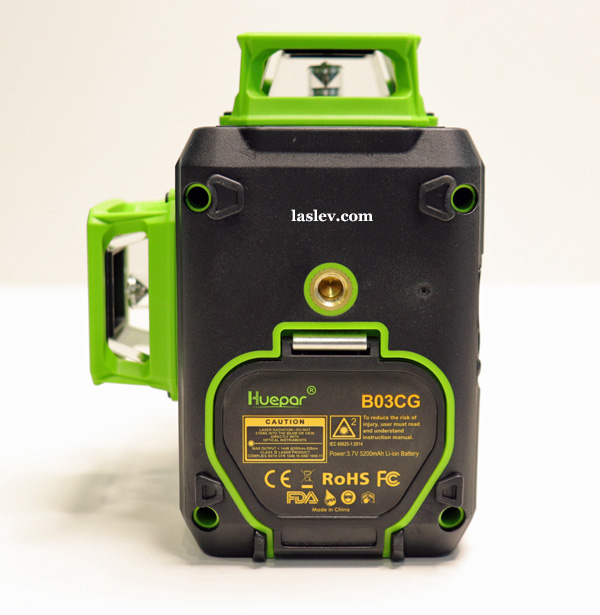
Battery compartment and accumulator
The disadvantages include the lack of a rubber gasket in the battery compartment. Although the compartment itself and the non-removable lid are also well made.
Next to the battery cover, which, by the way, bears the logos of all passed certifications, and as you can see quite a few of them, there is a 1/4-inch thread.
The threaded brass bushing is neatly mounted and looks very aesthetically pleasing.
Compared to the Huepar GF360G model, the HUEPAR B03CG laser level uses an updated battery.
They look the same and have the same capacity. The biggest difference is that the updated battery can be charged separately via the Type-C port. This is somewhat more convenient.
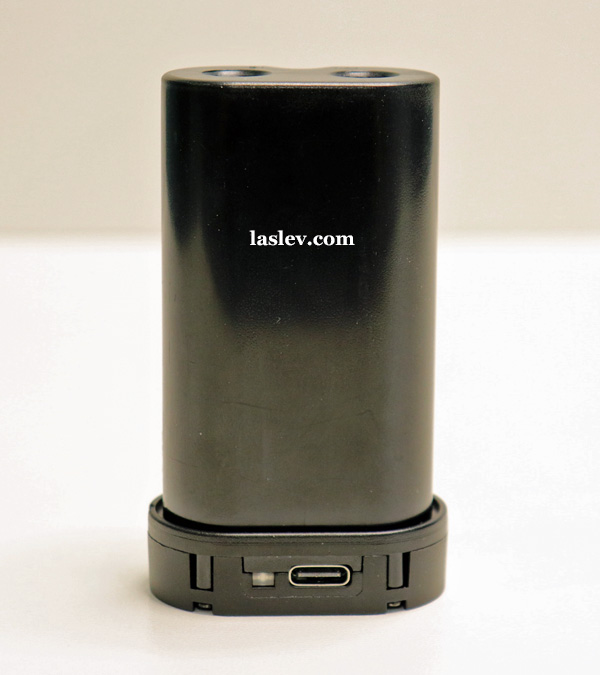
The device itself also has a socket for charging the battery installed in the laser level. Accordingly, you can also work with the device plugged in.
It is possible to work from the electrical network, both with the battery installed in the device, and without it.
Yes, by the way, the plug itself is made of soft rubber and closes perfectly from time to time.

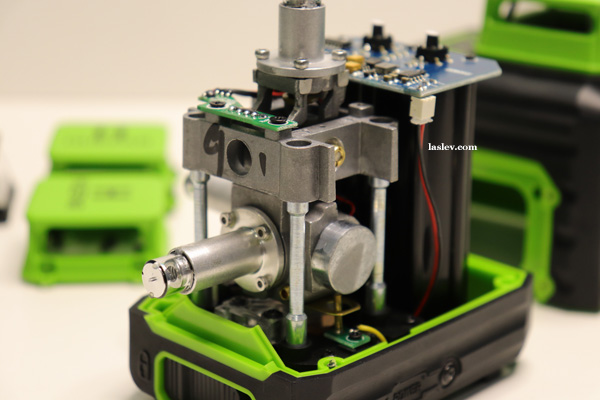
Compensator Huepar B03CG
The device has a magnetic compensator with a pendulum. But it should be noted that it is quickly set to its original position. The actual installation time is less than 2 seconds.
The entire auto-leveling system is ready to handle a 4º ± 1º tilt in all directions. However, if the tilt of the device body is higher, then auto-leveling will not occur and the alarm will automatically turn on in the form of fast flashing lines.
This notification indicates that the compensator can not cope with a large slope. To disable the alarm, you just need to put the laser level on a flatter surface. And the lines will stop blinking.
There is no duplicate audio signal. But this is more of a plus than a minus.
But what exactly should be attributed to the advantages, because it is that the entire compensation system is installed on a metal skeleton. This is somewhat more reliable than a plastic skeleton.
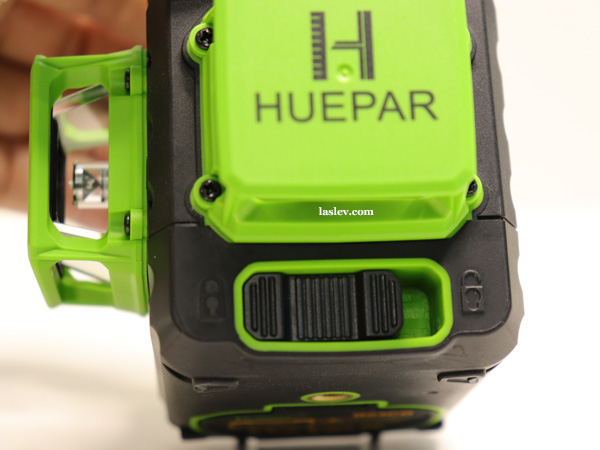
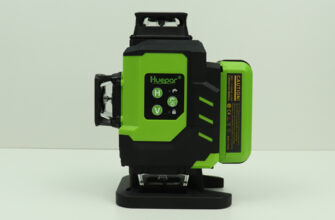
Control elements
Control of the Huepar B03CG laser level is intuitive and everyone can handle it.
In front there is a two-position toggle switch, which is responsible for blocking the compensator and turning on the device.
Blocked compensator
Toggle switch in the “closed lock” position. The compensator is locked and the level is ready for transport.
The TILT function is also activated in this position to work at any arbitrary angle. To enable this mode, hold down the upper left button for 2 seconds.
You can also use this button to switch planes individually. (we’ll look at the full algorithm below).
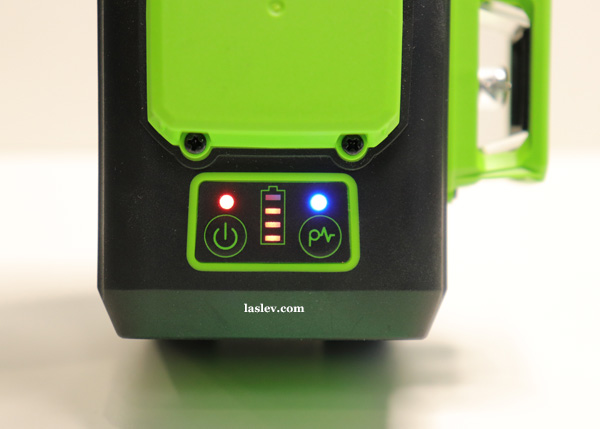
The lines in this mode blink slowly – once every five seconds. Plus, the red indicator on the keyboard above the left power button lights up. This is done on purpose so that you remember that you are in a special mode.
You can’t mark up a level with the TILT function!
The button on the right with the letter “P” turns on the mode of operation with the receiver. When turned on, the corresponding indicator above the blue button also lights up. This mode is available when working with both a locked compensator and an unlocked one.
When the laser level is completely turned off, you can view the remaining battery charge without turning on the device. To do this, just briefly click on the left button at the top. The charge indicator will show the remaining number of divisions.
Unlocked compensator
When switching the toggle switch to the “open lock” position, the compensator opens and all planes are immediately switched on.
Then you can use the left button to select the desired combination of planes.
The algorithm is as follows:
- The first press – turns off the front vertical. The horizon and the lateral vertical are on
- Second press – only one horizon is lit
- Third press – only one front vertical is lit
- Fourth press – two verticals are on
- Fifth press – all three planes are turned on and then in a circle
The “P” button also activates the mode of operation with a special receiver, for working outside in Sunny weather at a distance of 120 meters in diameter or 60 meters in radius.
Functional
The Huepar B03CG laser level is perfect for all construction and finishing work.
Thanks to the conical prisms, the 360-degree laser plane can be projected as close as possible to a wall or ceiling. This is much more visual than simple 2D levels like the Firecore F112G.
But I must say that there are already laser levels with two horizontal planes. One horizon is projected as close to the ceiling as possible (convenient for mounting different types of ceilings). And the second one is as close to the floor as possible, which is already convenient for working with floors and their coverings.
For example, consider a pair of laser levels: Fukuda MW-94D-4GX or Huepar 904DG.
Using the TILT function, you can solve non-standard marking tasks.
Working outside in Sunny weather is also not a problem for this model. It is only necessary to buy a receiver and the issue with marking in the sun is resolved.
Comparison table with competitors
| Technical data | Huepar B03CG | Huepar GF360G | Fukuda MW-93T-3GX |
| Accuracy, mm / m | ± 3mm / 10m | ± 3mm / 10m | ± 1mm / 7m |
| Compensator range, ° | 4º ± 1º | 4º ± 1º | ± 3.5 ° |
| Range without / with receiver | 40 * / 60 | 45 * / 60 | 20m * / 50m |
| Dust and moisture protection | IP54 | Code IP54 | Code IP54 |
| Tilt function | + | + | + |
| Working with the detector | + | + | + |
| Working from an outlet | + | + | No |
| Li-ion Batteries | 3.7V 5200 mah | 3.7V 5200 mah | 1500 mAh / 4АА |
| Working temperature | -10°С to + 50°С | -10°С to + 50°С | -10°C to +45°C |
* – a conditional indicator that directly depends on the degree of lighting both indoors and outdoors. Indoors, under normal lighting conditions, green laser levels from all manufacturers will be visible at a distance of 30-40 meters.
Laser line thickness at different distances
In this test, B03CG was not particularly surprised, and showed the following results.
At a short distance of 1 meter, the line was only 1 millimeter thick. Quite an excellent result.
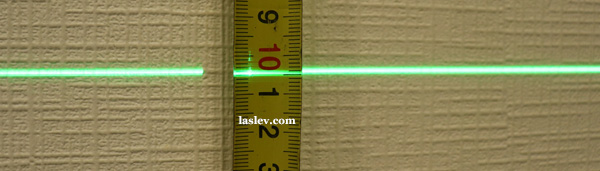
At 5 meters, the thickness was already 2 millimeters.
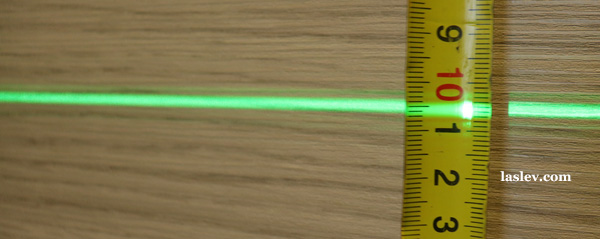
And at a distance of 10 meters, the laser line increased in thickness to 4 millimeters.

Accuracy check
The declared error is ± 3mm per 10 meters. That is, at 10 meters, the maximum take-off between points when turning the level can be 6mm. How to correctly calculate the error for laser levels with conical prisms, see here.
And so, the distance between the points in this instance was no more than 2 mm. It turns out that the level is configured even better than stated.
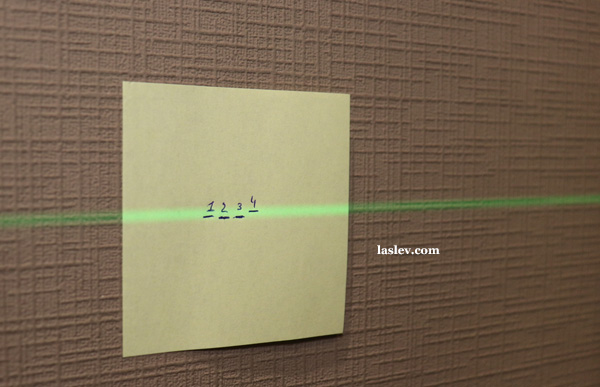
As for verticals, everything is also in order, everything is in acceptable norms. You can see a detailed accuracy check in the video at the end of the review.
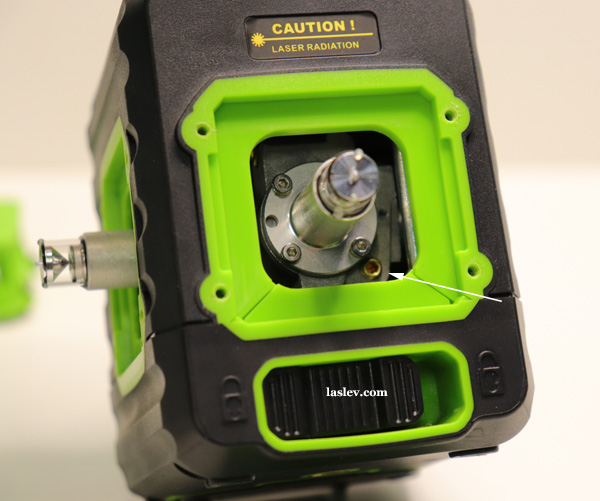
How to do calibrate at the laser level Huepar B03CG
A huge plus of this model is the easy adjustment of accuracy. There is no need to disassemble the entire body of the device.
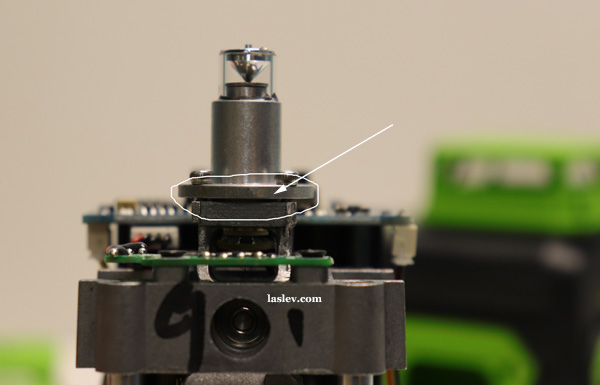
To adjust the position of a separate laser module, simply remove its protective tower. And four adjustment bolts (see the photo below) to adjust its position.

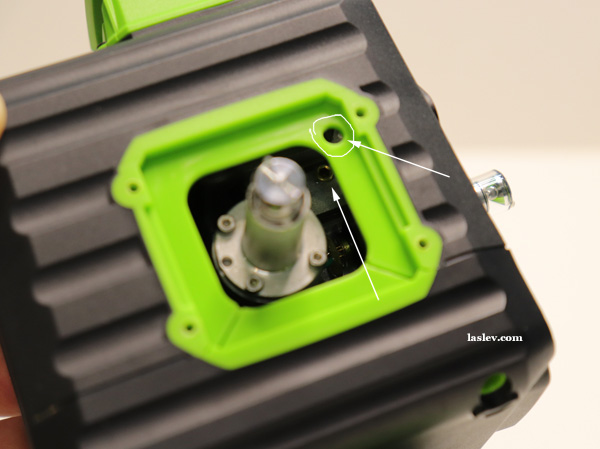
To adjust the axial displacement of the planes in one direction, it is enough to correct the position of the entire pendulum. This is also done simply by using two hexagon bolts.
We remove the protective towers from the verticals and get free access to the longitudinal adjustment bolt of the pendulum (photo below)
And to the transverse adjustment bolt.
In this instance, there are gaps everywhere between the base of the laser module and the body of the pendulum. Therefore, the position of each module can be adjusted separately.
But it often happens that one laser tube is tightly screwed to the pendulum. Therefore, when setting up all three planes, you first need to set up this particular laser tube with the position of the pendulum. That is, the adjustment is made by two adjusting bolts on the pendulum.
Then the other two laser modules are adjusted, which have a gap between the base of the emitter and the pendulum. For more information about setting up, see the video.
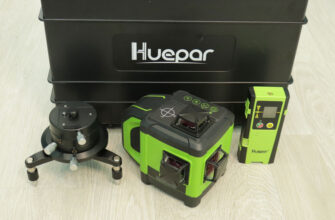
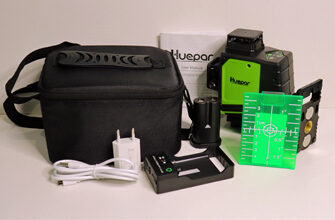
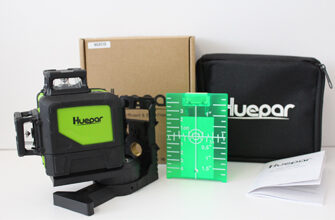
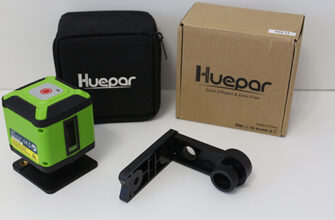
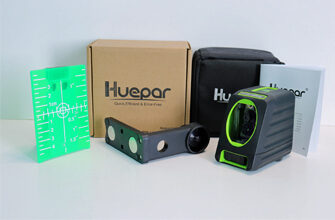
Delivery set
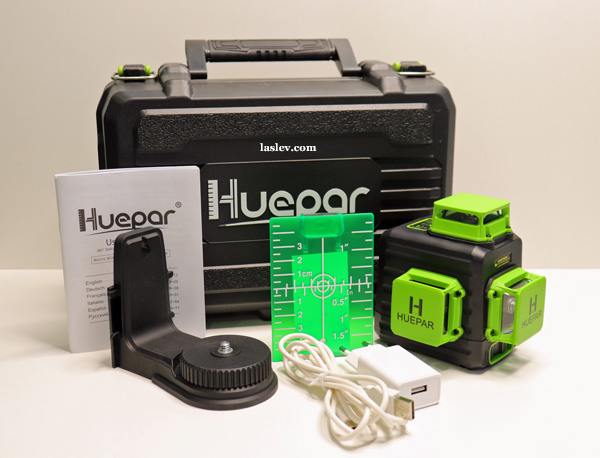
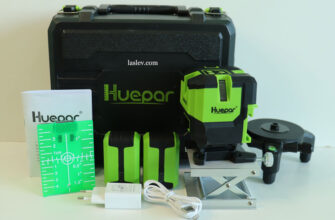
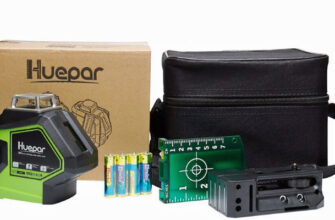
The Huepar B03CG laser level is delivered in a compact plastic case.
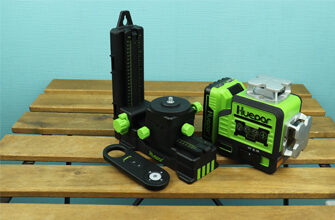
Which, in addition to the laser level, includes: a green laser magnetic target, a USB – Type-C wire with a USB plug, instructions in different languages, and a magnetic mount, which we will consider in more detail below.
Universal wall mount, in addition to two powerful neodymium magnets, can be attached to screws and straps. Also, the mount has rubber heels, so as not to spoil the magnetic surface.
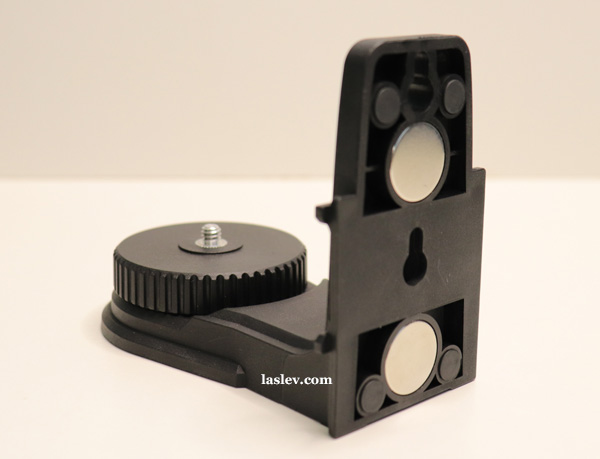
In addition, the bracket is equipped with a turntable that rotates relatively smoothly.
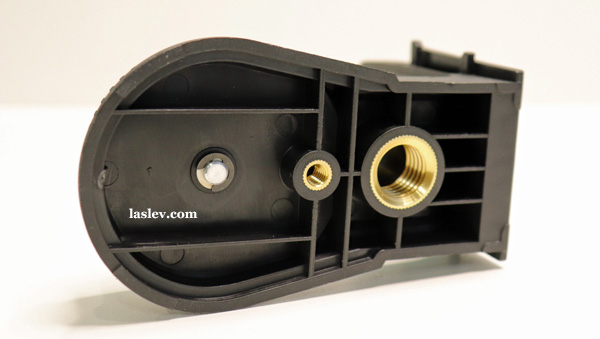
Also at the base of the mount are two brass bushings neatly mounted – 1/4 and 5/8 inches. Therefore, the mount can act as an adapter for mounting the Huepar B03CG laser level on a tripod or a rod with a 5/8 “mounting screw.
Pros and cons
inexpensive, three planes of 360 degrees, full plumb line, bright green laser lines, high-quality Assembly, easy accuracy adjustment, as close as possible projection of planes to the ceiling and walls, convenient algorithm for switching planes, TILT function, receiver mode, work from the electric network, high accuracy, magnetic mount included, large battery capacity that can be charged separately, informative battery charge indicator.
it is not possible to work on simple batteries, tight buttons.

Thank you so much
Can a laser level be wrong? Or does it constantly show precisely under any circumstances?
Initially, all laser levels are precisely configured at the factory according to the declared accuracy. But the accuracy can be affected by various factors ranging from simple mechanical shocks during incorrect delivery and ending with the ambient temperature. If someone does not know, then the accuracy of the usual bubble level, in addition to the above, is also affected by sunlight, or rather ultraviolet. Therefore, ov
Initially, all laser levels are precisely configured at the factory according to the declared accuracy. But the accuracy can be affected by various factors ranging from simple mechanical shocks during incorrect delivery and ending with the ambient temperature. If someone does not know, then the accuracy of the usual bubble level, in addition to the above, is also affected by sunlight, or rather ultraviolet. Therefore, over time, the laser level may show incorrectly, as a result of which it will require adjustment (calibration). How to do it with this model, see the review.