- Where to buy a laser level profitably and reliably?
- Technical Data
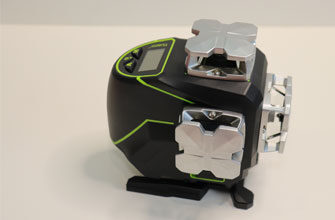
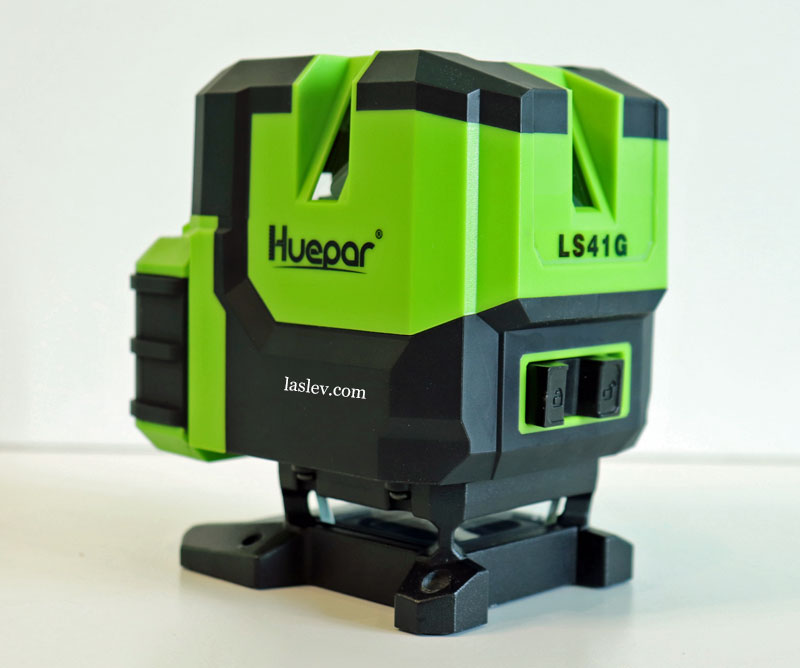
- Huepar LS41G Laser Level Housing
- Quick-release lithium-ion battery
- The Compensator
- Control elements
- The TILT function
- Operating mode with the receiver
- Laser line thickness at different distances
- Checking the Declared Accuracy
- Calibrating the Huepar LS41G laser level
- Package Contents
- Pros and cons
- Video review of Huepar LS41G
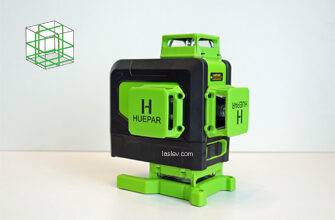
The Huepar LS41G combination green laser level is from the company’s new line of instruments. It projects 4 vertical planes with an intersection on the ceiling, a 360 degree lower horizon, and a full laser plumb line along the center axis of the instrument.
Of the features we can highlight two quick quality batteries with a discharging indicator scale, and the possibility of separate charging.
Also very interesting in this model is arranged plummet, or rather point down (nadir). The thing is that the plumb line goes through the central axis of the case, and on the lower horizontal plane is in the center of one cylindrical prism. This has not happened before, now after the appearance of the model Huepar LS41G I think we will encounter such designs more and more often.
But first things first…
Where to buy a laser level profitably and reliably?
Technical Data
- Leveling accuracy: ± 3mm / 10m (± 1/9 in. At 33 ft)
- Plumb point accuracy: ± 1mm / 1m (± 1/25 in. At 3.3 ft)
- Working distance without receiver: 30m / 98ft (100LUX)
- Distance with receiver: 40-60m / 130-197ft in radius
- Self-leveling time: <3 seconds
- Compensator range: ± 3 °
- Laser wavelength: 505-520 nm LD
- Laser class: 2 (IEC / EN60825-1 / 2014), <1 mW
- TILT function: yes
- Tripod thread: 1/4 “-20 and 5/8” -11
- Dust and moisture protection: IP54
- Passed certifications: CE, RoHS, FDA, FC
- Power sources: Li-ion battery 3,7V 5200 mAh / from the socket
- Charging port: Type-C
- Power adapter: 5V = 1A
- Battery life: about 5 hours (all planes)
- Charging time: ~ 5 hours
- Working temperature: -10°С … + 50°С
- Storage temperature: -20°С … + 70°С
- Weight of the device/set: 615g/2268g
- Dimensions of the laser level: L.W.H. – 10.5cm / 8cm / 11.6cm
- Minimum distance from the horizon:
to the floor – 1.9 cm
to the ceiling – 9.7 cm - Min. distance from vertical to wall at ||: 3.9 cm
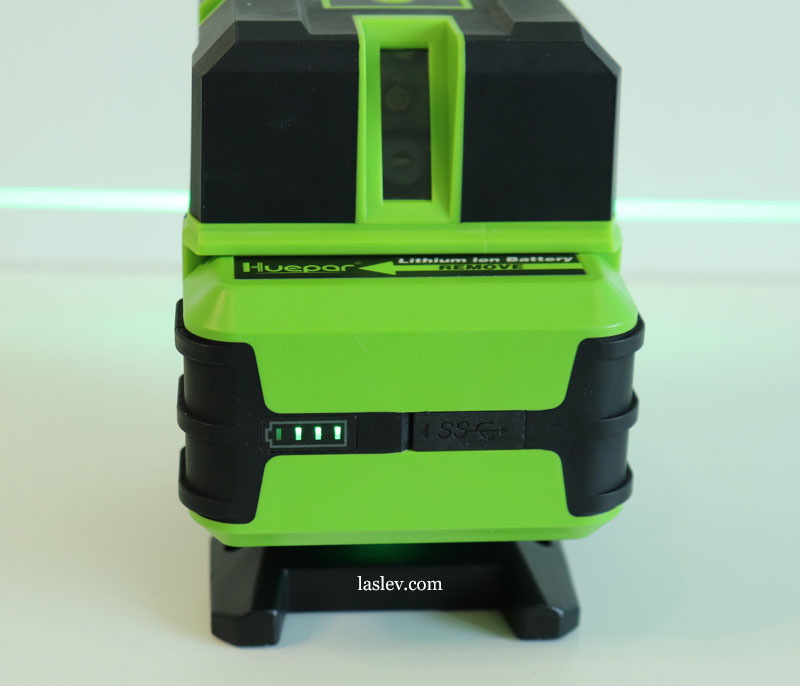
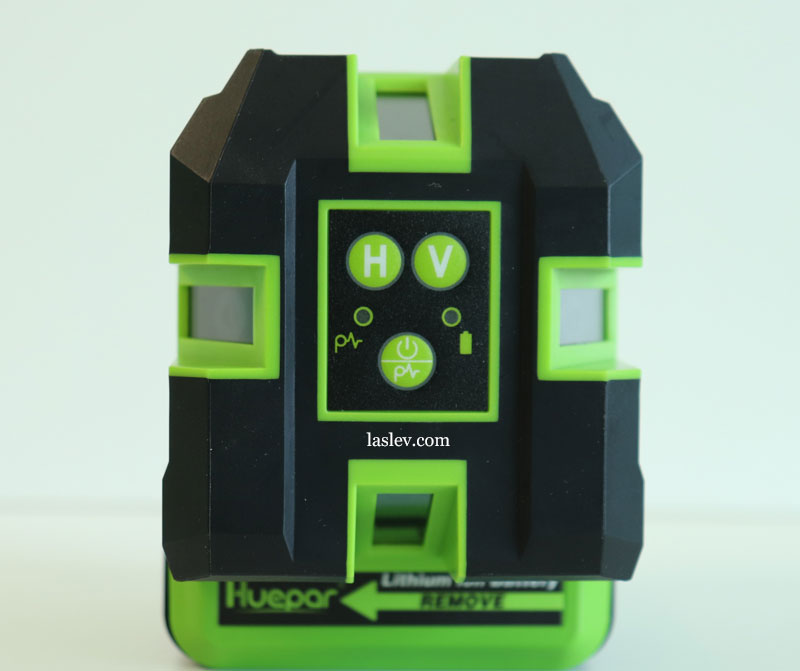
Huepar LS41G Laser Level Housing
The build quality of the case is perfect. The joint between the two main parts of the case is almost impossible to see. It is made of thick ABS plastic, in some places covered with black, dense rubber.
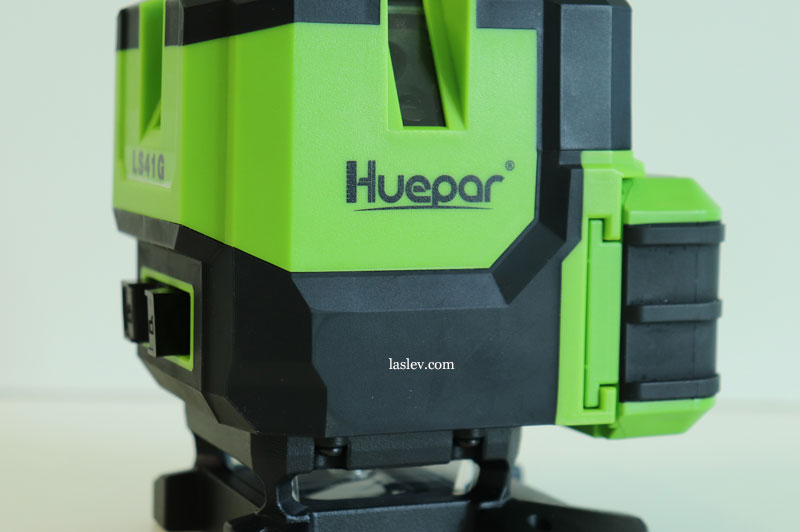
The lower “paw,” which is also the protective tower of the horizontal laser module, is made of metal, and is attached to the body through two massive rubber gaskets.
At the bottom are two standard threads for attaching to various tripods and all kinds of wall mounts. You can also see the rubber feet here so that the unit will not slip on smooth surfaces such as laminate or ceramic floor tiles.
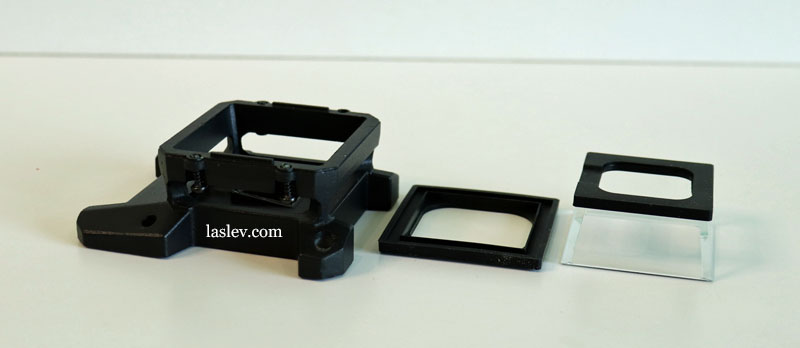
As I said before, the Huepar LS41G plummet runs through the center axis, which is sometimes much more convenient for various reference marks than a plummet with an offset axis like any 3D or 4D level with conical prisms, such as the Huepar B03CG.
But how did they do it? It’s very simple! They made a hole in the center of the cone prism and now when the laser beam hits the cone it creates both a 360 degree horizontal plane and nadir (plumb point down). You have to agree that this is a very interesting solution.
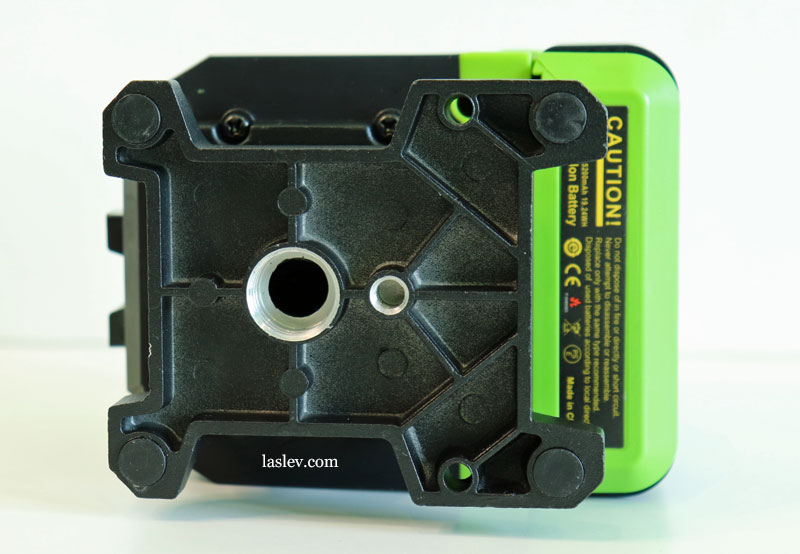
Quick-release lithium-ion battery
The lithium-ion battery case also has thick quality plastic and cushioned rubber ribs on the sides.
The battery is installed very tightly with the characteristic click of proper installation, just as well as the more expensive DeWalt DW089LG laser level.
Here, too, thanks to a four-step indicator, you can see the remaining battery charge. If necessary, it can be recharged both during operation and separately from the device via the USB Type-C port, which, by the way, is covered by a perfectly fitting rubber cover.
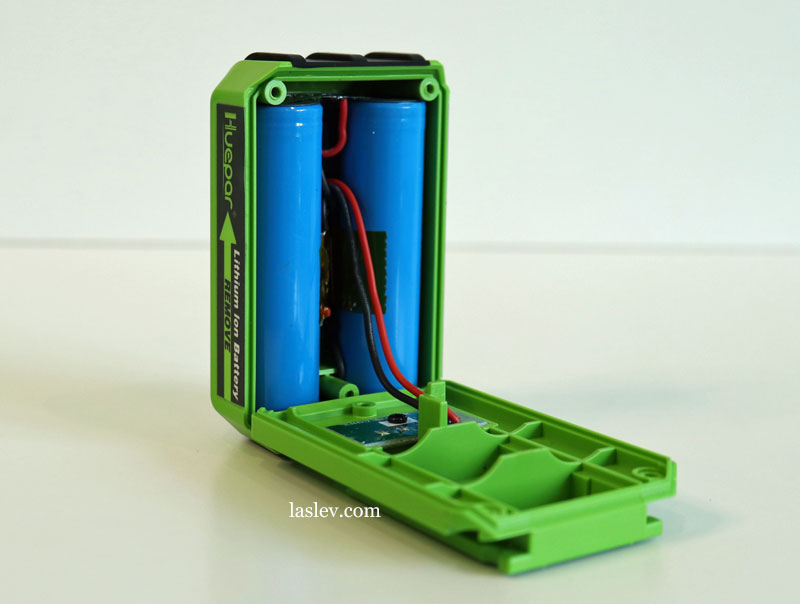
Inside the battery are two of the most common types of cells – 18650, they are so popular that they are even used in huge batteries of electric cars, including Tesla.
And this is actually a big plus, so if necessary, they can simply be replaced. Again, the Huepar LS41G laser level comes with 2 batteries, so you probably won’t need to replace them.
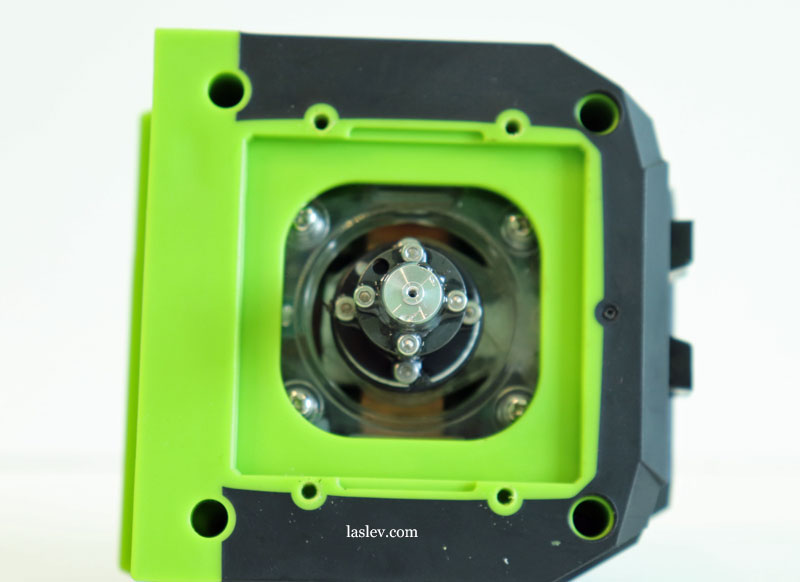
The Compensator
It has a magnetic pendulum compensator, with an excellent performance in terms of speed of setting to the working position. The setting time takes less than 3 seconds, which is very good.
The entire compensation system is mounted on a metal frame, this is much more reliable than the plastic frame, as, for example, the Zokoun IE16R.
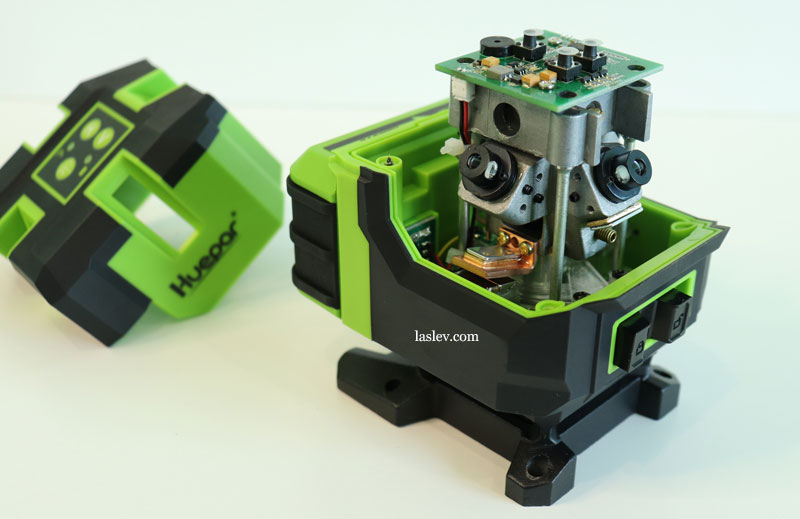
The range of operation of the compensator is ±3°. This means that a tilt of up to 3° to either side will be compensated and the pendulum will return to the correct reference position with a marking accuracy of ± 3mm/10m (± 1/9 in. at 33 ft).
If the inclination of the instrument with the compensator unlocked is greater than 3°, the visual and audible alarms will automatically go off. The laser lines will start flashing in increments of 2 times per second and an audible alarm will sound in time with the flashing. When the instrument is placed on a flatter surface, the alarm will immediately turn off.
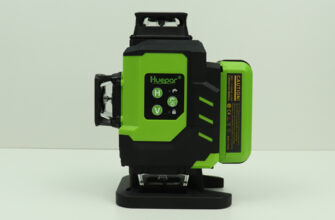
Control elements
The Huepar LS41G laser level is controlled by a toggle switch on the body of the instrument, and a membrane keypad on top consisting of three buttons.
So, the toggle switch on the front has two positions: open and closed lock. That is, it locks the compensator in the off position, and in the on position (position “open lock”) on the contrary removes the lock of the pendulum.
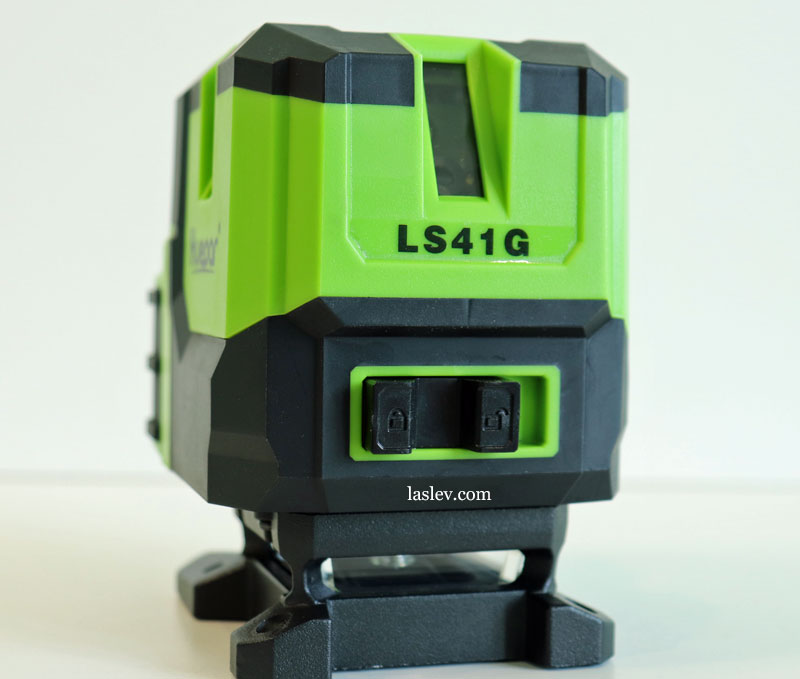
When you turn on the toggle switch, the horizontal plane and the plumb line down point light up immediately.
All further switching is done with the buttons at the top.
The “H” button enables and disables the horizon and the plumb point down.
The “V” button is responsible for switching the verticals:
- 1-press – activates only one vertical from the front of the instrument;
- 2-pressing – activates an additional vertical on the right side at a 90-degree angle with intersection on the ceiling. The two verticals light up and the plumb point at the top (zenith) appears.
- 3-press – activates all four verticals. And then in a circle.
Here we can highlight a not entirely convenient nuance. The plumb down is projected only when the laser module is active from the horizon. Therefore, in order to work a full plumb line (up and down), the horizon and the two verticals must always be enabled.
The TILT function
The mode of operation with a locked compensator for tilt marking is activated as follows: with the toggle switch in the “closed lock” position, hold the trigger up for about 2-3 seconds until the horizontal plane turns on and the red light to the right of the button comes on.
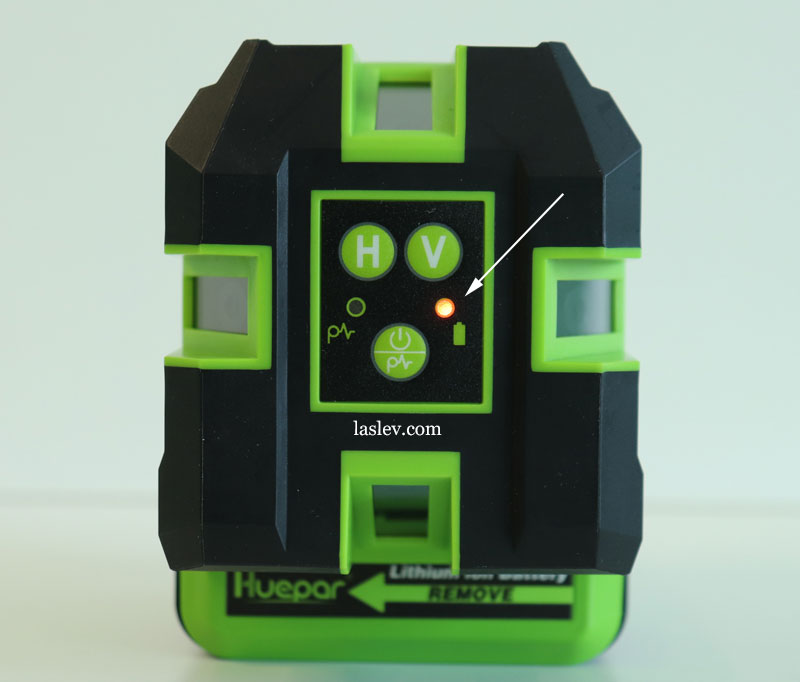
Also in this mode the laser lines will flash at a rate of once every 5 seconds. This is also a kind of alert so that you don’t forget that you are in tilt marking mode.
If you have the TILT function enabled and all planes are switched off, the instrument will beep every 30 seconds to tell you that the instrument is not switched off, and after 5 minutes of inactivity it will switch off altogether. This is handy, but it is worth remembering that the laser level can only be turned off completely if the compensator is locked. If the pendulum is unlocked and all planes are turned off, the unit will simply beep every 30 seconds until you go over and turn it off with the toggle switch.
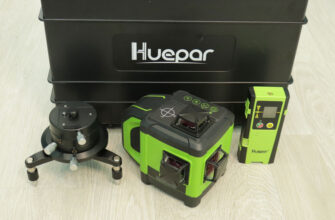
Operating mode with the receiver
To work outdoors with a laser level, you use a laser receiver and the corresponding mode enabled on the instrument, often referred to as “pulsing mode”.
This mode is activated by briefly pressing the trigger at the top. When it is activated, the laser lines are slightly dimmer and the blue light to the left of the button comes on.
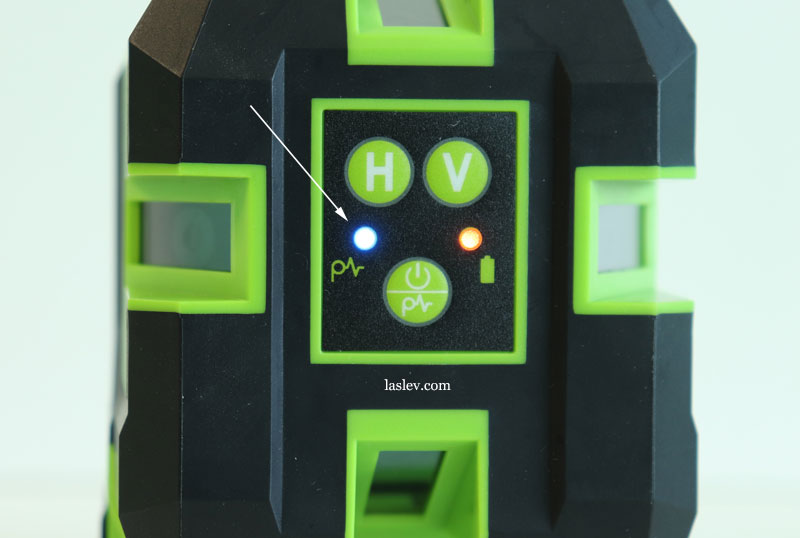
That’s it, now you can turn on the receiver (purchased separately), and make markings on the street in daylight at a distance of 40-60m / 130-197ft in radius.
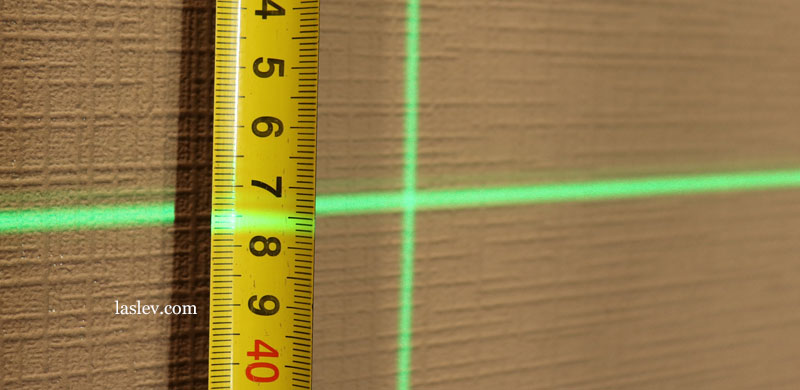
Laser line thickness at different distances
In this test, the Huepar LS41G laser level performed as well as possible. Whether the cylindrical prisms on the verticals or the cone prism on the horizon, they all have an excellent projection.
So, at 1 meter the thickness of the lines was 1 mm.
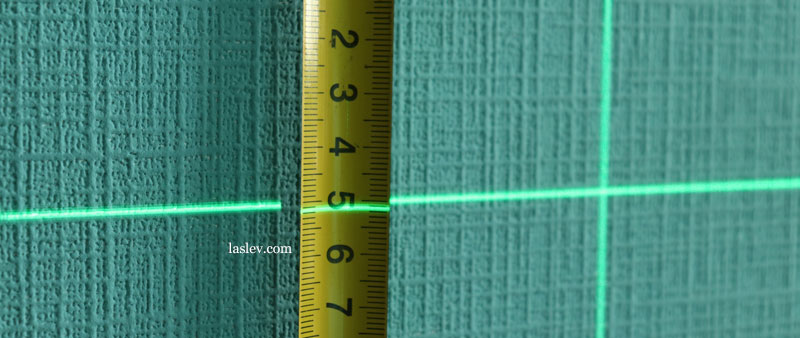
At an average distance of 5 meters it is less than 2 mm.
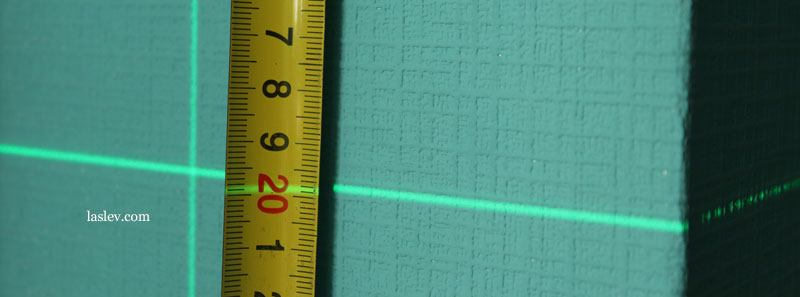
And at a distance of 10 meters from the wall, the thickness was only 3 mm, and the vertical was even less at about 2.5 millimeters.
Checking the Declared Accuracy
To determine the error, you need to understand how the error is calculated for cone prisms. When testing the horizontal accuracy of the Huepar LS41G laser level at 10 meters, the maximum difference between the points was about 2mm.
This means that this laser level can mark a distance of 20 meters with an error of 2mm. Therefore, the actual error of this unit is 1mm/10m or 0.1mm per meter.
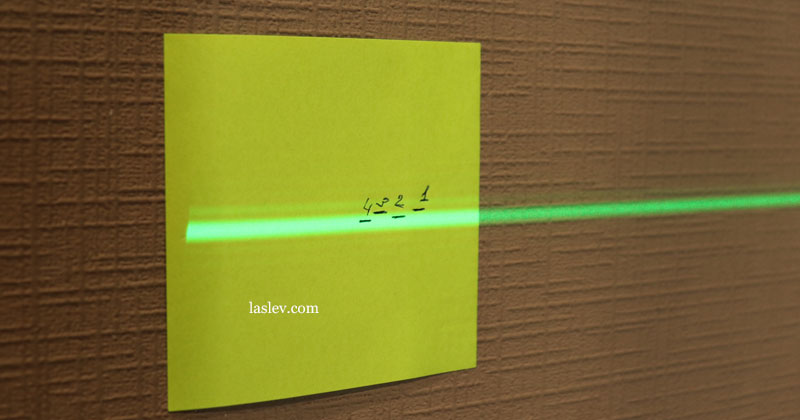
When checking the verticals with the analog plumb line, no strong deviations beyond the allowable limits were found.
Calibrating the Huepar LS41G laser level
Adjustment of this model is not a simple process. We are talking about self-adjustment without special equipment.
First of all, it concerns exactly the opposite verticals, which will be almost impossible to reconcile on the ceiling because of the difficulty of determining the curvature of one or another vertical. Such adjustment requires a special collimation stand.
But to be fair, we should note the very convenient disassembly of the device whereby it remains fully operational with good access to all alignment bolts.
For more details on calibration, see the video review below.
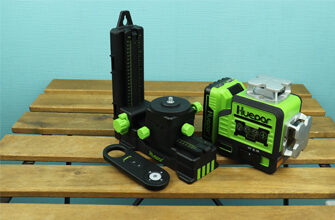
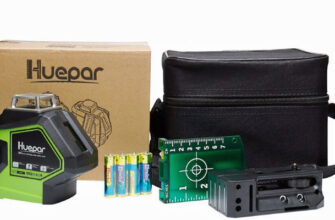
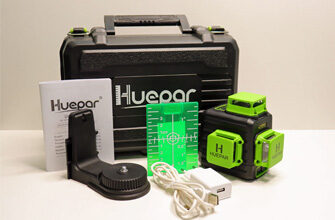
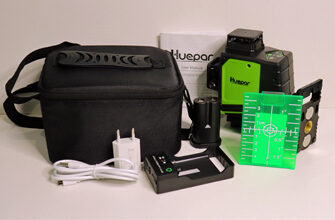
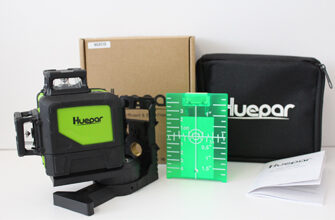
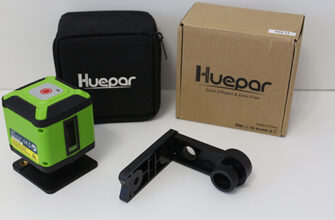
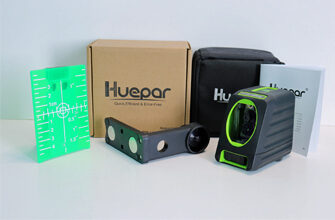
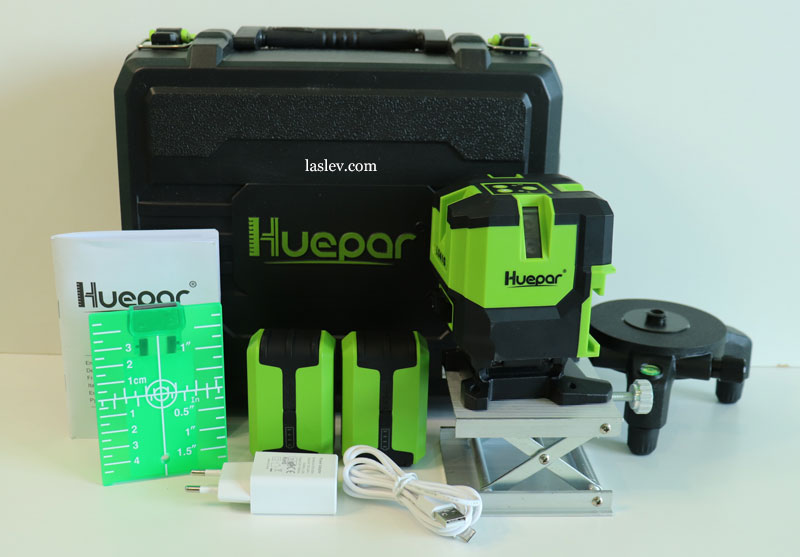
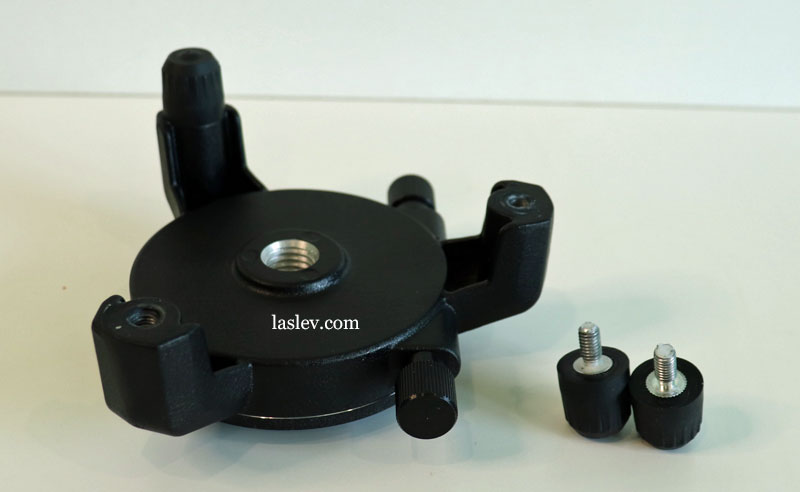
Package Contents
The Huepar LS41G laser level comes in a compact plastic case that includes:
- device,
- 3.7V 5200 mAh li-ion battery (2 pieces),
- swivel base,
- mechanical lifting pad,
- green magnetic target,
- USB plug,
- charging wire USB – USB Type-C,
- instructions in English and other languages.
Separately, I want to highlight the swivel base with a micro-screw, made of a monolithic piece of metal. The upper platform moves very smoothly without any backlash when rotating around its axis.
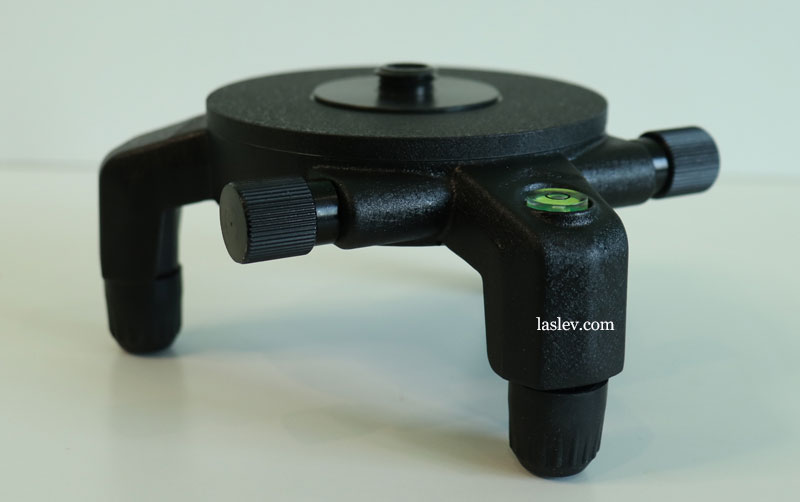
A spatial bubble level is built into the swivel base, for easier installation on uneven surfaces.
The column screw has a through hole so that a full plumb bob can be operated while the laser level is mounted on the pivot base.
The removable supports are coated with a thick layer of rubber, and spaced quite a distance apart, so the stability of this base on slippery surfaces is also excellent.
And of course the base has a 5/8″ thread for mounting on tripods or tripods. All in all a simple, yet excellent swivel base.
Pros and cons
Compact, high quality build, thin and bright green laser lines, 360 degree horizon, two verticals almost 360°, full plumb (passing through the center axis), receiver mode, TILT function, separate plane switching, network operation, two quick-release batteries, auto shut-off*, metal compensator frame, base made of metal, good delivery kit.
The lower plumb point (nadir) lights only when the horizontal plane is on, difficult to adjust on your own (*if needed).