- Where to buy a laser level profitably and reliably?
- Technical parameters
- Housing level Huepar GF360G
- Threads for mounting
- Battery compartment
- Disassembling the case
- Lithium ion battery
- Compensator
- Checking for accuracy
- How to do calibrate at the laser level
- Coaxial displacement
- Not coaxial displacement
- Huepar GF360G Laser Level Control
- First option. Locking toggle switch in the “closed lock” position
- Second option. Lock toggle switch in the “open lock” position
- The thickness of the laser line at different distances
- Comparison table with a competitor
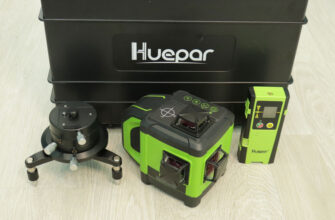
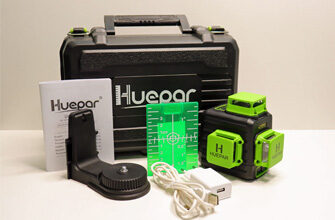
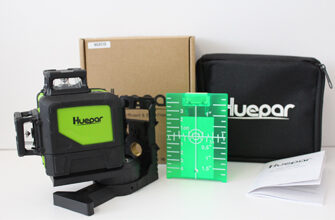
- Delivery set laser level Huepar GF360G
- Pros and cons
- Video review laser level Huepar GF360G
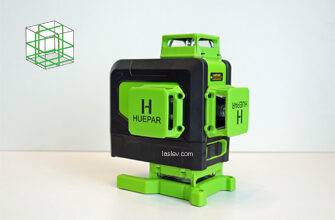
Green 3D laser level HUEPAR GF360G – which projects three laser planes of 360 degrees and a full-fledged laser plumb line formed at the upper and lower intersection of two verticals.
Just getting ahead of myself, I want to say. In my opinion, this is not the most successful model from the entire Line of huepar laser levels. But about everything in order.
Where to buy a laser level profitably and reliably?
Technical parameters
- Accuracy: ± 3mm at 10 meters
- Working distance: 45m * without receiver (* 100 LUX)
- Distance with receiver: 60m in radius / 120m diameter
- Compensator operating range: 4º ± 1º
- Laser wavelength: 510 ± 5nm
- Laser class: 2 (IEC / EN60825-1 / 2014), ≤ 1mW
- Power supply: Li-ion battery 3.7V / 5200 mAh
- Working time from one charge: ~ 5 hours (all planes)
- Dust and moisture protection: IP54
- Working temperature: -10 °C ~ + 50 °C
- Storage temperature: -20 °C ~ + 70 °C
- Dimensions of the device with towers: l / w / h 12.8×8.5×12 cm
- Kit weight: 1261 grams
- Minimum distance from the horizon:
to the floor – 11.2 cm
to the ceiling – 0.8 cm - Minimum distance from vertical to wall: 1 cm
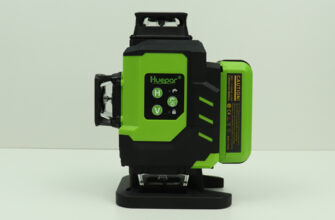
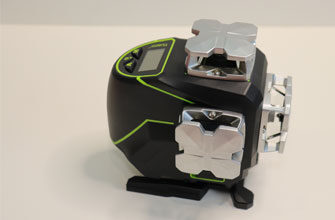
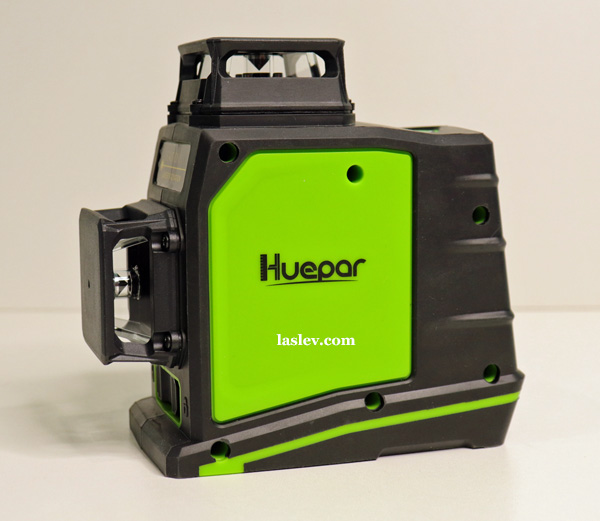
Housing level Huepar GF360G
The Huepar GF360G laser level is made of high-quality ABS plastic, and covered with good rubber.
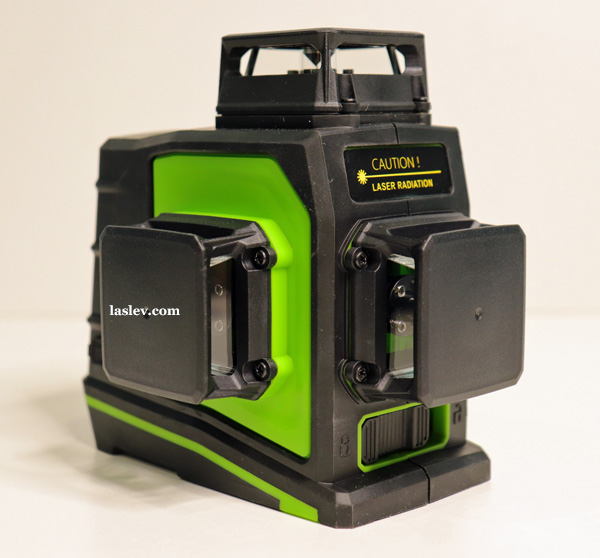
The protective towers are also made of plastic and are attached to 4 screws through rubber gaskets. There are rubber gaskets on both the bottom and top of the glass. This is of course very good.
This is where the advantages end and the disadvantages begin.
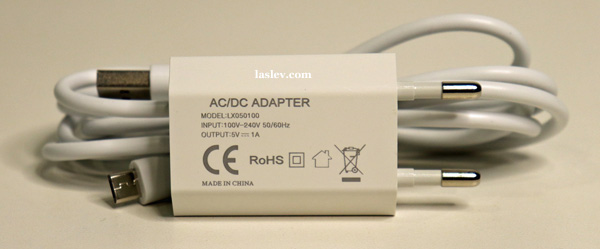
First, it’s a terrible plug connector for connecting charging or working directly from a wall outlet.
It is made of very hard rubber or soft plastic, it is not clear exactly. It is constantly bent and never tightly pressed. This is really annoying.
And only this model has this problem. For example, the new Huepar B03CG model completely eliminates this drawback. There, the same plug is made of soft rubber. And it closes the nest perfectly every time.
By the way, the new Huepar 904DG 4D laser level has the same plug, and there is no such problem there either. This is of course a trifle, but agree unpleasant.
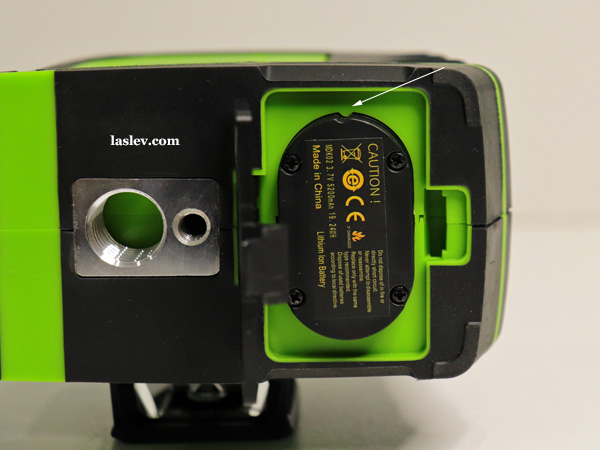
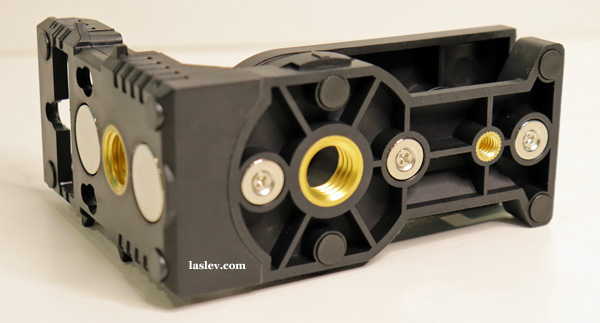
Threads for mounting
At the base of the Huepar GF360G laser level is a rectangular metal insert with two threads for mounting on tripods and other accessories.
Again, it seems to be a trifle. But it looks much cooler when the threads are mounted, like the Huepar 603CG or Firecore F93T-XG.
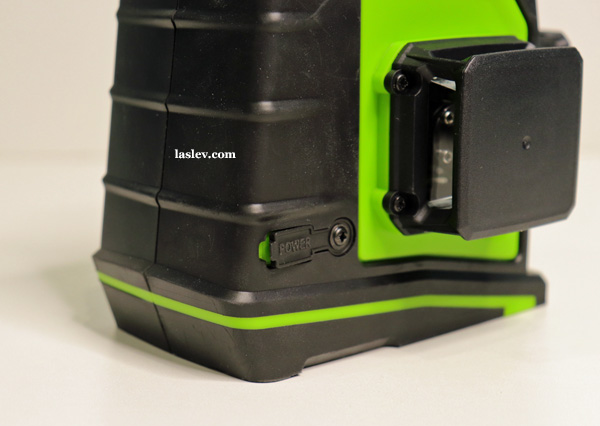
Battery compartment
The battery cover is not removable. And apparently made of another cheaper plastic.
Plus, it opens very inconveniently. When you open the latch literally penetrates under the nail, causing the unpleasant sensation of pain.
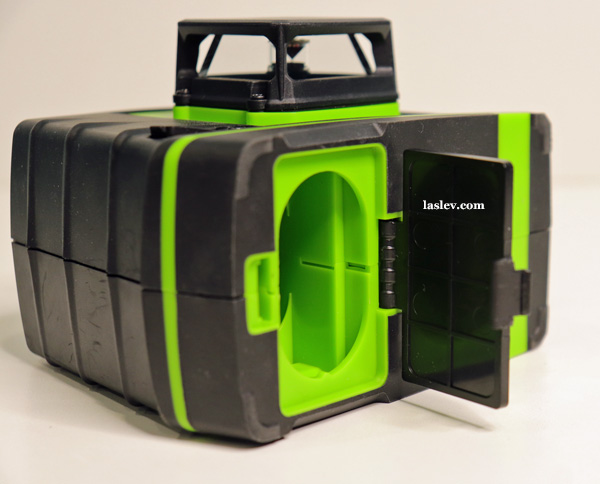
And such a moment.
When installing the battery, it is not immediately clear how it is installed. But if you look closely, you can see a small plastic pointer in the battery compartment, and a small notch on the battery.
These are the guides. That is, when installing them, you need to combine them.
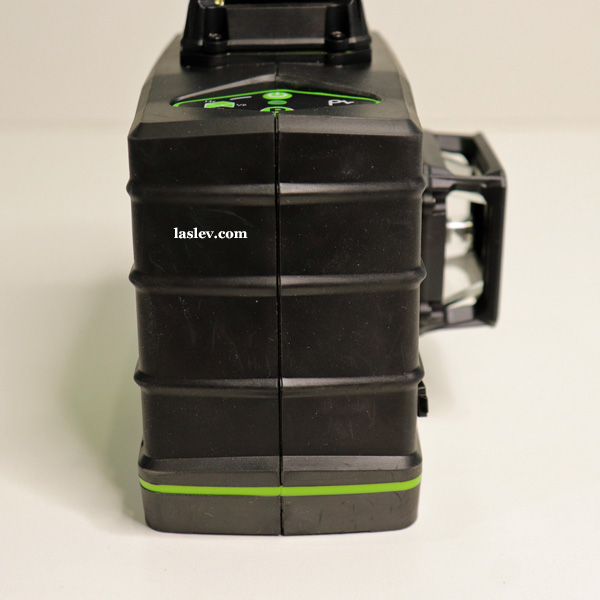
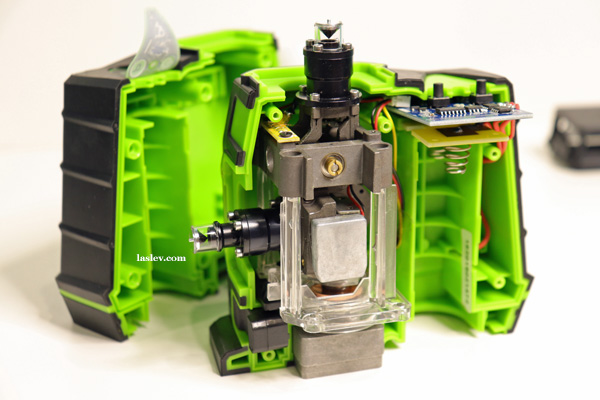
Disassembling the case
The biggest disadvantage in my opinion is the inconvenient disassembly of the case. It is laid out in two halves to the sides, not up. For example, like the Huepar 902CG laser level.
When disassembling the case in this way, it is necessary to remove the membrane control keyboard from the top and all the stickers that are pasted on both parts of the case at the same time. And this will certainly affect their appearance when they are re-glued.
In fact, this is also not so critical. Since the case does not need to be disassembled during alignment, but not always.
Sometimes, in order to understand which laser module to start adjusting (which we will discuss in more detail below), the case will still have to be disassembled.
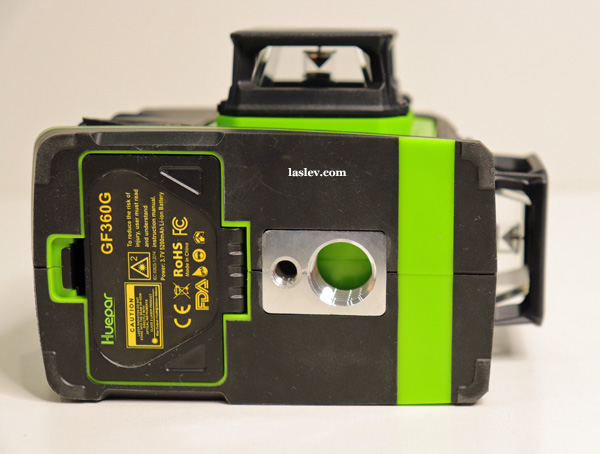
Lithium ion battery
The Huepar GF360G laser level comes with a very common battery. Which can easily buy separately.
Plus, its capsule is easy to disassemble, just Unscrew the 4 screws on top. Inside there are even more popular batteries, two 18650 batteries.
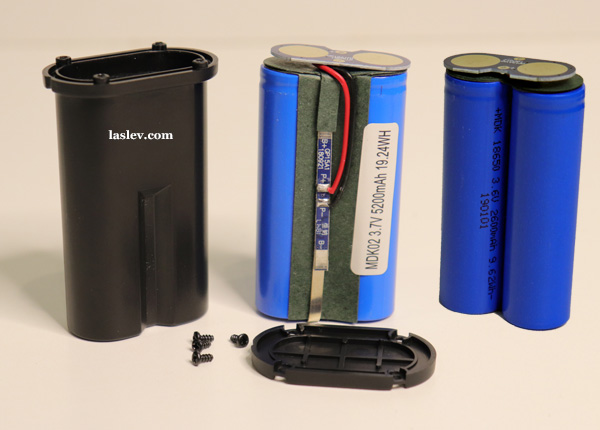
Therefore, it is not necessary to buy a new battery if it fails. You can simply replace the internal elements. Fortunately, they are always sold and are inexpensive.
Compensator
The Huepar GF360G laser level has a standard pendulum compensator with magnetic dampers. The speed of its installation is around 3-4 seconds. This is not a bad result, but it can be better.
The maximum allowable tilt of the compensator in different directions is 4º ± 1º. Thus, if the slope is higher, the entire system will not be able to set the pendulum strictly vertically.
For this purpose, a special alarm system has been invented that informs about the unacceptable tilt of the device case.
The GF360G only triggers a visual alarm in the form of rapidly flashing laser lines. In some models, a short beep has been added. But this is for an Amateur. Since the signal is quite nasty.
The entire automatic alignment system is mounted on a plastic skeleton. The same Huepar B03CG has a metal skeleton.
Checking for accuracy
In this test, the Huepar GF360G laser level showed good results. At least its horizontal error fully fits into the declared characteristics.
The distance between the points at 10 meters was less than 4 millimeters. At the maximum allowed 6 mm by 10 m.
If you still have questions, see how the error of the laser level with cone prisms is calculated correctly.
Critical vertical deviations were also not observed.
If your instance still has large deviations that go beyond the acceptable limits. Then you can independently adjust the laser level at home. For more information, see below.
How to do calibrate at the laser level
Coaxial displacement
You can adjust the accuracy without disassembling the case. But only if you have a coaxial offset of the planes. For example: the horizon and one vertical have the same slight slope in one direction.
Then it is enough to remove the protective towers from the verticals. And adjust the position of the pendulum with two adjusting bolts for the hexagon.
In the photo below, you can see the longitudinal adjustment bolt.
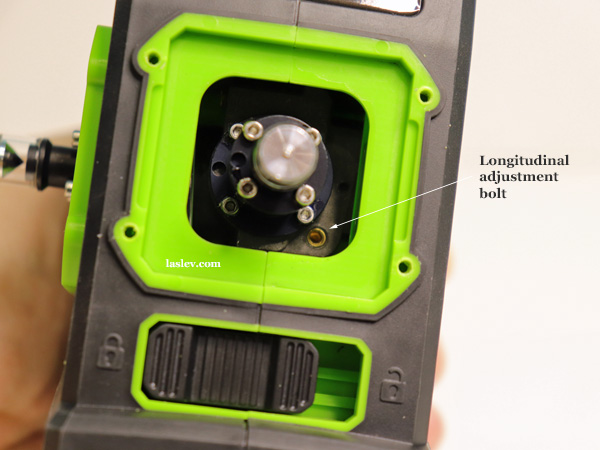
If it is screwed deeper into the body of the pendulum, its center of gravity will shift when installed. The front part of the horizontal plane will rise, and the back part will fall accordingly. This bolt will also affect the front vertical in the same way. On the second side of the vertical impact it will have.
Thus, if your horizon looks down by 5 mm, and the front vertical is filled up to the left side by the same 5 mm. It is enough to screw the longitudinal adjustment bolt into the body of the pendulum.
You need to screw in gradually, and watch the result. If the desired values are not reached, turn again.
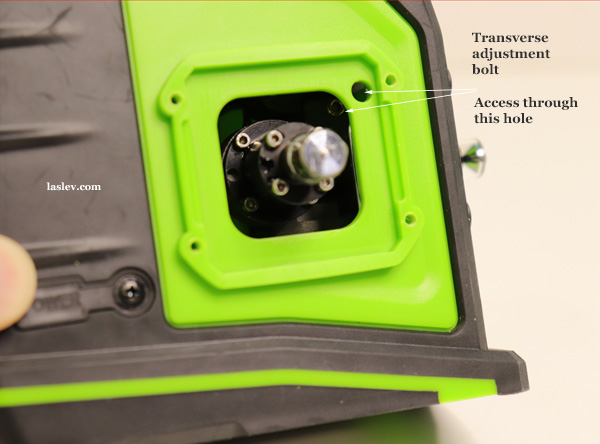
The same thing happens with the cross adjustment bolt. Only changing the direction of the slope. Namely, the slope of the horizon is adjusted to the left and right. And the perpendicular to the lateral vertical is adjusted. This bolt will not affect the front vertical.
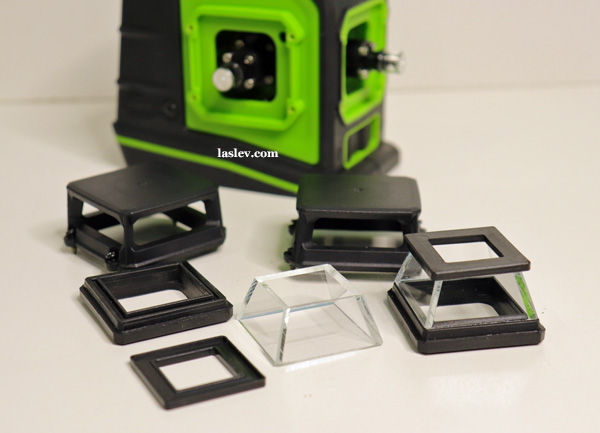
Not coaxial displacement
There are situations when all the planes show a large error in the discrepancy. Here you need to act differently.
First you need to disassemble the case. This, by the way, applies not only to the Huepar GF360G laser level, but also to many other models from different manufacturers.
Then we use the visual method to find out which laser module is most tightly screwed to the pendulum. That is, who does not have a gap for a separate module position setting.
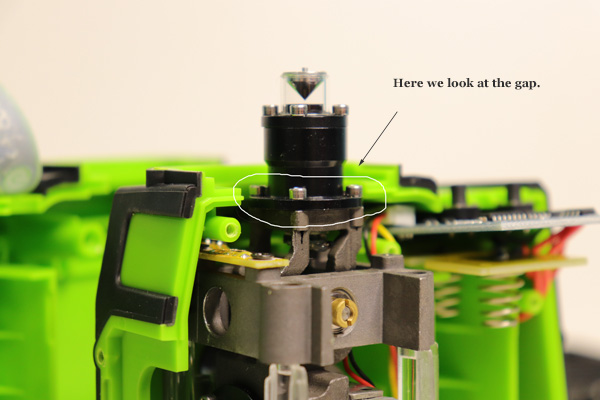
For example, the laser module from the horizon is very tightly screwed to the pendulum. Then the horizontal plane must be fully adjusted with the longitudinal and transverse bolts of the pendulum (see the photo above).
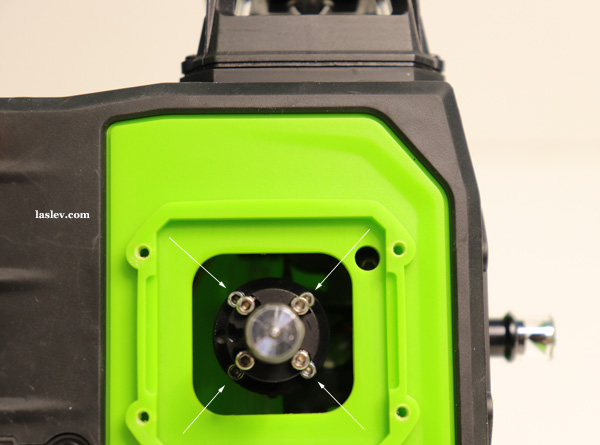
And the other planes are configured separately. The position of the laser module is adjusted by four bolts at the base of the module. (See the photo below)
Huepar GF360G Laser Level Control
There are also some nuances with the management. Some people will not find them convenient, as in principle I do. Let’s look at them in more detail.
The compensator lock toggle switch is located in the front. It has no other function.

This is where the first inconvenience arises. When you turn on the toggle switch, nothing visually happens. The planes don’t light up, there are no sounds.
In this case, it is very easy not to notice that the compensator is unlocked. And as we all know – transportation with an unlocked pendulum is undesirable.
In fact, all control is reduced to two buttons.
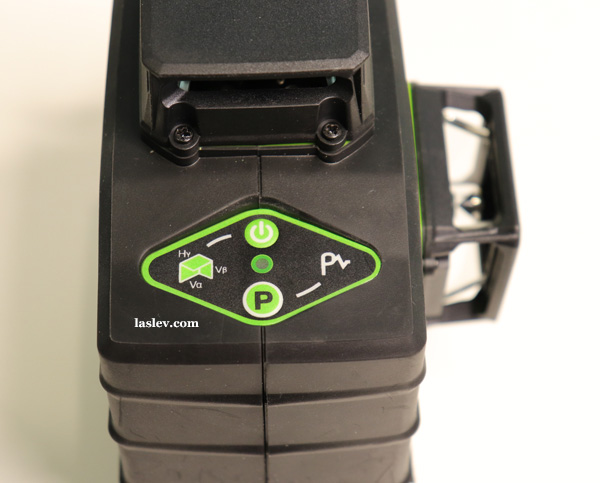
And there are two possible scenarios.
First option. Locking toggle switch in the “closed lock” position
Briefly press the power button on top – all planes light up. The lines flash once every 5 seconds. This is a kind of alarm that tells you that you are in operation mode with a blocked compensator.
Then you can use the same power button on top to switch planes separately. We will consider the exact algorithm below, in the second version.
To turn off the device, you need to hold the power button for about 3-4 seconds.
The second button “P” – enables the receiver operation mode. At the same time, the laser lines start to burn a little dimmer.
Second option. Lock toggle switch in the “open lock” position
The compensator is unlocked. Auto-leveling mode is enabled, but nothing lights up.
- The first press on the power button – all three planes light up simultaneously.
- The second click on the same button – the horizon and one side vertical are lit.
- The third press – the horizon and one front vertical are on.
- The fourth click – only two verticals are lit.
- Fifth press – only one horizon remains.
- The sixth press – only one side vertical is lit.
- Seventh pressing – only one front vertical is on and then everything is again in a circle.
To turn off the Huepar GF360G laser level, turn the toggle switch to the “closed lock” position and hold the power button on top for 3-4 seconds.
In General, I must say that the algorithm for switching planes is very interesting and convenient. But the way to turn off the device in my opinion is not very rational.
The “P” button is also responsible for switching to the receiver mode.
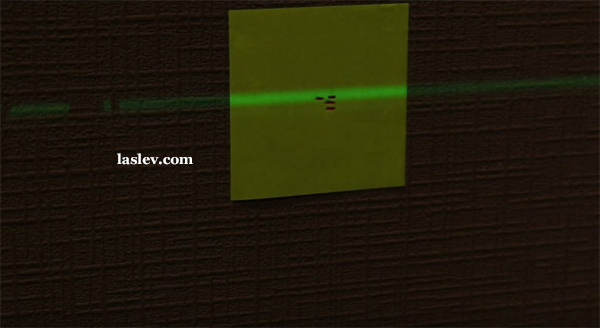
The thickness of the laser line at different distances
But in this test, the Huepar GF360G laser level showed its best side. And especially at long distances.
The line thickness at 1 meter was 1.8 millimeters.
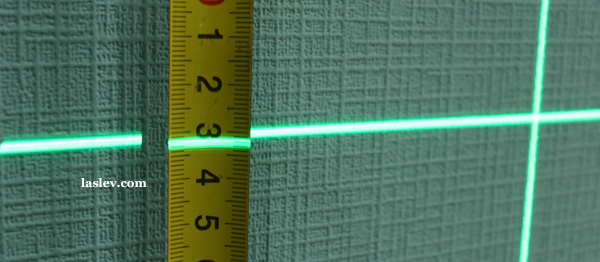
At a distance of 5 meters from the wall, the thickness of the laser line became even smaller – about 1.4 millimeters.

And at a distance of 10 meters, the thickness was only 2 millimeters! Excellent indicator.
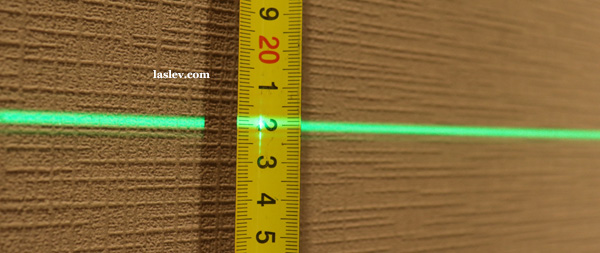
For information. In photos and videos, the lines always seem thicker. But when you look at them live, they are thinner.
Comparison table with a competitor
| Technical data | Huepar GF360G | Fukuda MW-93T-3GX |
| Accuracy, mm / m | ± 3mm / 10m | ± 1mm / 7m |
| Compensator range, ° | 4º ± 1º | ± 3.5 ° |
| Range without / with receiver | 45 * / 60 | 20m * / 50m |
| Dust and moisture protection | IP54 | IP54 |
| Tilt function | Yes | Yes |
| Working with the detector | Yes | Yes |
| Working from an outlet | Yes | No |
| Batteries | Li-ion 3.7V 5200 mah | Li-ion 1500 mAh / 4АА |
| Working temperature | -10°С to + 50°С | -10°C to +45°C |
*- a conditional indicator that directly depends on the degree of illumination both indoors and outdoors. Indoors, under normal lighting, green laser levels from all manufacturers will be visible at a distance of 30-40 meters.
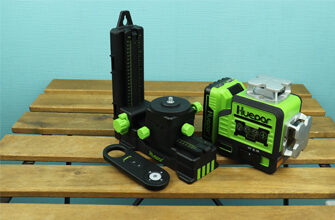
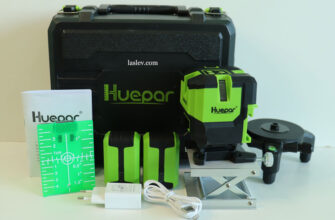
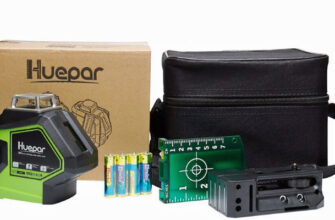
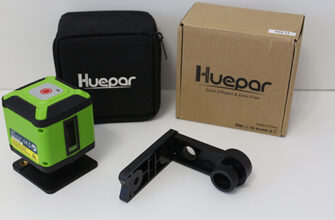
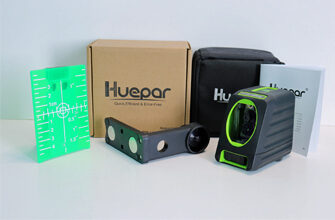
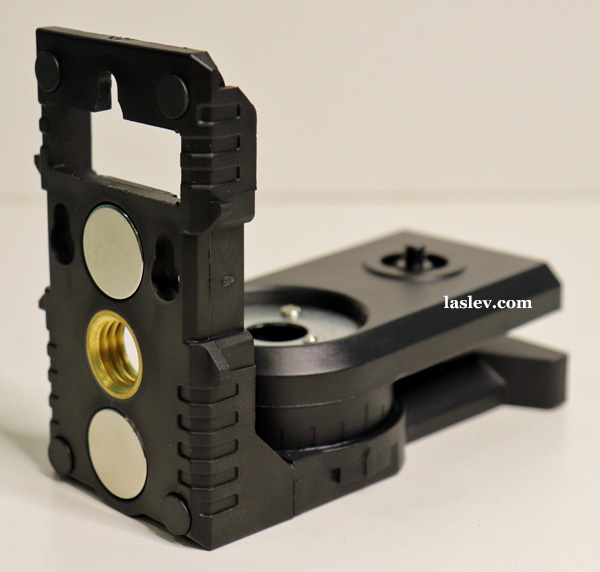
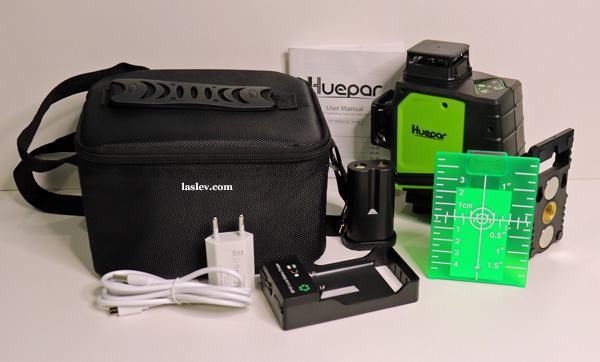
Delivery set laser level Huepar GF360G
If we consider the kit in more detail, then in principle there is everything you need.
1. Excellent swivel magnetic mount.
2. Separate charger with USB-micro USB wire and plug. The battery can be charged separately or in the device itself when working from the mains.
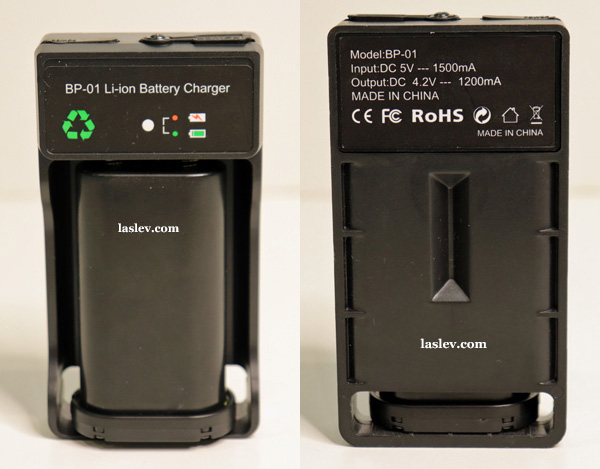
The plug for the charger varies depending on the country
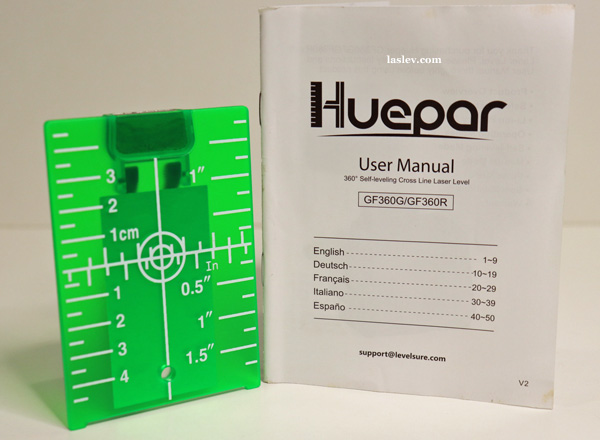
3. Also included is a green laser target and instructions in different languages.
And it all fits into a compact and well-sewn laser level carrying bag.
Pros and cons
Inexpensive, three planes of 360 degrees, a full plumb line, bright and thin laser green lines, a convenient algorithm for switching planes, there is a TILT function, there is a mode of operation with the receiver, you can adjust the accuracy without disassembling the case, work from the network, a good package.
Minor flaws in the build quality of the case, impractical disassembly of the case, inconvenient switching off of the device.