- Where to buy a laser level profitably and reliably?
- Technical parameters
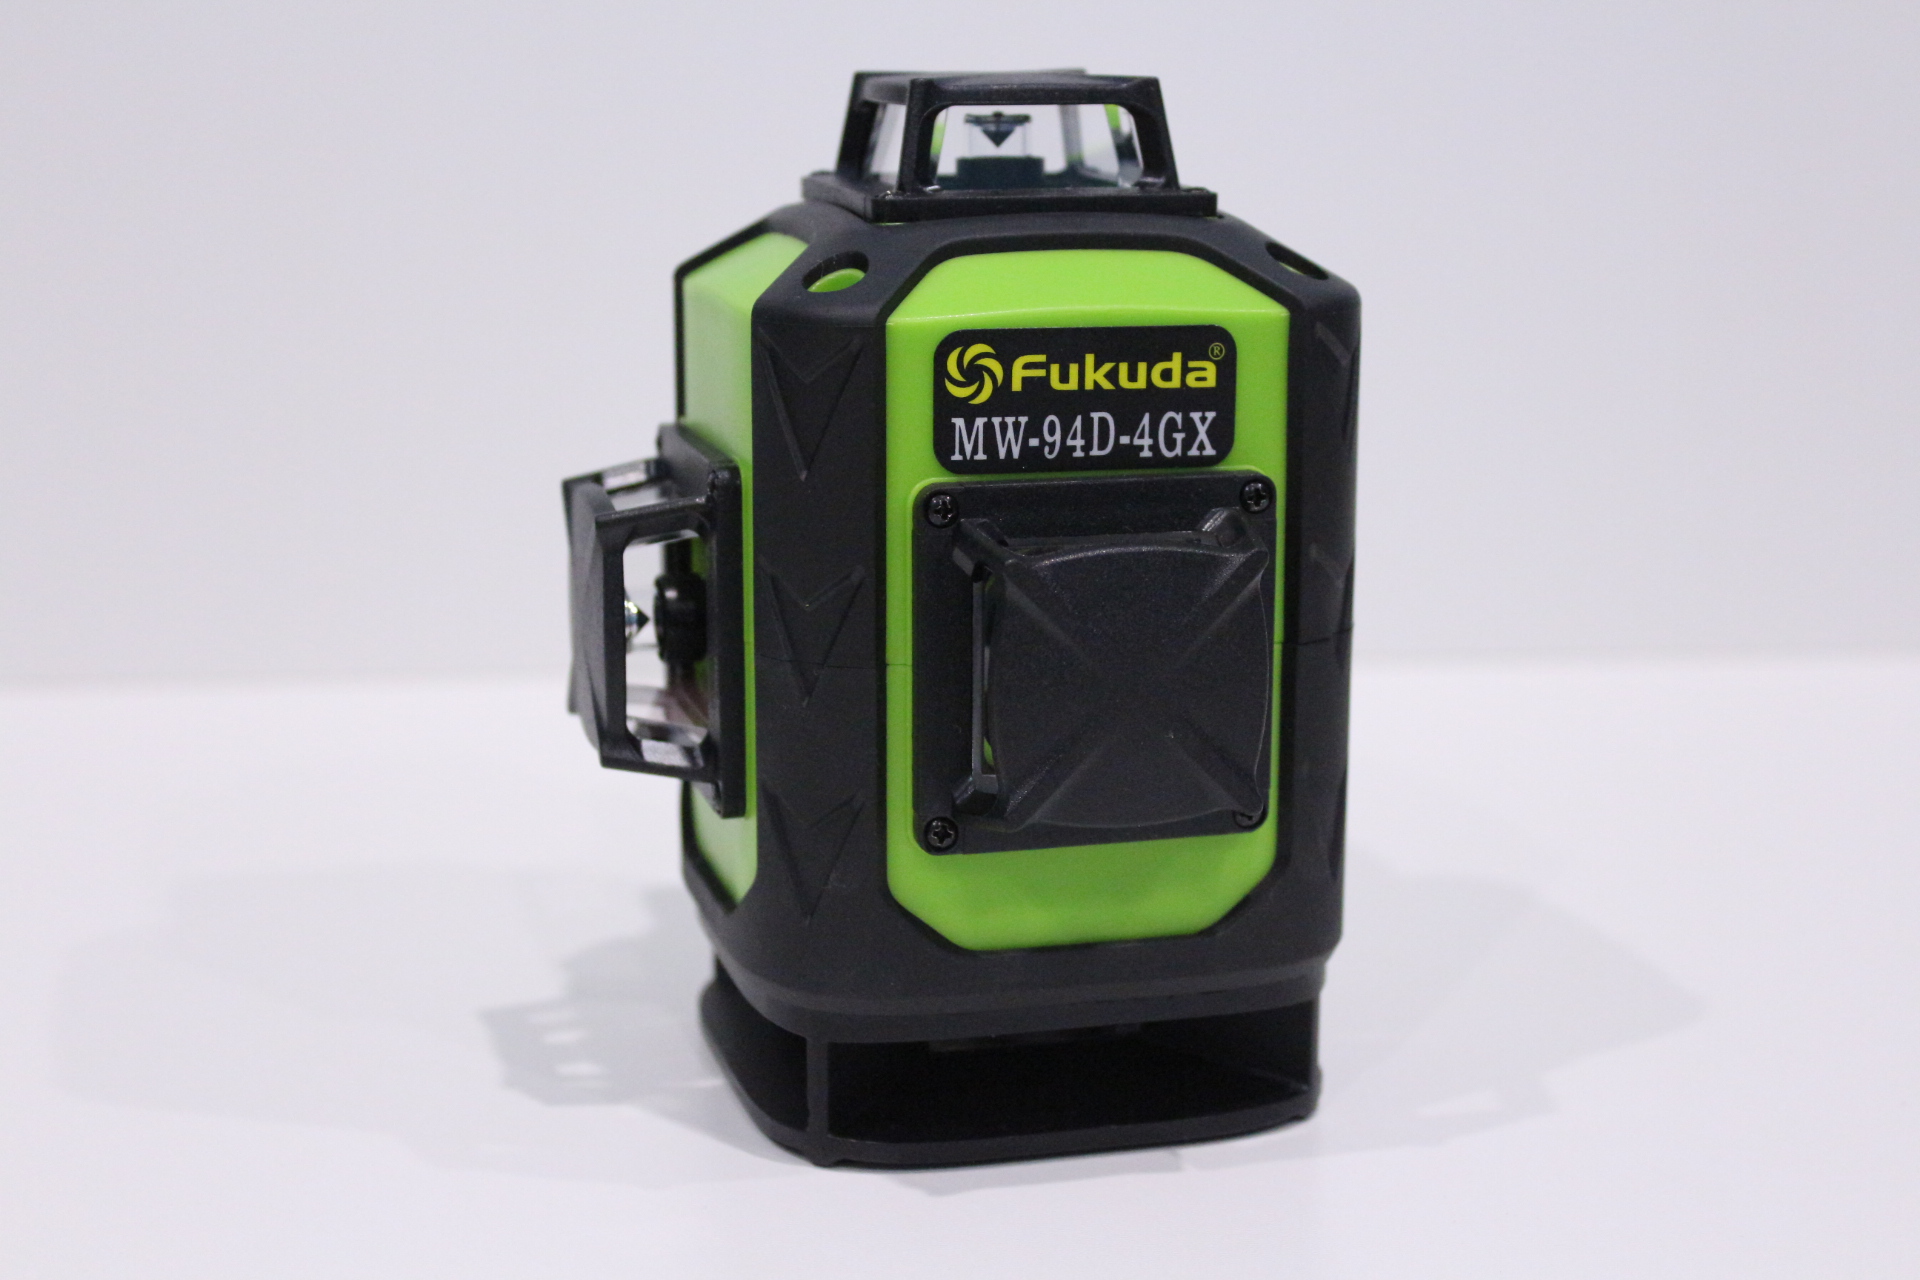
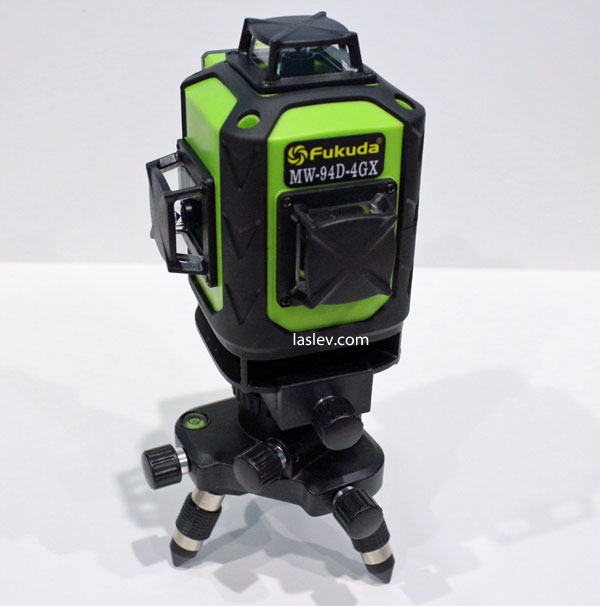
- Housing Fukuda MW-94D-4GX
- The compensator
- Control Fukuda MW-94D-4GX
- Control on the device
- Remote control
- Functionality Fukuda MW-94D-4GX
- The thickness of the laser line at different distances
- Accuracy setting
- Comparison table with a competitor
- Contents of delivery
- Pros and cons
- Video review of Fukuda 4D
- Video for testing the accuracy
- Big comparative review of 4D laser levels
- FUKUDA 4D or FIRECORE 4D?
- HUEPAR 4D or FUKUDA 4D?
A truly interesting piece of engineering in this industry. One of the most complete and high-quality solutions to date.
4D laser level FUKUDA MW-94D-4GX with four planes of 360 degrees and a plumb line. But as always, there is still something to think about for developers.
So far, only the Huepar 904DG and the new Huepar S04CG model with Bluetooth and built-in inclimeters can be distinguished from quality competitors. Well, first things first, in the review.
The device can be purchased with one or two batteries included. But a second battery is required for non-stop operation. One is charging, the other is working.
The price difference is small, so it is better to buy a set with two batteries right away.
Where to buy a laser level profitably and reliably?
Second in the list of the best 4D laser levels!
Technical parameters
- Projection error: ± 0.3mm/m
- Range without / with receiver: Ø 40m* / Ø100m (* depending on the degree of illumination)
- Compensator range: ± 3°
- Installation time: 2-3 sec
- Waterproof and dustproof: IP54
- Laser class and wavelength: II, 515nm LD Sharp Japan
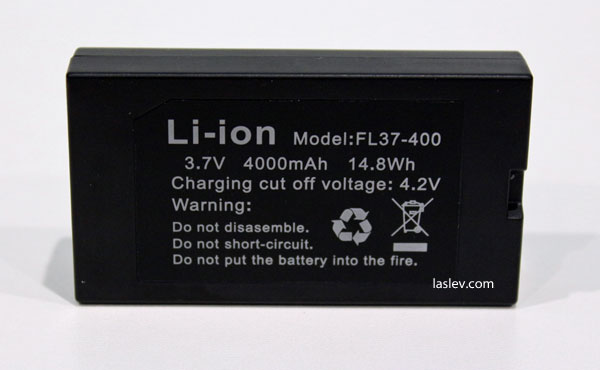
- Power supply: Li-ion battery 4000 mAh 3.7V
- Tripod thread: 1/4″ on instrument, 5/8″ adapter included
- TILT function: yes
- Working temperature: -5°С … + 45°С
- Storage temperature: -20°С … + 70°С
- Weight of the device with batteries: 760 gr
- Weight of the whole set in a case: 2.9 kg
- Dimensions L/W/H including towers: ~ 12.2 / 10 / 13.6 cm
- Minimum distance from the lower horizon:
- to the floor – 0.9 cm / to the ceiling – 12.7 cm
- Minimum distance from the upper horizon:
- to the floor – 12.7 cm / to the ceiling – 0.9 cm
- Minimum vertical to wall distance: 0.9 cm
- Distance between lower and upper horizon: 11.8 cm
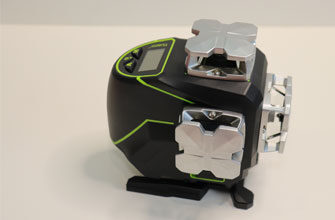
Housing Fukuda MW-94D-4GX
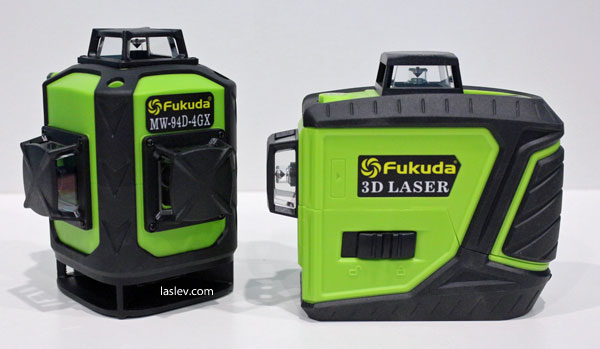
I want to start with the dimensions of the device. In the photo on the Internet, you might think that it is quite large. But the 4GX is actually A very compact device.
If you compare it with the three-plane laser level Fukuda MW-93T-3GJ (GX), you can immediately see that the dimensions are really small
It is also necessary to note the highest quality of the body Assembly and the materials from which it is assembled.
All towers are made of plastic, except for the large lower tower support. It’s made of metal. Hence the rather large weight of the level 760 grams.
Almost all sides of the case, except for the battery compartment, are covered with black rubber.
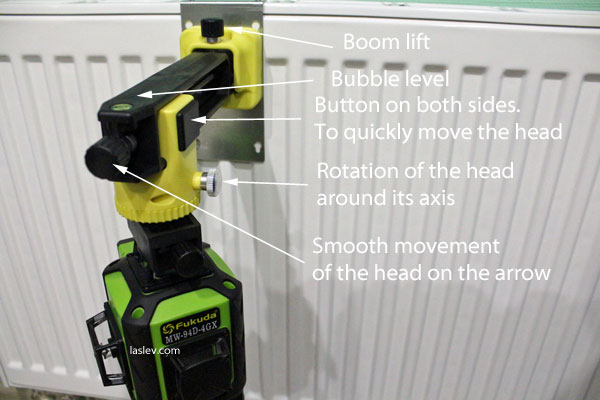
A bubble level is located in the upper part of the case. For rough pre-installation. It seems to be a trifle. But it really helps to quickly assess the position of the device in space.

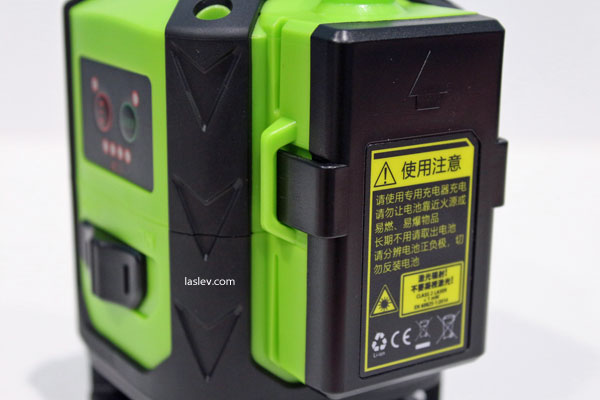
The battery compartment is located outside the case. It closes with a plastic lid with two large latches. The coupling of the cover and case is also excellent.
The battery compartment only holds the battery. You won’t be able to work on batteries.
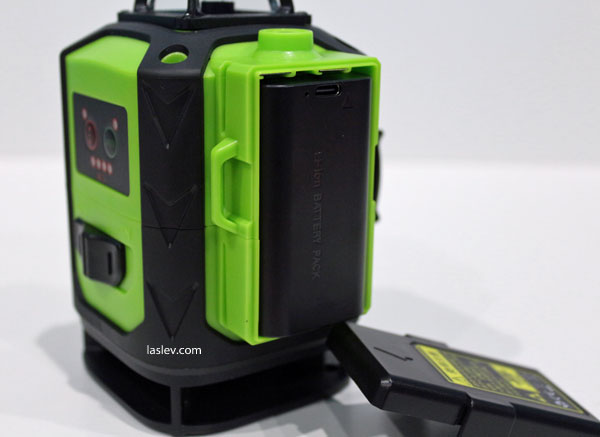
And here, by the way, one negative turned out. The level can also not be powered on and charge the battery at the same time. That is, the battery is charged separately from the device.
Thus, it turns out that the second battery is simply necessary. To avoid unplanned downtime.
Does not work from the electrical network
The fact is that finding the same battery is not so easy. Therefore, I recommend to buy at once with two batteries in the kit.
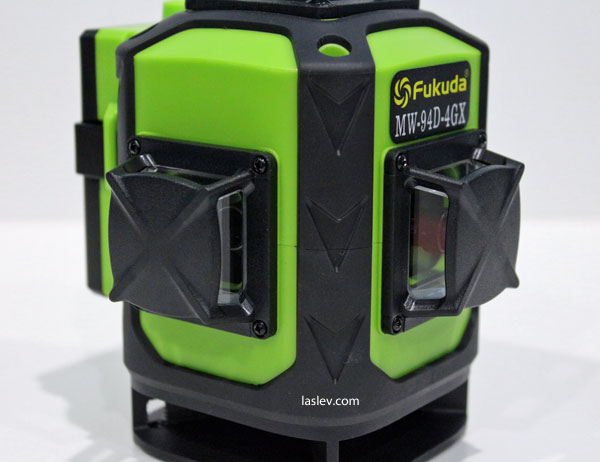
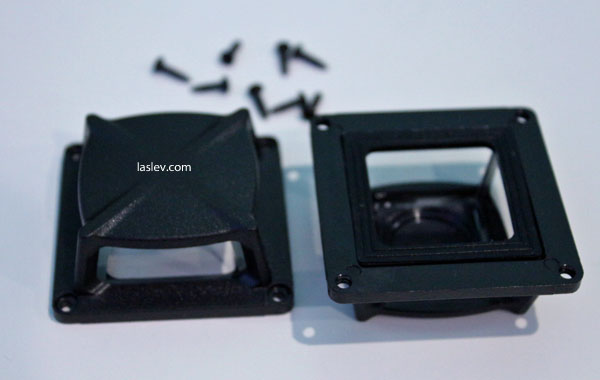
The protective towers are attached to the body by four screws through a rubber gasket. This is good!
The case itself is quite simple to understand. You need to remove the towers from the vertical emitters, and Unscrew the four screws on top of the corners.
The Fukuda MW-94D-4GX laser level is equipped with Japanese sharp LD laser emitters. The entire laser module is also perfectly assembled.
It projects a thin and bright green line. For line thickness tests at different distances, see below.
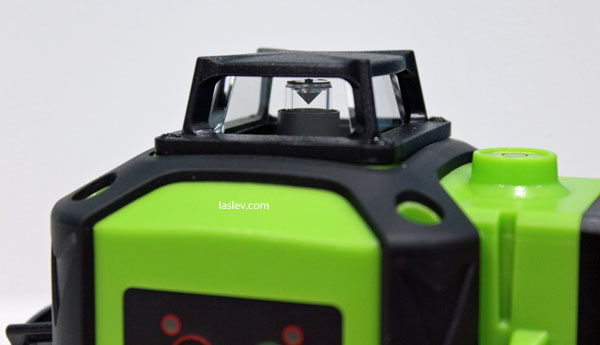
The compensator
A mechanical compensator is installed in the Fukuda MW-94D-4GX laser level. Which is able to align itself within 3°.
If the level is tilted more than 3°. Then an audible alarm will be triggered automatically. The lines will also start flashing quickly.
This notification is made to protect against incorrect markup. To turn off the alarm. And the lines stopped blinking. You need to put the device a little more equal. So that the slope falls within the working range of the compensator.
It should be noted the fast speed of installing the compensator in the working position. After turning on or pushing the device, it is installed in just 2-3 seconds. This is a very good indicator.
Quick installation of the compensator
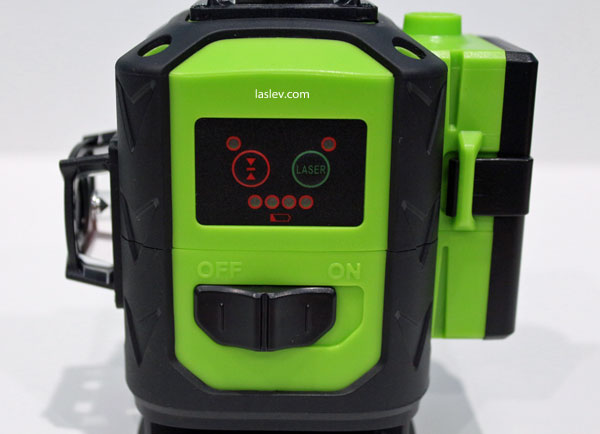
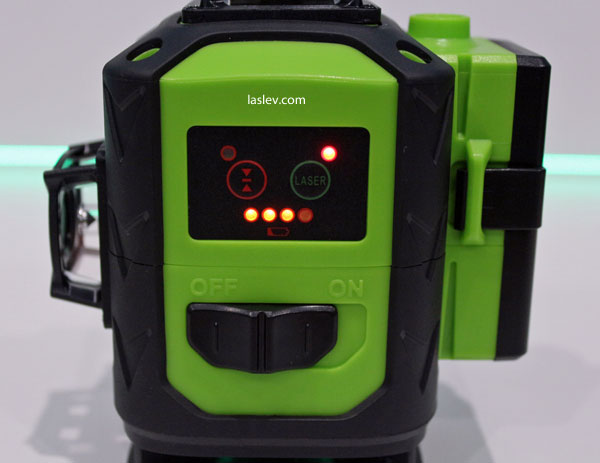
Control Fukuda MW-94D-4GX
The toggle switch on (lock) and the control panel are located on the same side. The panel also has a four-step diode battery charge indicator. Which allows you to control the remaining charge in the battery.
Level management is quite convenient, but there are some shortcomings. For example, you can’t enable the upper horizon separately, but only with two verticals enabled. in the same Huepar 904DG in this regard, everything is much better.
But don’t get upset. It was only about control from the buttons on the device. All other algorithms for switching planes are available on the remote control.
So, in order.
Control on the device
When you turn on the toggle switch, the lower horizon immediately lights up.
- The 1st click on the “Laser” button disables the lower horizon and includes only one vertical line in front.
- 2nd press, turns on the second vertical, only 2 verticals are lit.
- The 3rd click adds the lower horizon to the 2 burning verticals. Two verticals and the lower horizon are lit.
- 4th press, turns off the lower and turns on the upper horizon, that is, two verticals and the upper horizon are lit.
- 5th click, all 4 planes of 360 degrees (2H/2V) are lit.
- 6th tap, returns the circle to the beginning. Only one lower horizon is lit.
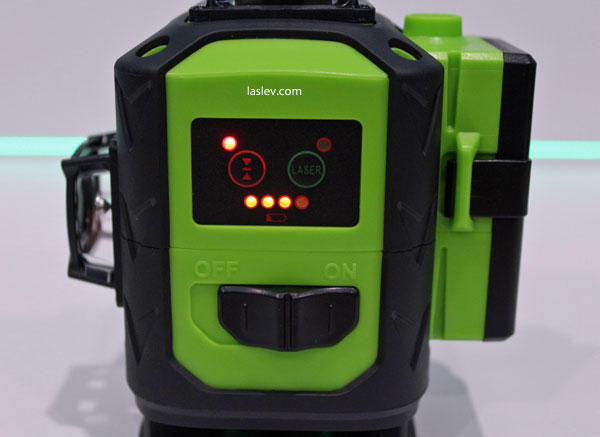
How do I enable tilt mode? In the locked state, hold the “Laser” button for 2-3 seconds. Until the lower horizontal plane turns on. And the red diode above the “Laser”button will not light up.
You can also switch planes in this mode. Either from the device or from the remote control.
The lines will flash once every 5 seconds. This is done on purpose. So that you don’t forget that you work in a special mode. To turn off the mode, you need to click the entire algorithm in a circle. Or turn the toggle switch on and off.
You can only enable the TILT function from the device! You won’t be able to activate it from the remote.
To activate the mode of the receiver need to click once on the button to the left with arrows.
A red indicator will light up above this button. And the lines will burn a little dimmer.
Now it can be placed with a receiver up to 100 meters in diameter. To turn off the mode, simply press this button again.
Remote control
From the remote control, the control of the planes becomes almost perfect. You can enable or disable everything individually. Only one minus. You can’t enable tilt mode from the remote control.
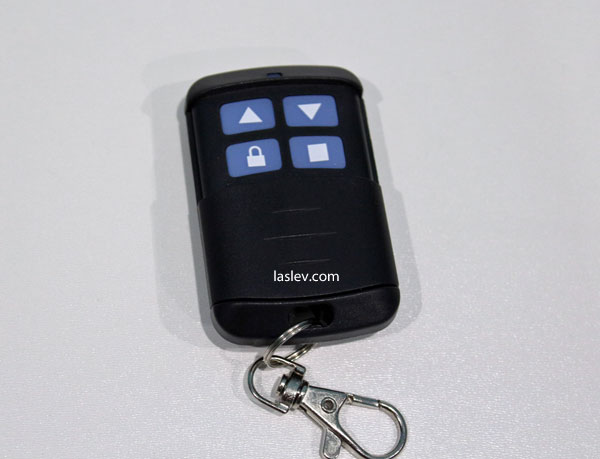
So, there are 4 buttons on the remote.
- Buttons with triangles are responsible for turning verticals on and off separately. In other words, one button turns one vertical on and off. And the other button with a triangle is the second vertical.
- Button with a square. It can enable/disable the upper and lower horizon separately.
This gives you complete freedom of choice. You can make absolutely any combination of planes. This is really very convenient.
- The button with a lock is responsible for activating the mode of operation with the receiver.
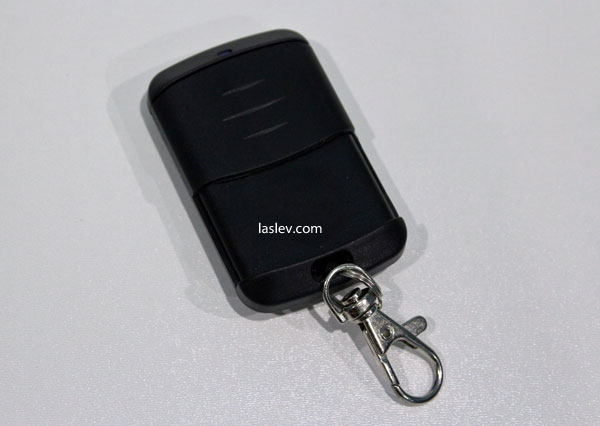
The remote control itself is made well, buttons are closed with a sliding protective cover.
Functionality Fukuda MW-94D-4GX
The most important functional difference from 3D levels. This is the appearance of a second horizontal plane.
That is, the variability of using the FUKUDA MW-94D-4GX laser level increases several times.
Of course, you can try and do everything with a regular laser cross. But if we are talking about convenience. About speed. About the performance. Then reasoning about what is better 2D or 4D is definitely unnecessary here.
4D laser level is much more productive!
This laser level will suit all construction and finishing professions to the maximum. It does not matter whether it is a plasterer, window fitter, installer (floors, ceilings, profile structures), tiler and others.
It just has everything you need. Both in terms of functionality and set. This is the highest to date.
The thickness of the laser line at different distances
At 1 meter from the wall the thickness was 1.5 mm
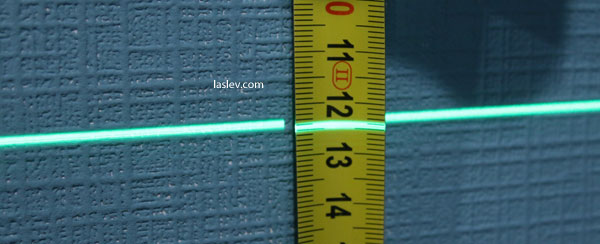
The distance of 5 meters. The thickness remained almost unchanged. And it was still the same 1.5 mm.
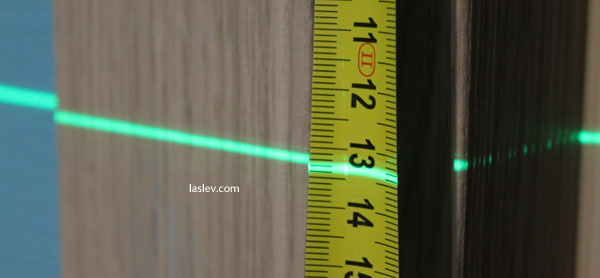
Ten meters from the wall. The thickness was slightly more than 2 millimeters.
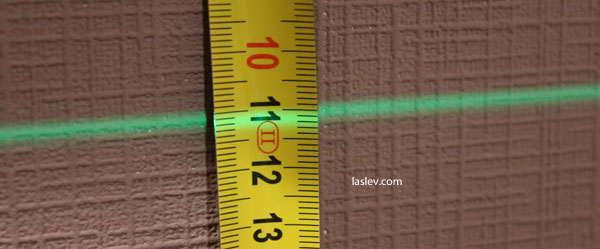
This is a great result!
Accuracy setting
If we compare it again with the 4D laser level Huepar 904DG, then the alignment is less convenient. But not so critical.
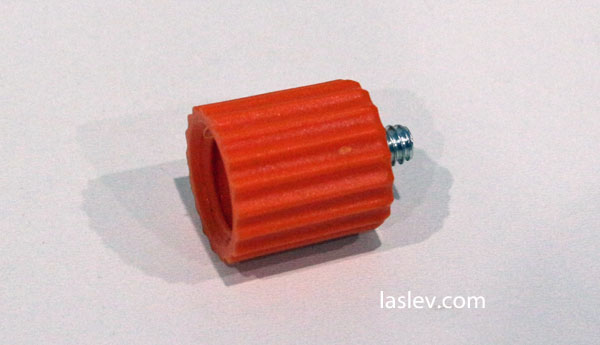
To adjust the position of the pendulum. (when all planes are aligned in one direction). You need to use two adjustment bolts. See the photo below.
That is, by moving the bolt in the barrel of the pendulum. Or for example, a nut on a longitudinal adjustment bolt. You will change the center of gravity of the pendulum.
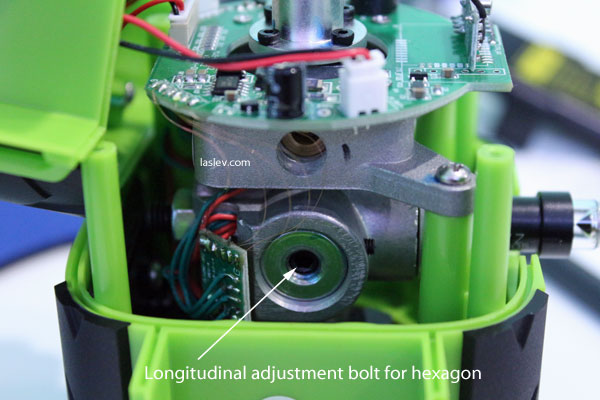
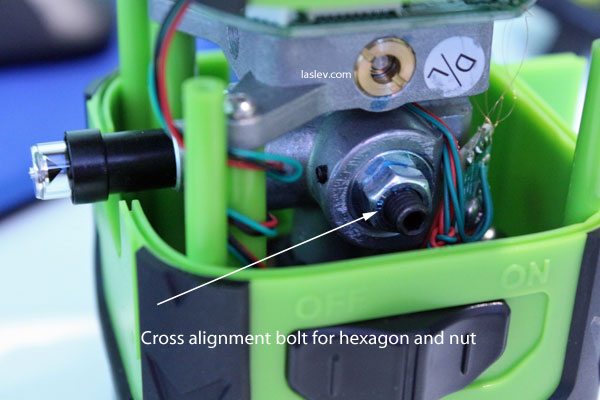
The disadvantage is that you will have to assemble the housing after each interaction with the bolt. And check the result. You can try attaching the battery when the case is disassembled. But it won’t be very convenient.
Alignment of the planes separately does not require disassembly of the housing. It is enough to remove only the corresponding tower. And access to the 4 alignment screws of the laser tube is open.
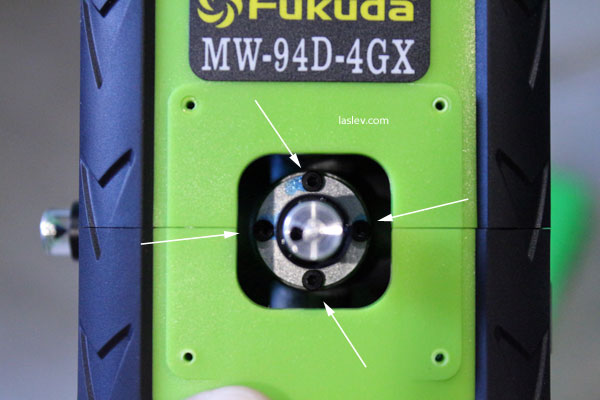
The same cannot be said about the lower horizon. If you have a large margin of error. Then it is necessary to output it by the position of the pendulum with two bolts. See the photo above.
After the lower horizon is configured, the other emitters are configured separately.
Adjusting the lower horizon is the first step! Only then all the others.
Comparison table with a competitor
| Technical information | FUKUDA MW 94D-4GX | HUEPAR 904DG |
| Accuracy, mm/m | ± 0.3mm / 1m | ± 0.3mm / 1m |
| Compensator range, ° | ± 3° | 4º ± 1º |
| Range without/with receiver | Ø 40m*/Ø100m | Ø 40m*/Ø120m |
| Protection | IP54 | IP54 |
| Tilt function | Yes | Yes |
| Work from an outlet | No | Yes |
| Working with the detector | Yes | Yes |
| Batteries | Li-ion 4000mAh | Li-ion 5200mAh |
| Working temperature | -5°С to + 45°С | -10°С to + 50°С |
* – Is a conditional indicator. Which directly depends on the degree of illumination. Both indoors and outdoors.
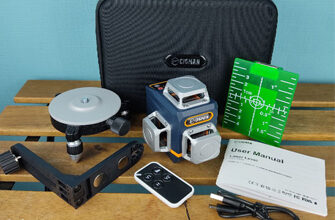
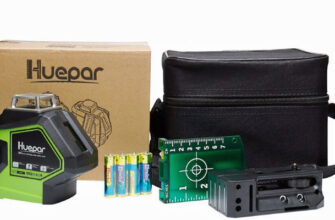
Contents of delivery
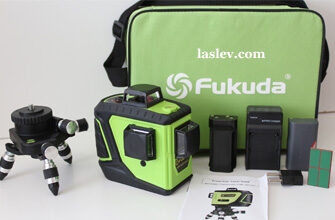
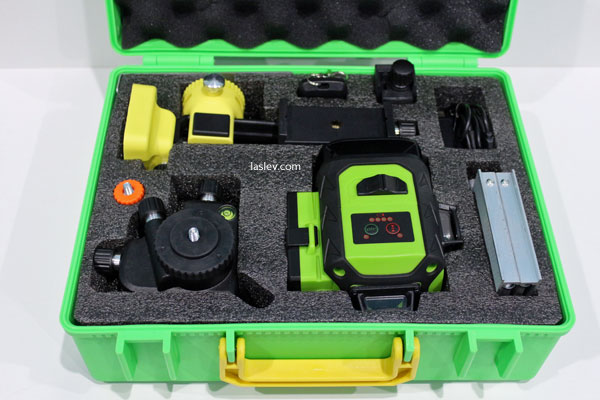
The Fukuda MW-94D-4GX laser level is delivered in a green suitcase.

A magnetic wall mount is best mounted on a plate. Which is included in the package. Or a clean full-width profile. In other cases, there is a risk that the mount will slide down. It is held very firmly on the plate.
You have to work with the wall mount through a special adapter clip. As a result, a certain accumulation of everything is formed. Which I don’t really like. But in General, the whole structure works properly.
Since the two holes in the base of the device with a 1/4″ thread for mounting are located at the corners. Which is not exactly suitable for mounting on such triggers. The device may simply overbalance and tip over.
After several removals and installations. To be honest, I even liked this clip. Everything happens much faster. In principle, it is very convenient.
Also included is a lifting platform with a mechanical microlift. Convenient thing for setting the level at low altitudes.

For mounting on a tripod or rod, a 1/4″ to 5/8″ adapter is included. Therefore, there will be no problems with mounting.
Well, also included is the remote control, which was mentioned above. And a charger, or rather a wire with a USB plug, and a type-C plug at the output. See the photo below for technical specifications of the plug.
Depending on the country of delivery, adapters may be attached to the plug.

The instruction was nested from a completely different laser level. Therefore, we can assume that it was not. But you don’t need it now. Since this review contains complete instructions for using the Fukuda MW-94D-4GX laser level.
The entire set is carefully placed in its cells in the case, so nothing is loose during transportation.
Pros and cons
For this level, it is inexpensive. High build quality, 4 planes of 360 degrees, the distance to the floor and ceiling of 0.9 cm, a full plumb line, sharp laser modules, thin and bright lines, tilt mode, receiver mode, 4-step battery discharge indicator, a good set, there is a possibility of adjustment, bubble level on the case, remote control, all planes can be switched separately (only from the remote), compact size.
it is not possible to work on regular batteries, there is no network operation, you can not turn on only one upper horizon from the device (you can only use the remote control).