- Where to buy laser measure profitably and reliably?
- Technical Specifications
- Huepar S60 laser distance meter housing
- Functionality of each button
- Button #1
- Button #2 (+)
- Button #3 (“U_”)
- Button #4 with squares
- Button #5 (OFF)
- Checking stability and accuracy of measurements
- How to calibrate the Huepar S60 distance meter
- Possible laser rangefinder errors
- Package Contents
- Pros and cons
- Video review of Huepar rangefinders
The Huepar S60 is a low-cost laser distance meter with great features, which is how you can describe this model in a nutshell.
It really is an excellent choice for both the home handyman and the professional.
To begin with, it must be said that Huepar S60 laser distance meter passed all necessary certifications: RoHS, CE, FDA, FC. It is well assembled, has excellent functionality and built-in two-axis inclinometer, which you can hardly find in other analogues at such a price. But that’s not all, see the review for more details.
Where to buy laser measure profitably and reliably?
Technical Specifications
-
Measurable distance: 0.05-60m (0.16-196ft.)
-
Accuracy: ±(2mm+5×10⁻⁵xD)/ ±(1/16inch+5×10-5xD), where D is the length of the measured distance.
-
Units: m/in/ft/’ “
-
Rangefinder calibration: Yes
-
Additional measurements: 7 options.
-
Built-in memory: 30 cells
-
Inclinometer measurement range: X±90°/Y±90°
-
Angular accuracy: ±1° (≤30°) ±2° (≤60°) ±3° (≤85°)
-
Number of reference points: 3 pcs (up/down/stand)
-
Laser inoperative shutoff: 30 seconds
-
Rangefinder auto power off: 180 seconds
-
Power supply: 2xAA NI-MH (included)/LR6/PowerBank
-
Tripod thread: 1/4″-20
-
Protection against dust and moisture: IP54
-
Laser class: II, 635nm, <1mW
-
Display: 4 lines
-
Dimensions and weight: 121x48x26mm/138 grams
-
Operating temperature: 0°C…+40°C (+32°F…+104°F)
-
Storage temperature: -10°C…+60°C (+14°F…+140°F)
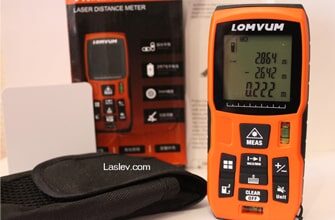
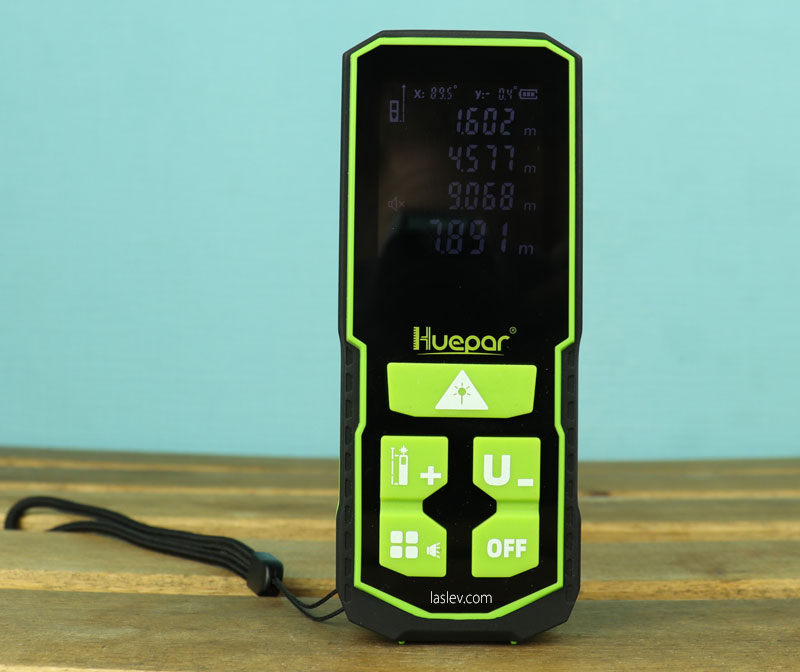
Huepar S60 laser distance meter housing
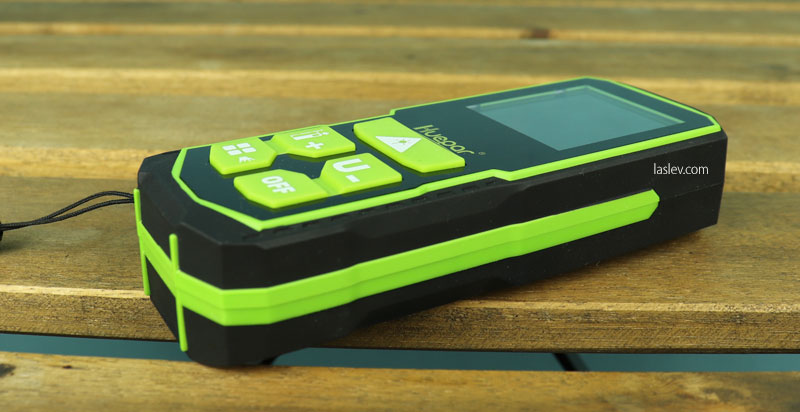
The device is made of two types of plastic, a good thick ABS and soft touch plastic, more like dense rubber. The workmanship is quite decent without any visible flaws.
The large rubber buttons are spaced far apart, making it easy to operate the rangefinder with gloves on.
The buttons have a well-balanced response when pressed with a characteristic click, this gives a clear understanding that the button has been pressed to the end.
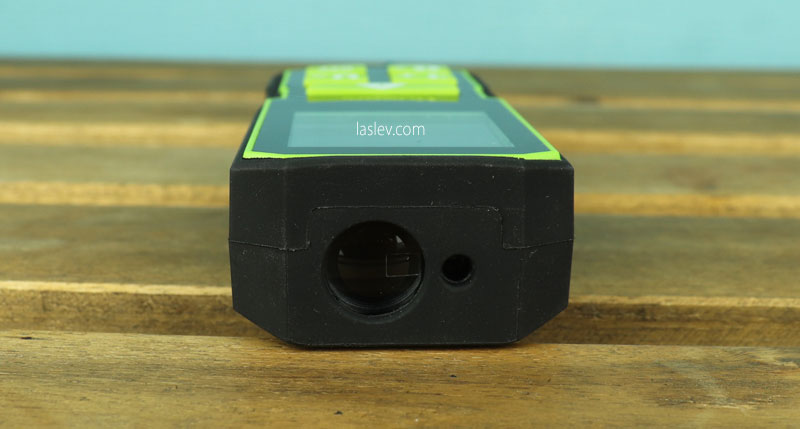
There are two windows in the front: a large laser receiver window and a smaller one where the laser beam comes out.
It must be said that despite the fact that the receiver window has a relatively small diameter, the Huepar S60 laser distance meter measures almost instantly indoors. This is definitely a big plus.
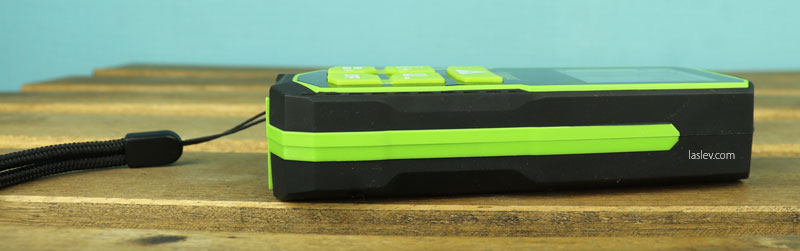
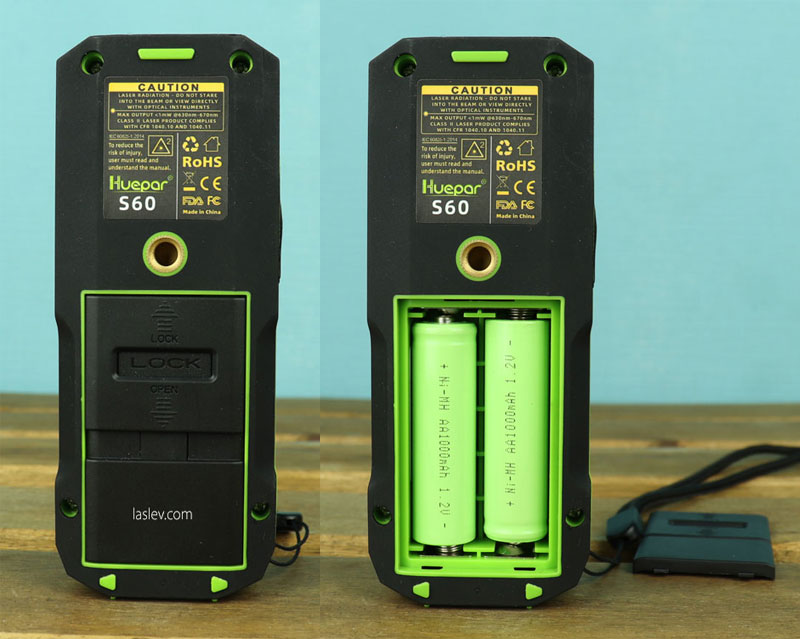
On the back side there is a 1/4″ thread, which is quite rare for cheap rangefinders.
There is also a battery compartment for two AA batteries (LR6) or the same type of batteries, which, by the way, are included in the kit.
The cover of the battery compartment is made in the form of a slider, which is also convenient.
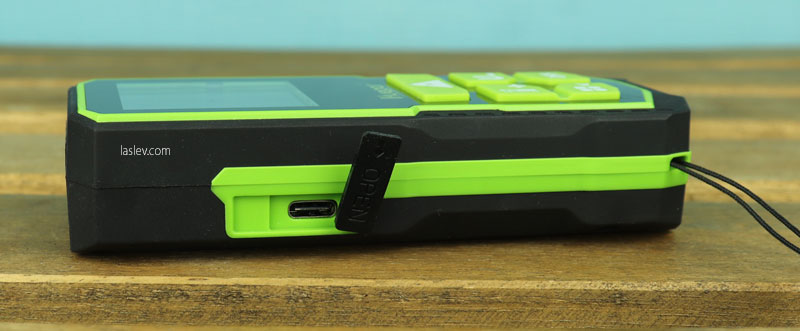
The supplied batteries can be charged directly in the rangefinder. For this purpose, there is a Type-C charging port on the side of the device.
If we talk about tactile size, the laser distance meter Huepar S60 is not big and not small, in the hand lies well, it increases comfort in operation.
Functionality of each button
The Huepar S60 laser distance meter has only five buttons, but there are many more functions associated with them, so let’s break it down in order. For clarity, let’s number all the buttons.
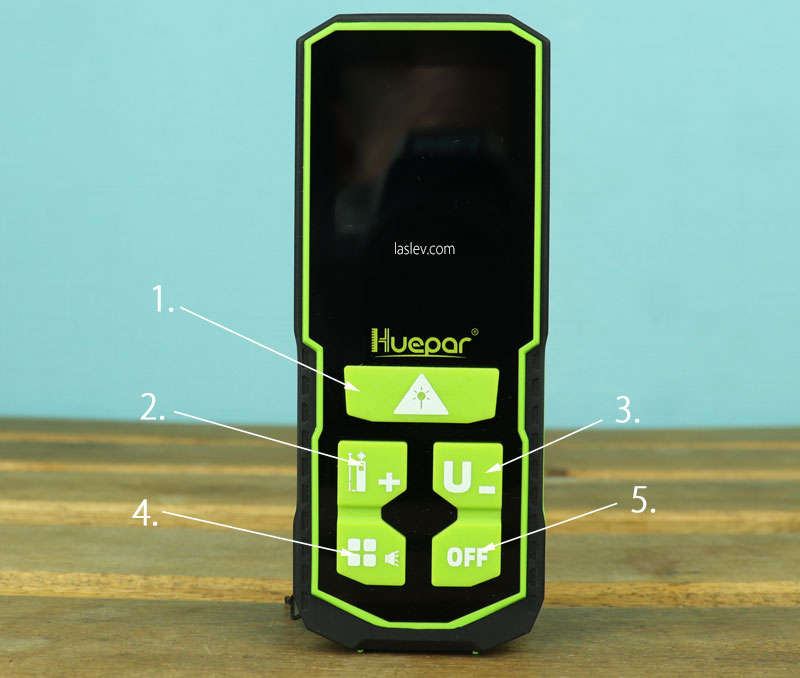
Button #1
The largest button at the top. It is responsible for switching on the laser rangefinder and, if briefly pressed, for measuring, but that’s not all.
A long press on this button for about 2-3 seconds activates the “min/max” function. Rangefinder goes into the tracking mode (constant measurements) and the lines appear on the screen: “MAX” at the top, and below “MIN”.
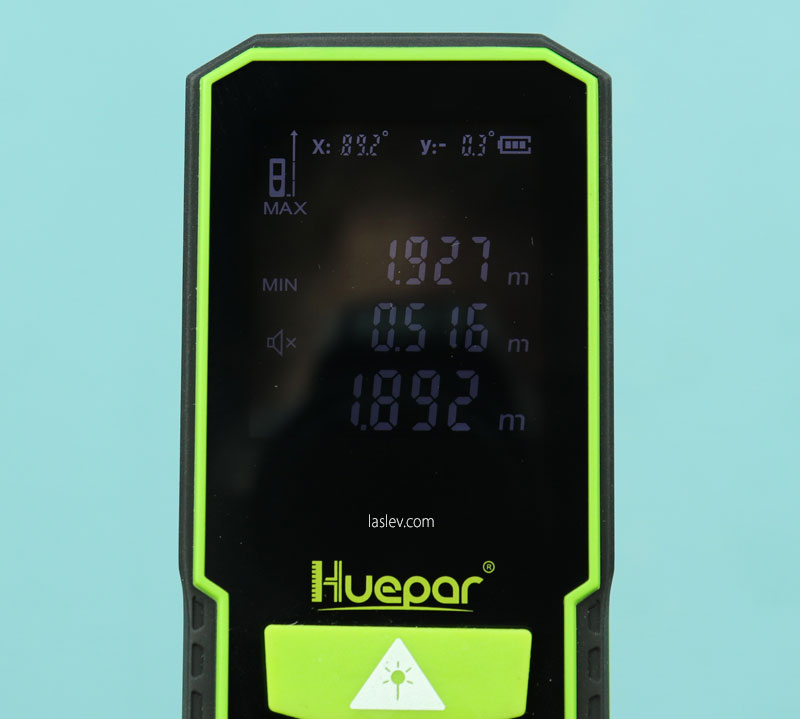
This is a very useful function when calculating perpendiculars (shortest distance) and, for example, diagonals (maximum distance).
For example, if you want to find the shortest distance to a wall (or any other surface), then you just turn this function on and scan the area where the perpendicular is supposedly located.
After you’ve run the point up and down the wall several times, you take a measurement, that’s it. Three values will appear on the screen: “MAX” (not interested in this case), “MIN” – this is just the perpendicular (the shortest distance), and in the final line the value of the measurement made.
Button #2 (+)
From the schematic designation it becomes clear that this button is responsible for adding the results, and for changing the reference point.
At a short press the “+” will be put and the next measurement will be automatically added to the previous one, and the sum will be displayed in the summary line.
It is possible to add not only simple linear measurements, but also areas and volumes.
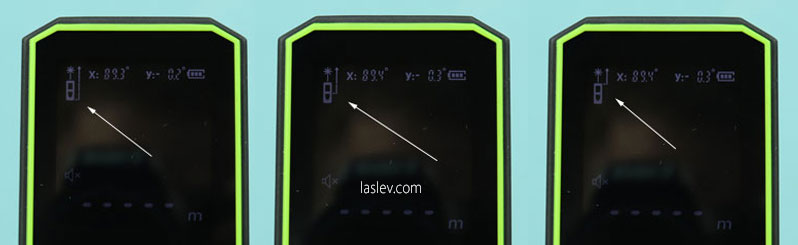
You can select the reference point by pressing the button for 1-2 seconds, at the same time you can see how the reference point changes in the schematic drawing in the upper left corner of the screen.
By default the reference point is always from the bottom edge of the rangefinder. Optionally, you can select from the upper edge of the instrument, and from the thread when mounted on a tripod.
Button #3 (“U_”)
When pressed for a long time, it changes the unit of measure. You can select m/in/ft/’ “.
If you press briefly, the next measurement is subtracted from the previous one. Distances, areas and volumes can be subtracted from each other.
In one session you can add and subtract results from each other as much as you want, for example V1+V2-V3+V4-V5, and so on. The result will always be displayed in the summary line, and immediately automatically without any confirmation.
Often in distance meters when adding or subtracting, such as the Huepar LM120A laser distance meter, to get the sum or difference you need to press the “measure” button again, and only then the final result appears in the summary line.
Button #4 with squares
This is the most functional key. With a long press it activates or deactivates the sound confirmation of all actions.
A short press on this key will alternately call up the following functions:
1st press. Quick calculation of the area by two measurements. Length and width of the room are measured – in the final line the area in square meters is displayed.
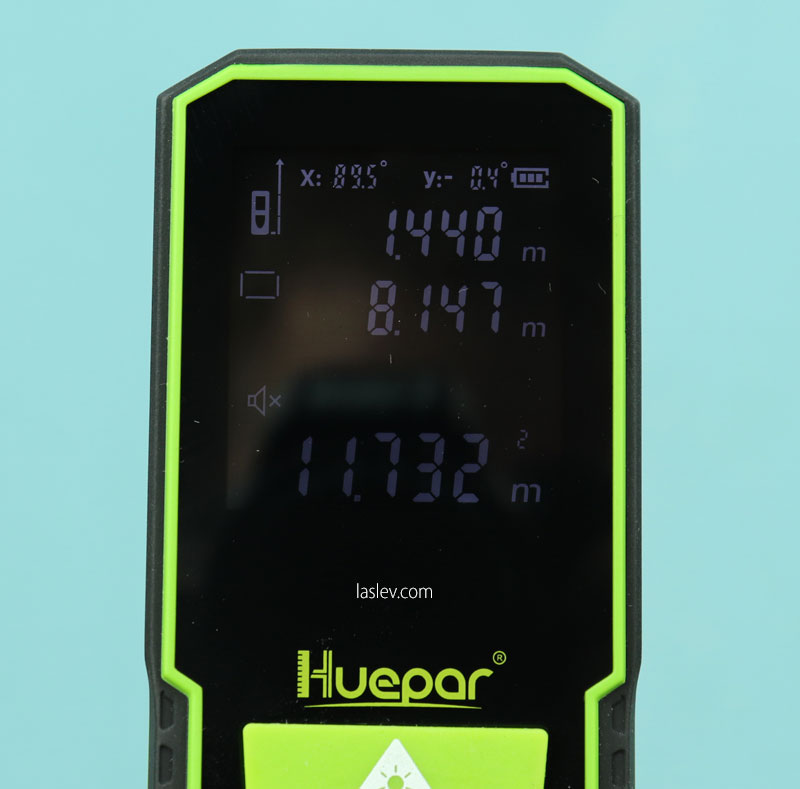
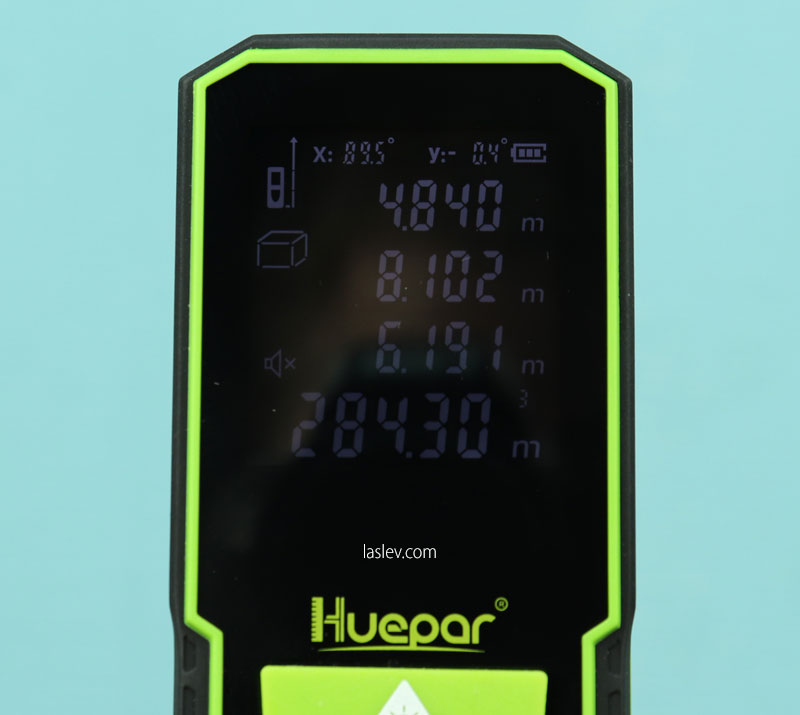
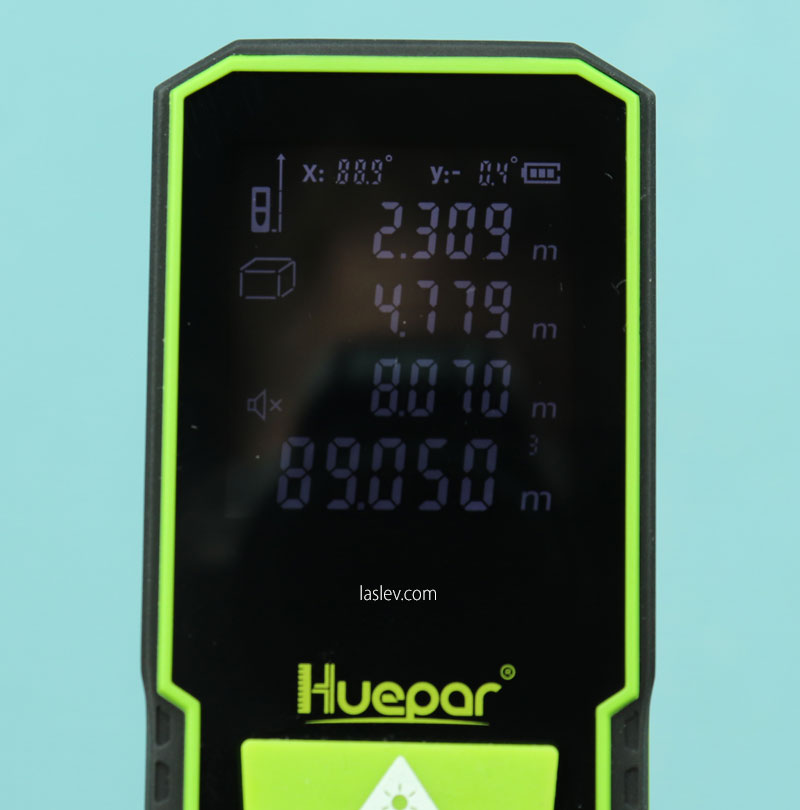
2nd press. The same quick calculation, but already the volume in cubic meters. Here to the length and width is added another measurement of the height.
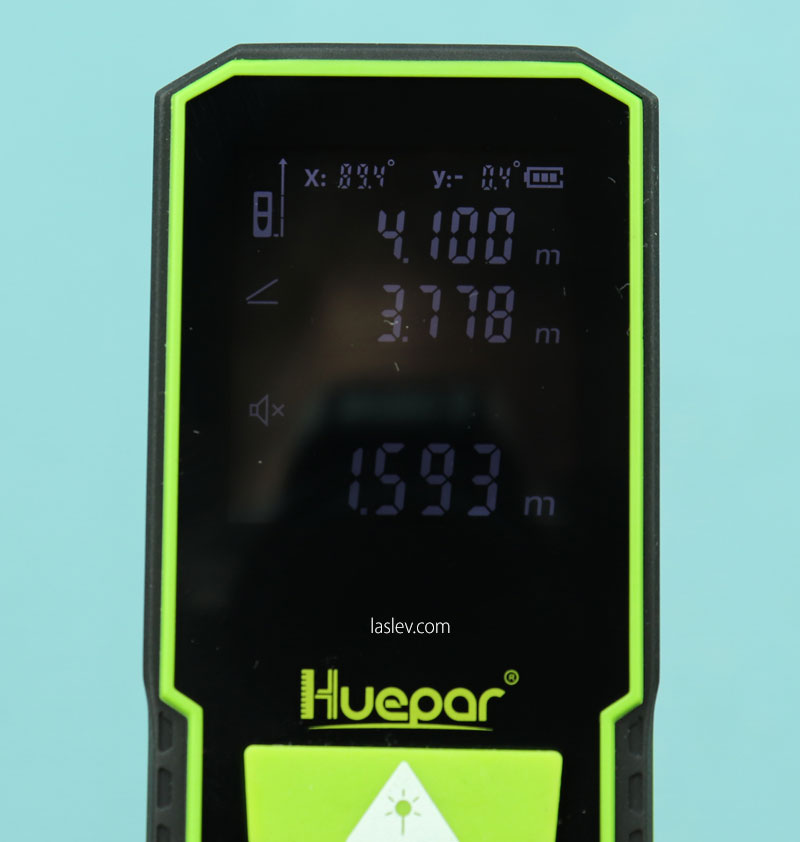
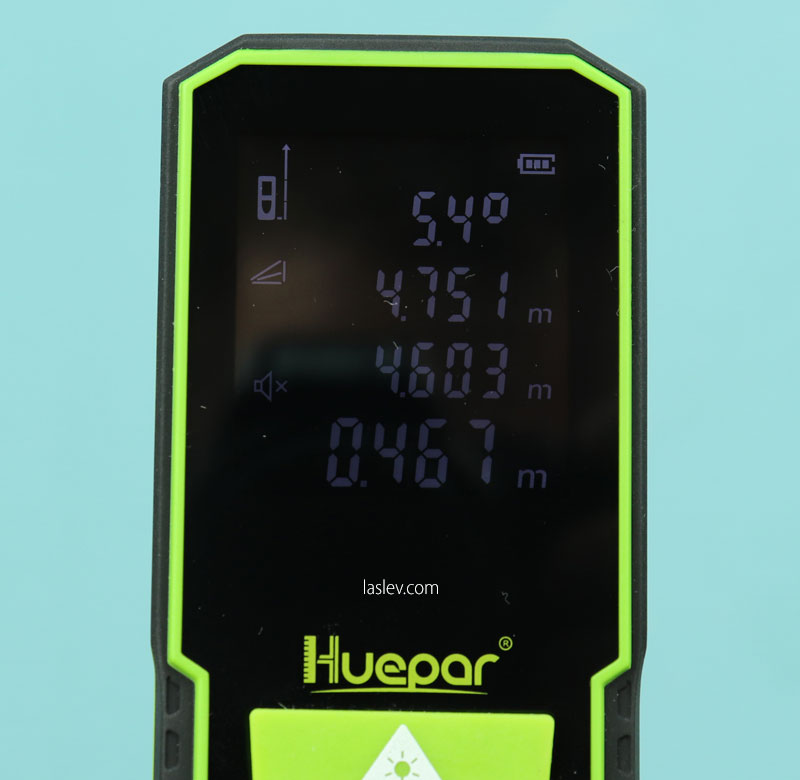
3rd push. The function of calculating the inaccessible height. Measurement is done from one point: first the length of the hypotenuse is measured, and then the length of the lower cathetus, everything. The final line displays the length (aka height) of the second cathetus.
Other cheap laser rangefinders like Sndway SW-T40 or Lomvum LV40 cannot boast such a convenient function.
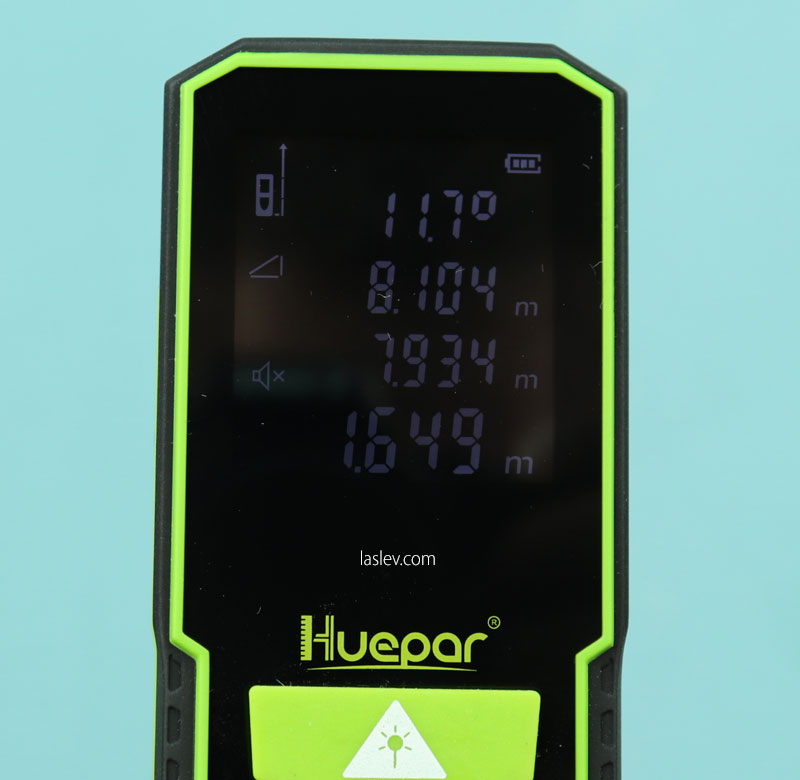
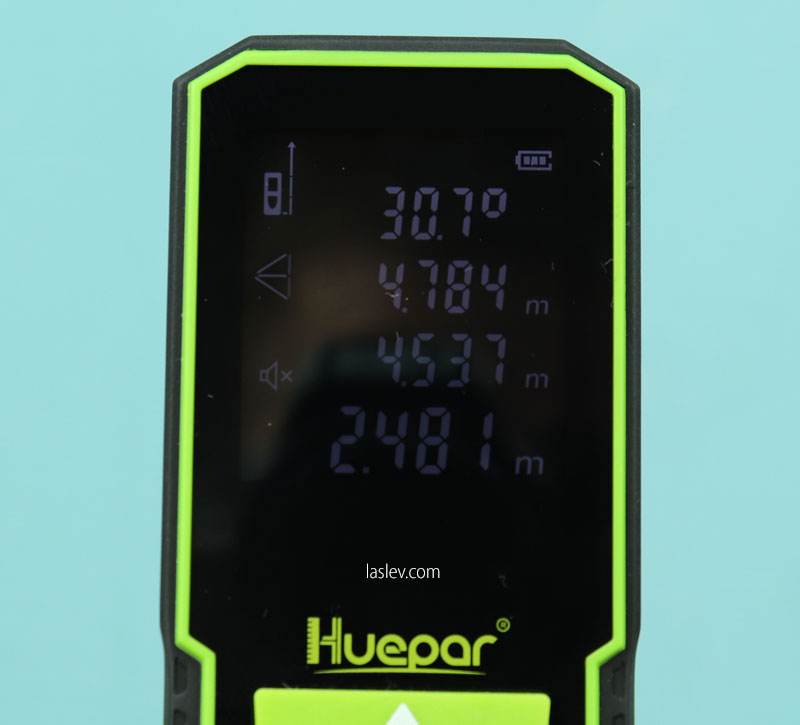
4th press. This function allows you to calculate the length (height) of the second cathetus, as in the function above, and also allows you to calculate the distance to an object through an obstacle. All this is done with a single measurement of the hypotenuse length.
Four values are displayed on the screen at once:
- angle in degrees
- length of the hypotenuse
- horizontal distance to the object (lower cathetus)
- height of the second adjoining cathetus.
5th press. Calculation of the height using two measurements.
This calculation is best performed with a tripod.
Only two measurements are made to the upper point and the lower point, that’s all. The height of the measured segment is displayed on the screen in the summary line.
Yes, by the way, this function is very common in other laser rangefinders as well, but here, in the Huepar S60 laser distance meter, it is done by two measurements, while in other rangefinders it is done by three measurements.
Everywhere else you need to measure in the middle strictly at an angle of 90° (this greatly affects the accuracy of the measurement). The newer calculation algorithms in this case allow you not to do it, which in turn increases the measurement accuracy.
6th press. This function is mainly found only in expensive advanced distance meters, for example Huepar T7-LM200C – it is the calculation of the inaccessible segment by two measurements.
It is very simple: first you measure to the upper point of the segment to be calculated, and then to the lower point, and that’s it! In the final line you get the length of this segment.
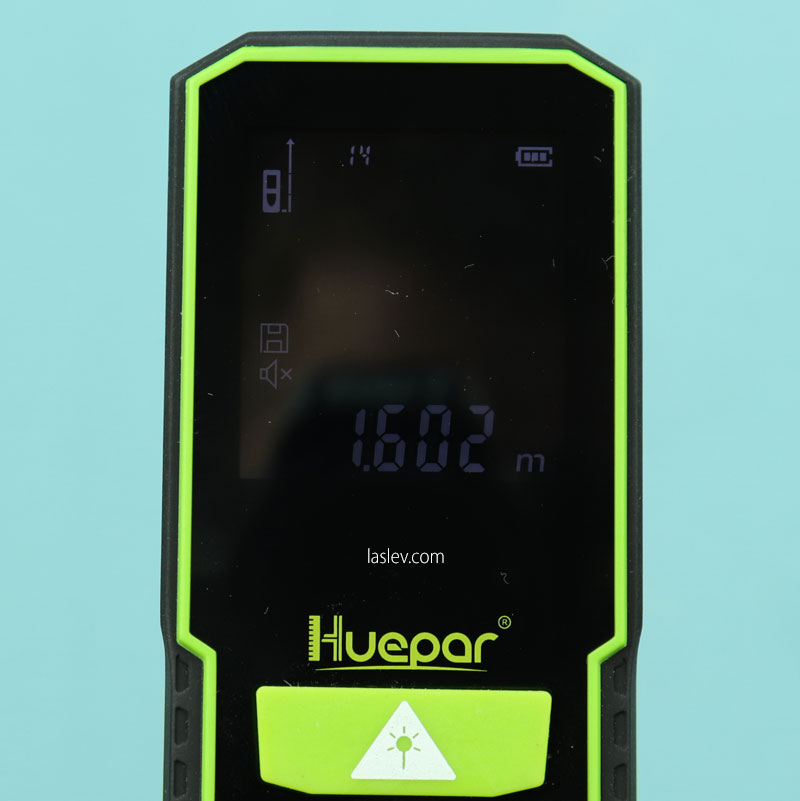
7th press. Recalls the internal memory of the device for the last 30 measurements. You can scroll through the recorded values with the “+/-” buttons.
To delete a value, briefly press the “OFF” button.
Button #5 (OFF)
Responsible for three actions:
- the laser can be temporarily switched off with a short press
- delete results from memory
- when held for 2-3 seconds – completely turns off the rangefinder.
That’s basically all the functionality you and I have covered. I think for an inexpensive laser distance meter, this is an excellent set of features. Plus, Huepar S60 has newer calculation algorithms that allow for better accuracy and measurement speed.
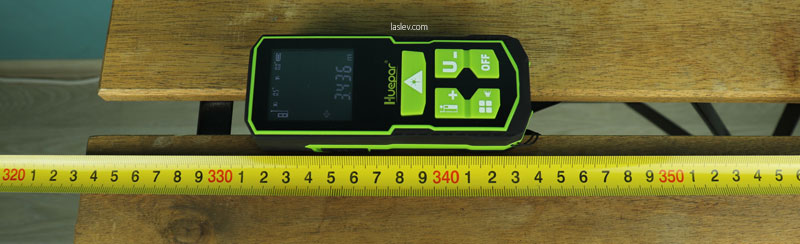
Checking stability and accuracy of measurements
The stability test was a 10 out of 10! This is an excellent stability test.
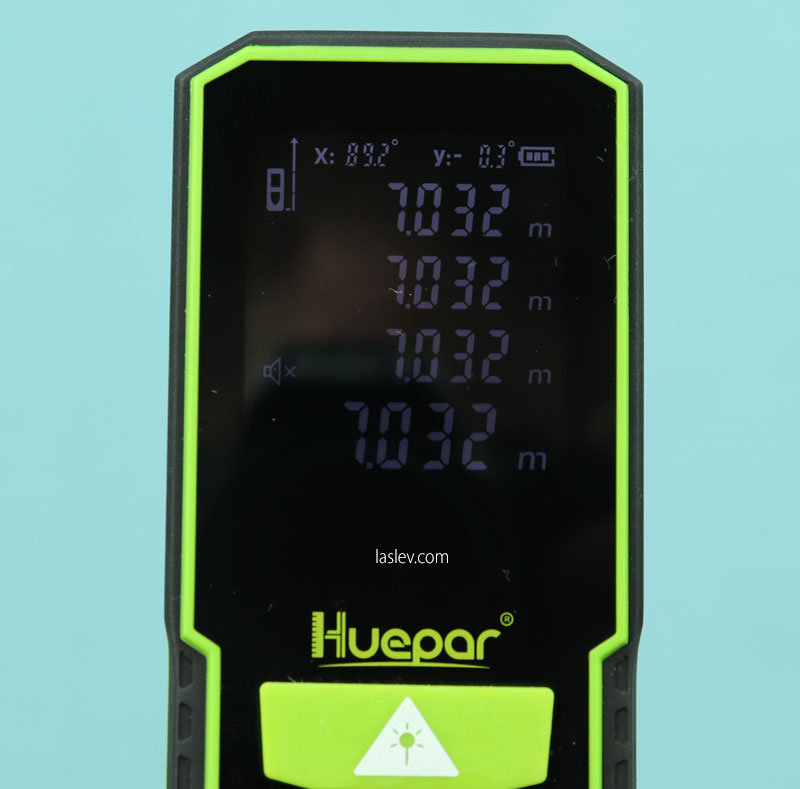
That is, from the same place the rangefinder gave the same value. Here it should be explained that quite often in this test readings vary within the stated error. That is, ± 1-2 millimeters can jump back and forth, but here everything is clear.
Accuracy is also top-notch. Although, again, it can be adjusted at any time if needed. How to do this will be discussed below.
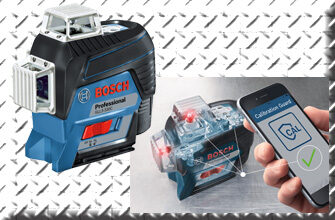
How to calibrate the Huepar S60 distance meter
To make a correction which will be taken into account for the next measurements, you need to go to the calibration menu. To do this, turn off the Meter and simultaneously hold down two buttons: “big power button” and “square button” for a few seconds until the corresponding menu appears on the screen (photo below).
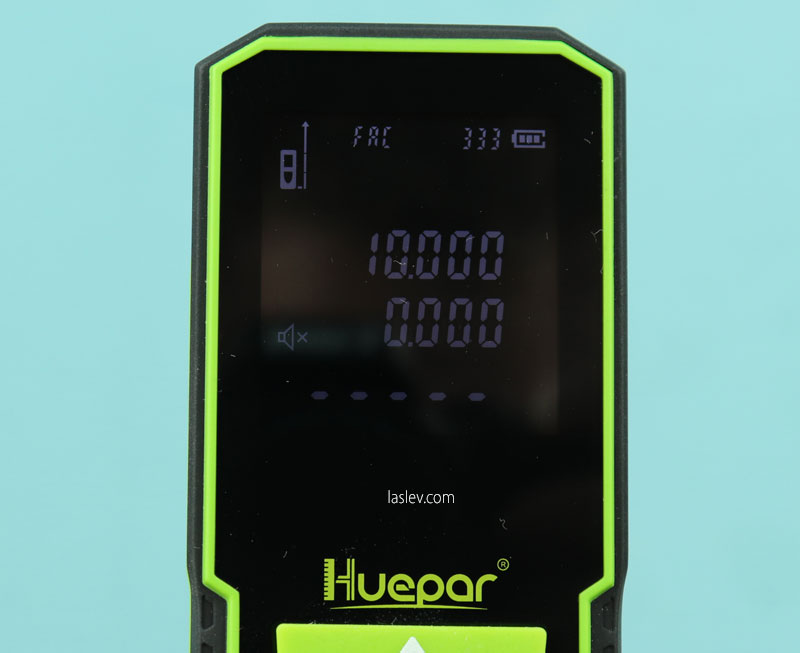
Then use buttons “+” and “-” to set the necessary adjustment with a negative or positive value.
After installation, be sure to press the “big power button” to fix the new settings. That’s it. Now all subsequent measurements will take into account the correction made.
Possible laser rangefinder errors
Sometimes alphanumeric codes may appear on the distance meter screen to indicate certain measurement errors. The table shows all codes with descriptions and possible solutions.
| Code | Cause | Corrective action |
|---|---|---|
| Err10 | The batteries are too low. | Replace the batteries. |
| Err15 | Measurement is outside the range specified in the specifications. | Measure within the permissible range. |
| Err16 | Weak reflective coefficient at the surface. | Measurement time is too long. Use a surface with a higher reflective coefficient. |
| Err18 | Too strong reflective signal. | Use surface with lower reflectivity. |
| Err26 | Not displayed on the screen. | Measure target within range. |
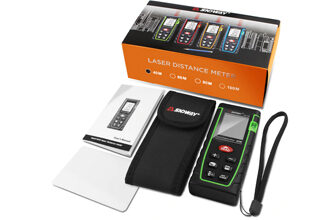
Package Contents
The Huepar S60 laser distance meter is delivered in a reduced package, without a protective cover. In the original box you will find:
- device
- manual
- two rechargeable nickel-metal hydride batteries
- USB-Type-C cable for charging
- hand strap
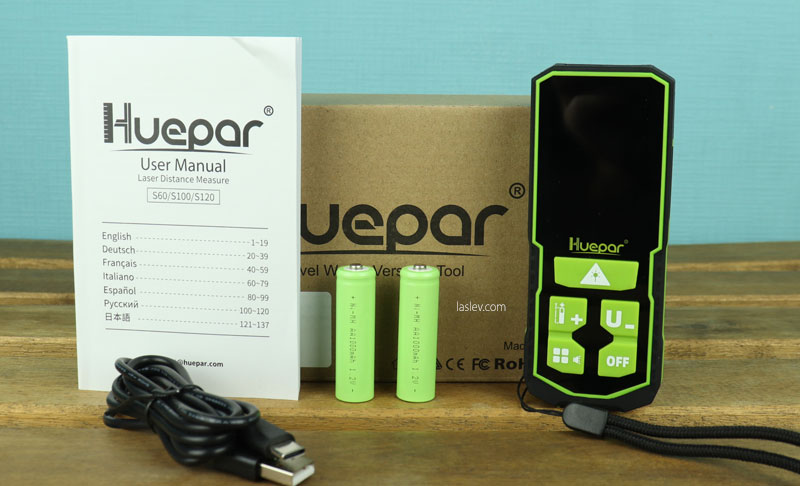
I can add that I personally am not embarrassed by the lack of a case, because compared to other rangefinders in this price category, this model (S60) deserves special attention. It really is a modern, more technologically advanced rangefinder with excellent functionality and measurement speed.
Pros and cons
Inexpensive, two-axis tilt sensor, high measurement speed, all necessary additional functions, automatic “S” and “V” addition or subtraction, inaccessible length calculation, min/max function, muteable sound, simple accuracy calibration, replaceable battery operation, three reference points, tripod thread, good build quality, improved indirect calculation algorithms, four-line display, large and convenient buttons, high accuracy, built-in memory.
No timer, no flip heel, no protective cover included.