- Where to buy a laser level profitably and reliably?
- Technical specifications
- Housing laser level DEKO DKLL12PB1
- Build Quality
- Built-in battery
- Operation from the electrical network
- Protective towers and laser modules
- Disassembly and calibration of the DEKO DKLL12PB1 laser level
- Compensator
- Control laser level DEKO DKLL12PB1
- Functional features
- Checking for accuracy
- Laser line thickness at different distances
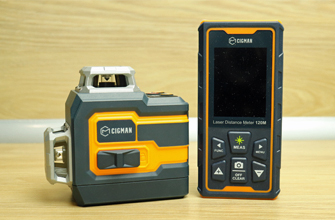
- Comparison table with a competitor at the same price
- Contents of delivery
- Pros and cons
- Video review of the laser level DEKO DKLL12PB1
- Video comparison with the analog
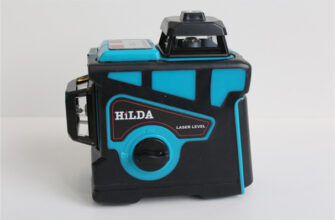
Another cheapest green 3D laser level DEKO DKLL12PB1 with three 360° planes, starting at $ 60. Among the competitors with the same price, you can select the HILDA 3D LS055 GREEN.
Before buying, I strongly recommend getting to know the laser level better, all the necessary information can be found in this review.
For those who are too lazy to study the details, links to the best offers below.
Where to buy a laser level profitably and reliably?
Technical specifications
- Accuracy: ± 1mm/7m
- Range: 20m (*Depending on the degree of illumination)
- Compensator operating range: ± 4°
- Laser emitter: Crystal, 532nm, Class II
- Tilt operation: yes
- Working with the receiver: yes
- Tripod thread: 1.4″
- Battery: Lithium 3000 mAh 3.6 V
- Full charge time: 2.5 hours
- Working hours (all planes): about 6 hours
- Operating temperature: 0°C…+50°C
- Level dimensions: ~ 15 x 7.5 x 12.6 cm
- Dimensions of the case bag: ~ 24 x 19.5 x 19 cm
- Minimum distance from the horizon:
to the floor – 10.7 cm
to the ceiling – 1.7 cm - Minimum distance from vertical to wall: 0.8 cm
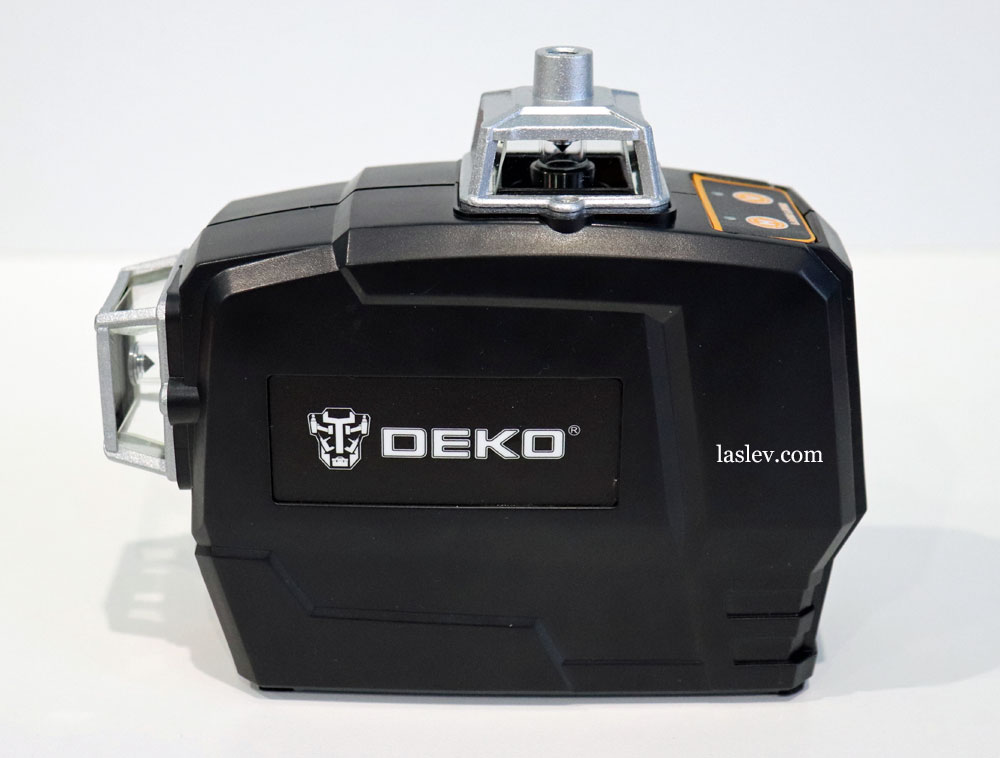
Housing laser level DEKO DKLL12PB1
Build Quality
In general, if we talk about the conjugation of the housing parts, then the DEKO DKLL12PB1 laser level is a little better than the HILDA 3D. But if we talk about the quality of the materials used, then everything is the same: cheap plastic, cheap laser modules, thin towers, and so on.
But knowing the price of the device to make claims about this would be somehow strange. Of course, there will not be such a quality of materials and assembly, for example, as in the same Huepar B03CG or Firecore F94T-XG.
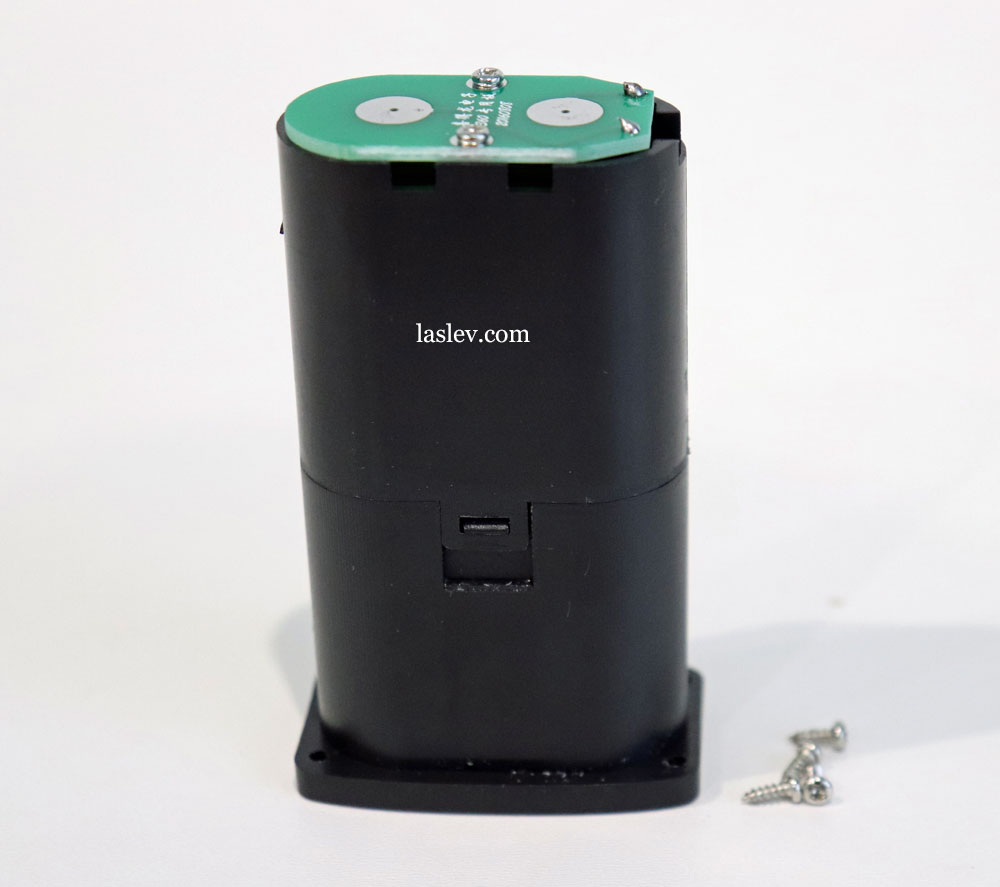
The DEKO DKLL12PB1 laser level cannot operate on simple batteries. Moreover, the battery it has a specific, if I may say so – semi-built. Although it can also be removed by unscrewing the four bolts.

Built-in battery
The battery itself is a kind of case for the two most common batteries of the type 18650. Therefore, to be honest, it is a little unclear why such difficulties. It would be cheaper and more convenient to immediately make a battery compartment for the same only removable batteries.
Operation from the electrical network
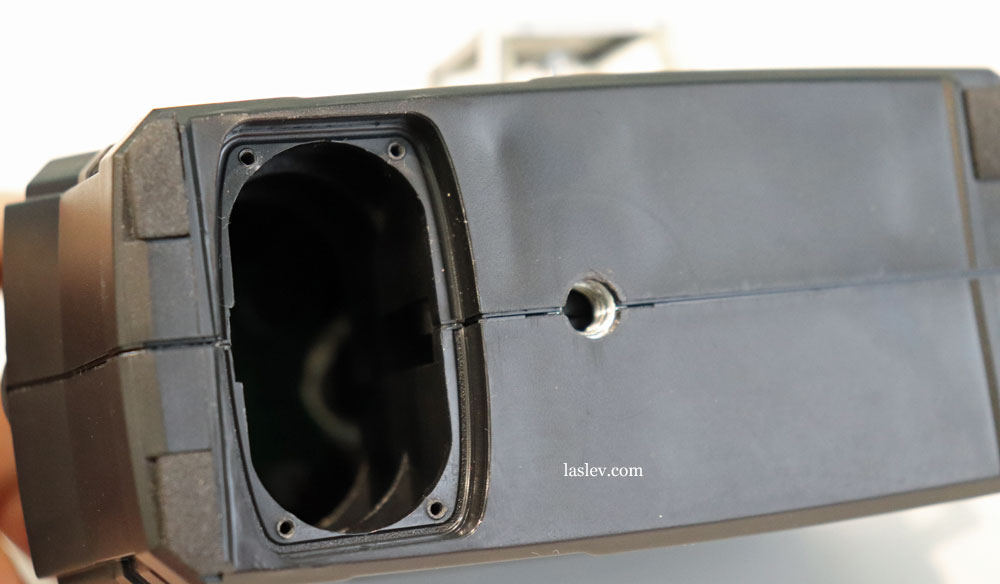
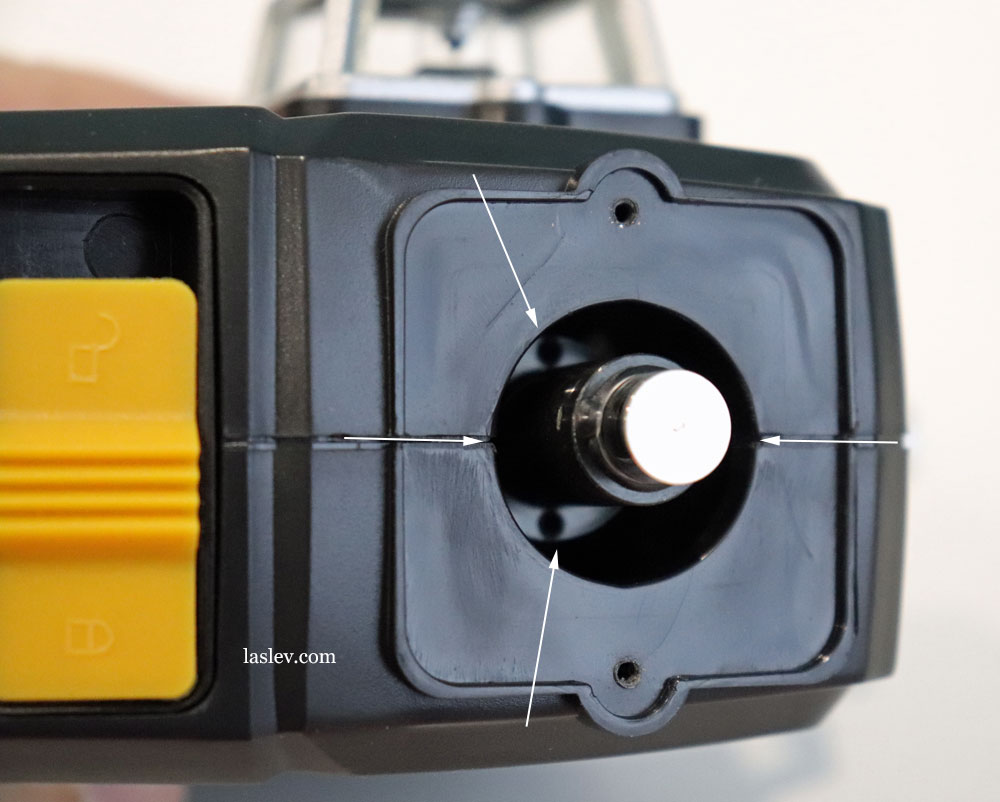
At the back of the housing there is a DC 5V connector for charging the battery and simultaneously working from the mains. You can connect the laser level to the network both with the inserted battery and with the removed one, the device will work in both cases.
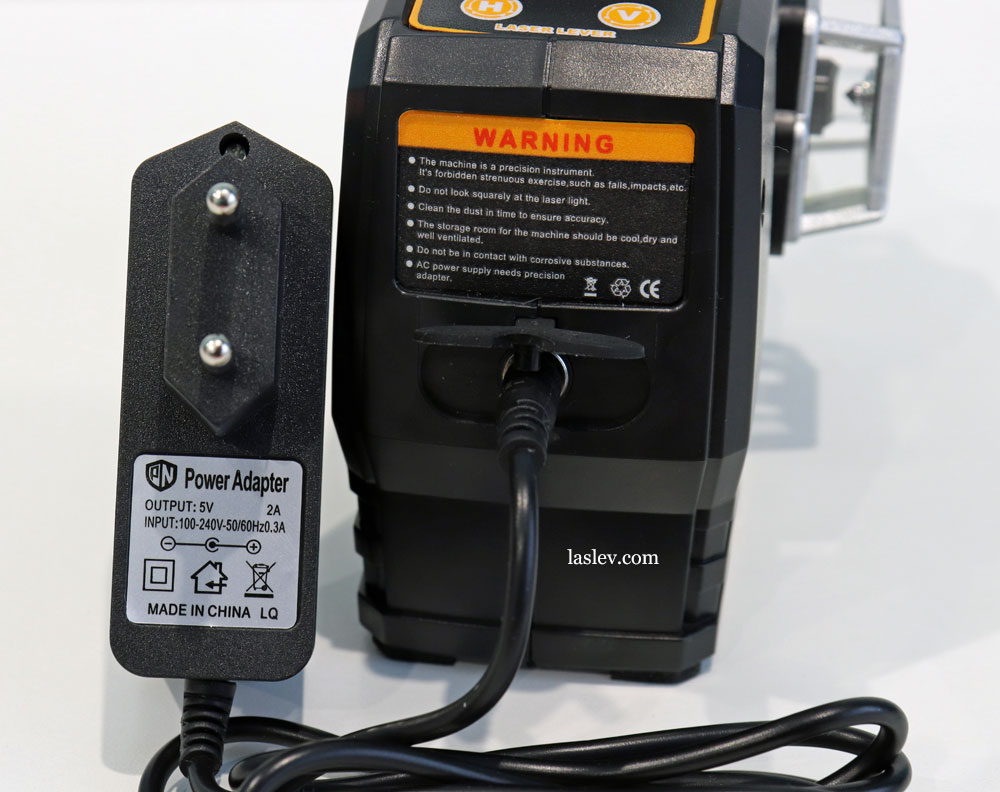
The only thing is that in the absence of a battery, an open “hole” is formed in the bowels of the housing, since the bottom of the battery is also the cover of the compartment.
Therefore, with the battery removed, it is definitely necessary to avoid working in dusty rooms. Otherwise, everything inside will be covered with dust, including the glass towers and laser modules.
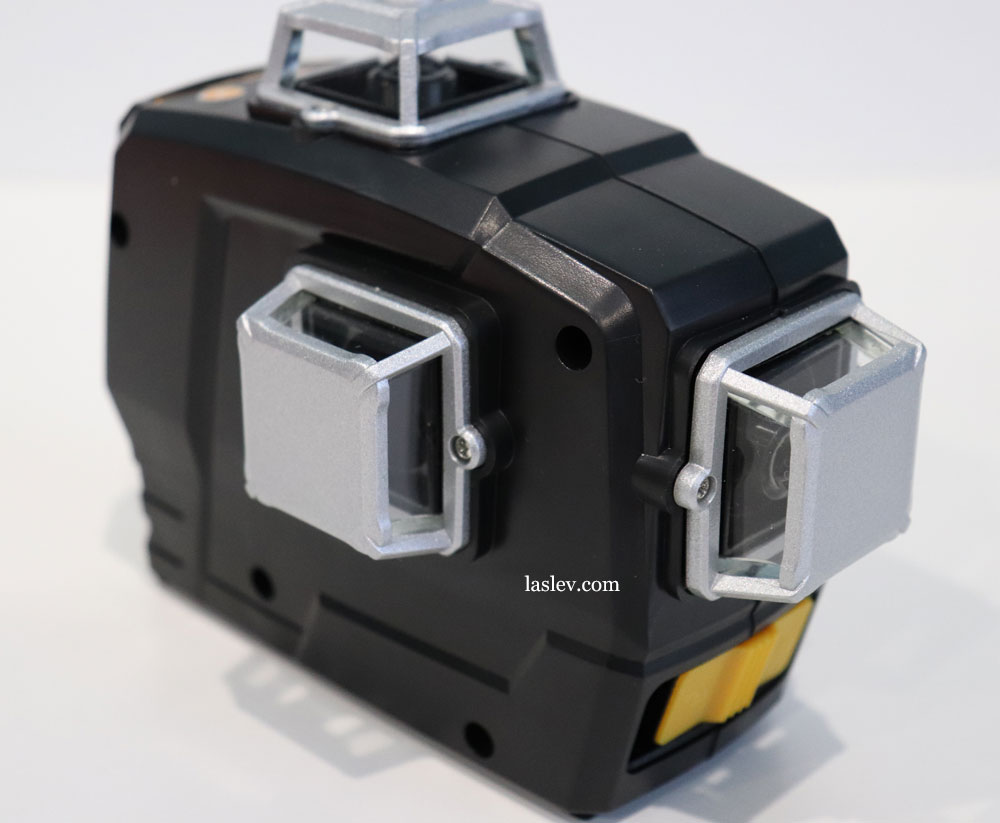
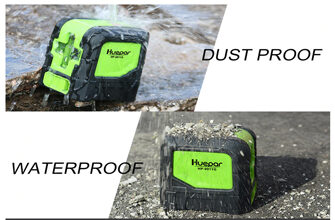
Protective towers and laser modules
Initially, the dust and moisture protection of the DEKO DKLL12PB1 laser level is quite good, even the mounting of the towers occurs through rubber gaskets. But the assembly still does not reach IP54 protection.
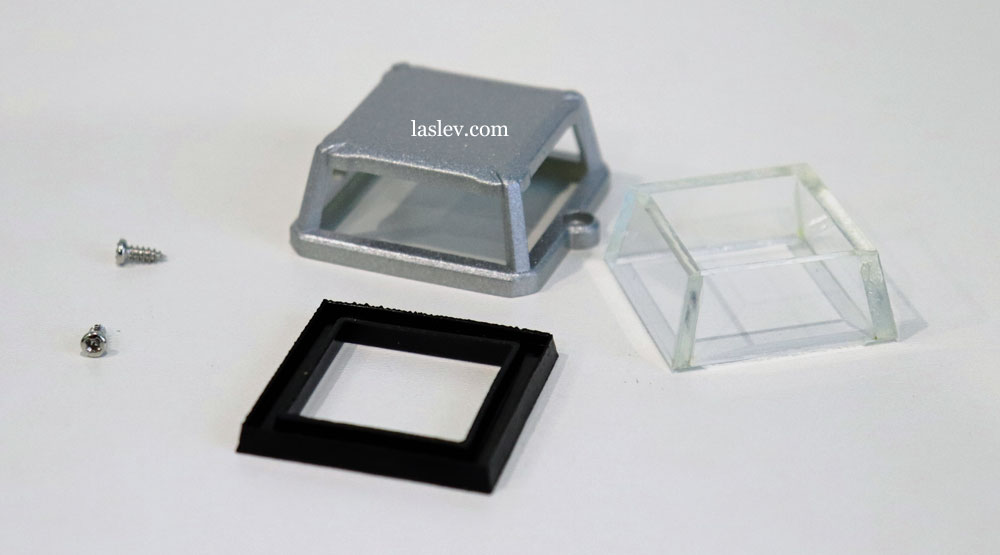
The side towers are made of thin plastic and do not inspire much confidence, but the upper tower with an additional 1/4″ thread is made of metal.
If we talk about the installed laser modules, then here we use cheap crystal laser emitters of local Chinese production, also very mediocre made.
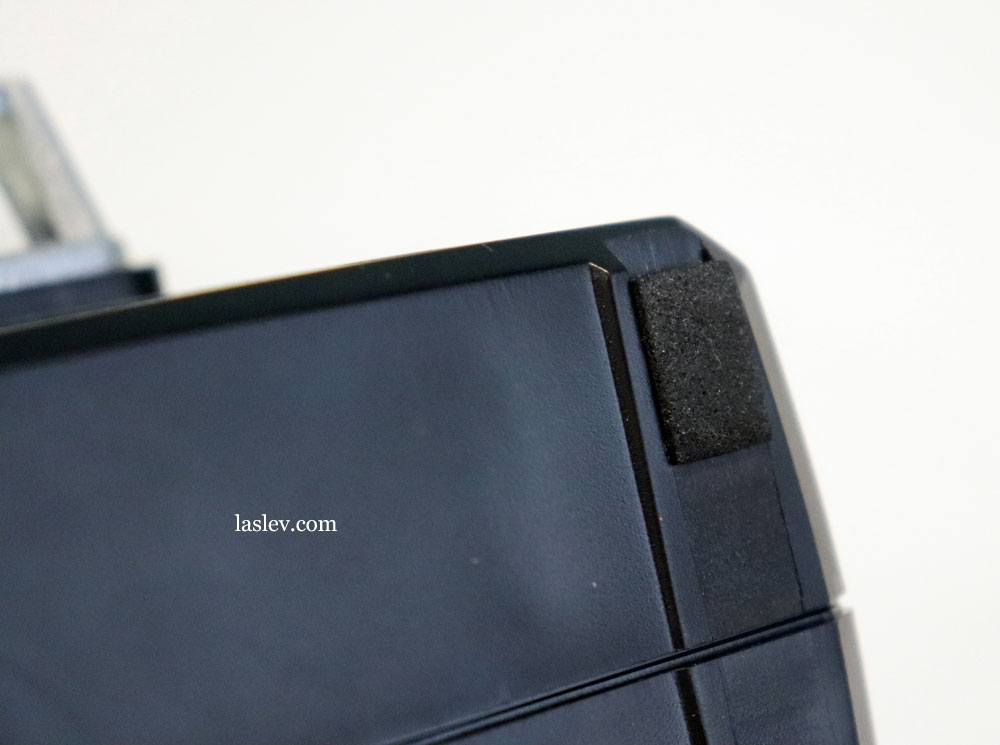
Four small pads are glued to the base of the DEKO DKLL12PB1 laser level housing. Everything would be fine, but they are only made of soft foam material. With daily use, these pads are erased after a couple of months.
It seems to be a trifle, but all this indicates a pronounced domestic purpose of the DEKO laser level and infrequent use.
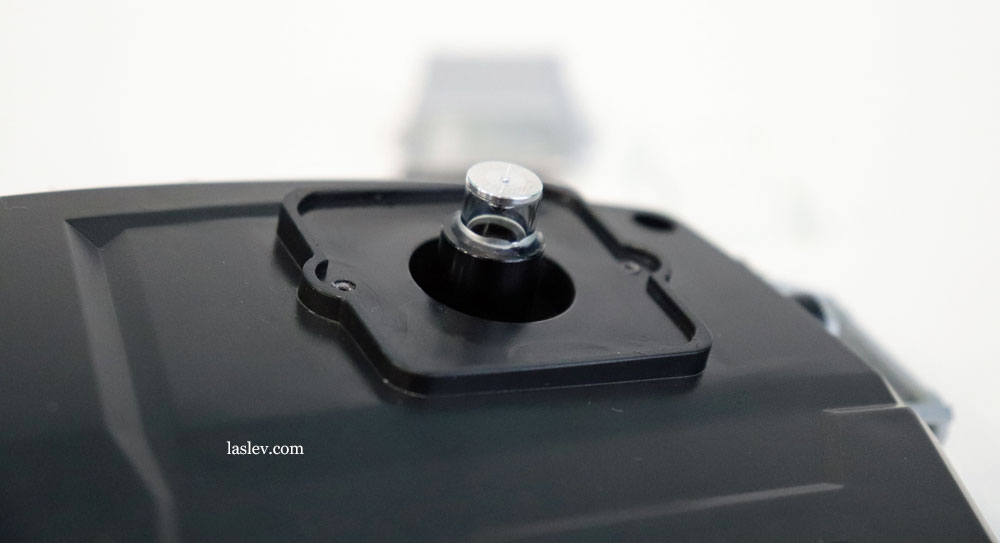
Also at the base is a 1/4-inch metal thread for attaching the device to various accessories, including those that come with the kit (we will consider them below).
Disassembly and calibration of the DEKO DKLL12PB1 laser level
The DEKO DKLL12PB1 3D laser level is suitable for calibration, and it must be said that it is very simple, but only if it concerns the adjustment of each laser tube separately.
There is no need to disassemble the entire housing, it is enough to remove the protective tower, the module that needs to be corrected.
The position of the laser module is adjusted by four small hexagons, which simultaneously attach the base of the laser tube to the pendulum.
But if you need to correct the position of the pendulum, for example, when all the planes are coaxially displaced (the planes are filled up in one direction at the same distance), then you already need to completely disassemble the housing, and it is not very convenient to disassemble it.
It is decomposed into two halves, and the device will be unworkable. Therefore, you will have to assemble and disassemble the housing every time you unscrew the transverse or longitudinal adjustment bolt in the body of the pendulum – this greatly increases the time spent on calibration.
Compensator
In the DEKO DKLL12PB1 laser level, a conventional pendulum-type compensator is installed, operating on the principle of a simple plumb line. The same auto-leveling systems are installed on all other self-leveling laser levels.
With the exception of laser levels with electronic compensators on servos with stepper motors, for example, as in the Firecore FIR-GL8-EA or Huepar DT03CG.
The tilt that the pendulum can compensate for is 4° in all directions, this is called the range of operation of the compensator.
If this inclination is higher, the system will automatically start signaling that it is impossible to cope with such a large inclination.
Therefore, as soon as you hear the sound and see the flashing lines, just put the device on a flatter surface and the alarm will immediately turn off.
The time for setting the compensator to the working position is 4 seconds. Quite a good average result.
Control laser level DEKO DKLL12PB1
In the front part of the device there is a two-position toggle switch. It is responsible for turning on the laser, and for blocking the compensator during transportation.
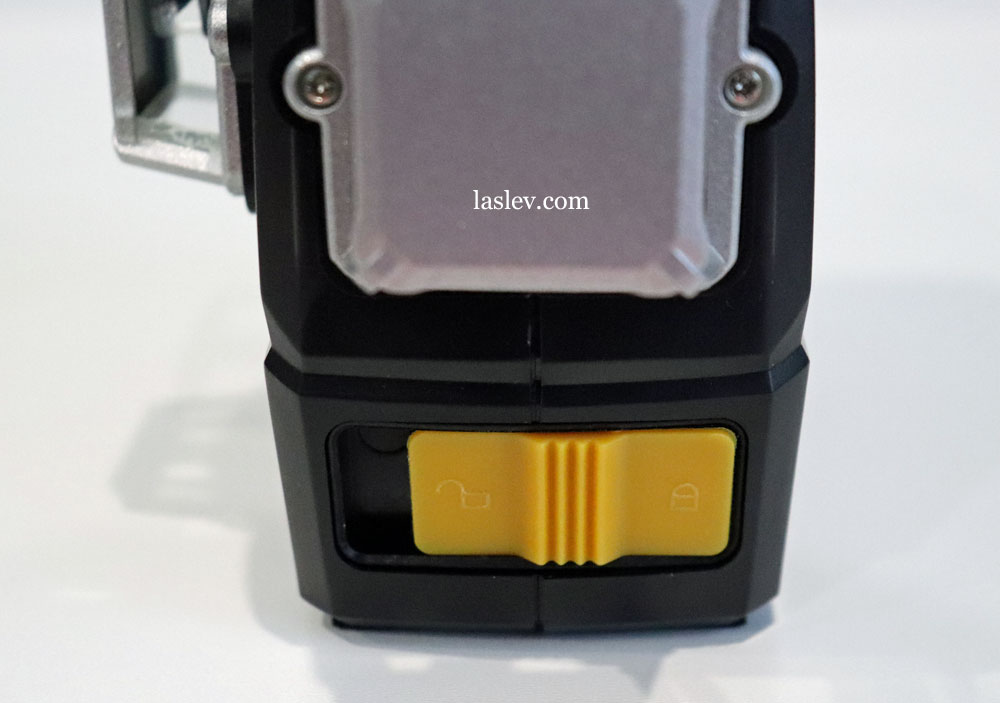
When the toggle switch is moved to the “open lock” position, a certain diagnosis of all planes occurs. They all turn on in turn, but only one horizontal plane remains lit.
Next, all control is carried out by two touch buttons with light diodes above them. The panel sticker, by the way, does not completely fit into the allotted space, but oh well…

The “H” button is responsible for turning the horizontal plane on and off.
Another purpose of this button is to activate the tilt markup mode. You need to put your finger on the button for 3-4 seconds, after which a beep will sound and the green diode on top will start flashing.
Now you can mark up under any arbitrary angle, the alarm will not be triggered if the inclination is more than 4 degrees.
But it must be remembered that the compensator is not blocked at this moment, so you should avoid sudden movements. To exit this mode, press your finger again for 3-4 seconds before the beep sounds.
The “V” button controls the verticals:
- press – one front vertical is activated;
- click – only the side vertical is lit;
- press – both vertical planes are lit;
- click – disables both verticals.
Say nothing, but the algorithm for switching planes at the DEKO DKLL12PB1 laser level is really convenient. You can select any desired combination of planes.
Functional features
The most important advantage of this model is of course the price. More precisely, for this low cost, you get almost all the functionality of the 3D laser level, with the exception of the receiver mode.
Yes, this level is not suitable for working on the street, or at least you will have to use life hacks for working with a laser level in the outdoors in daylight.
The quality of the assembly and the materials used are not taken into account here. Everyone decides this for himself, based on his own considerations and capabilities.
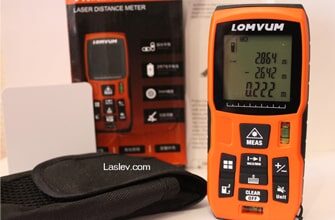
Checking for accuracy
If we were talking about calibration, it would be nice to check it for accuracy. More precisely, to see what you can expect for this money, what accuracy. At least the claimed error is ± 1mm/7m, and this is a fairly high accuracy.
By the way, who does not remember all the subtleties, see “how to check the laser level for accuracy“. Also, be sure to read “how to correctly calculate the error” for such devices.
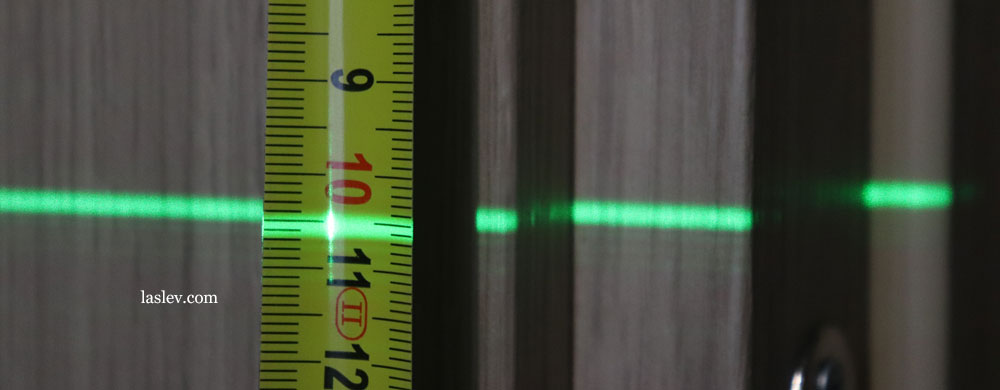
And so, in the photo, you can see the discrepancy of all four points at 7 meters, marked when turning the laser level. As you can see, the discrepancy between the extreme points is more than 2 mm. (The maximum allowable discrepancy is 7 meters. See how the error is calculated correctly.)
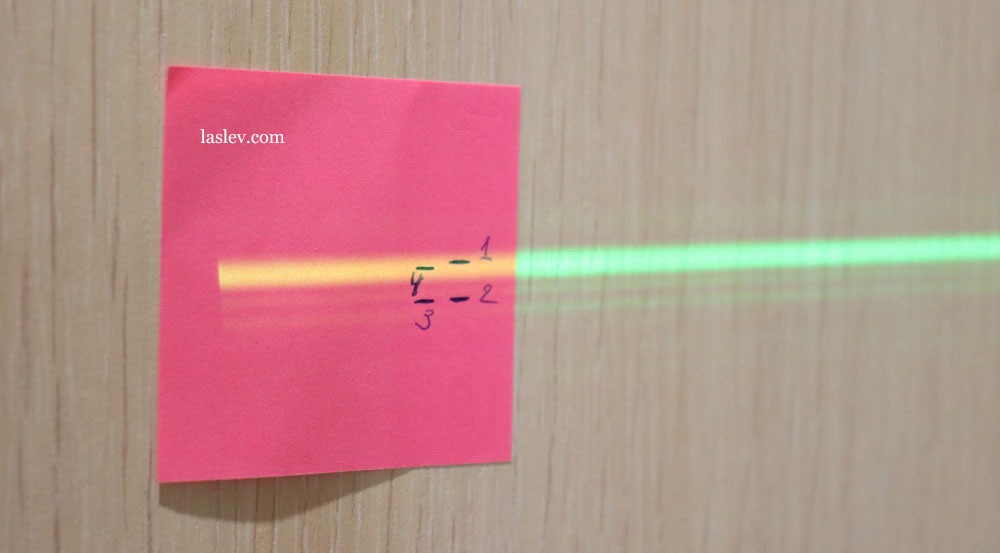
Based on these indicators, we conclude that the laser level requires adjustment. But this is if we take into account the declared accuracy, which I think is too high for such a cheap segment.
With the actual accuracy, this instance is well within the value error ± 0.4 mm/m – this is just the accuracy of most household laser levels.
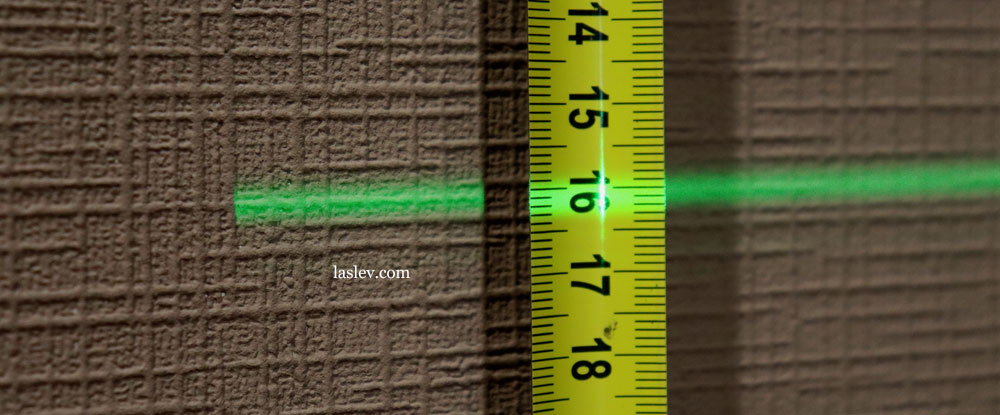
Laser line thickness at different distances
In general, in this test, DEKO 3D showed its best side, despite the cheap laser modules.
At a distance of a meter, the line thickness was only 1 millimeter!
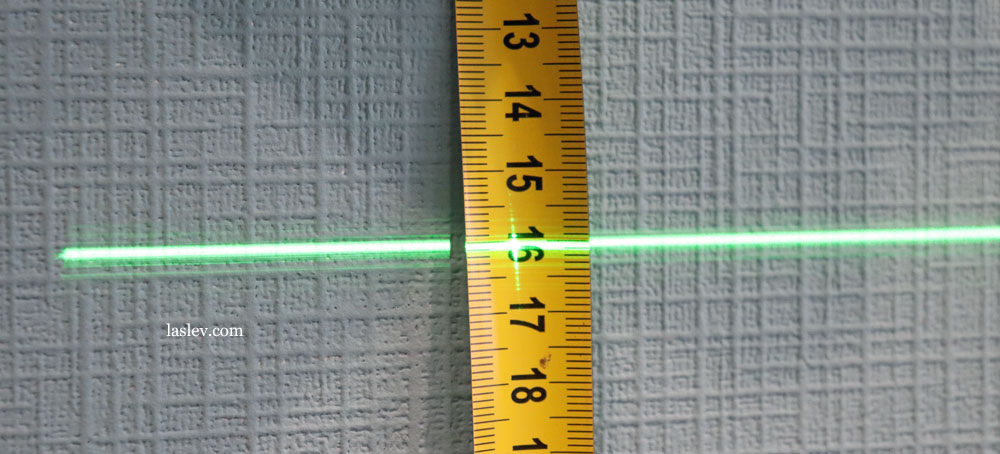
At 5 meters from the wall, the thickness was about 2 millimeters, which is also not bad.
And at a far distance of 10 meters, the thickness of the laser line is about 3 millimeters.
Comparison table with a competitor at the same price
| Technical data | DEKO DKLL12PB1 | HILDA 3D LS055G |
| Accuracy, mm / m | ± 1mm / 7m | ± 2mm / 10m |
| Compensator range, ° | ± 4º | ± 4º |
| Range without / with receiver | 20m* / – | 30m* / – |
| Dust and moisture protection | – | – |
| Tilt function | Yes | Yes |
| Working with the detector | No | No |
| Working from an outlet | Yes | Yes |
| Batteries | accumulator | accumulator |
| Working temperature | 0°С to + 40°С | -10°C to +40°C |
* – a conditional indicator that directly depends on the degree of illumination both indoors and outdoors.
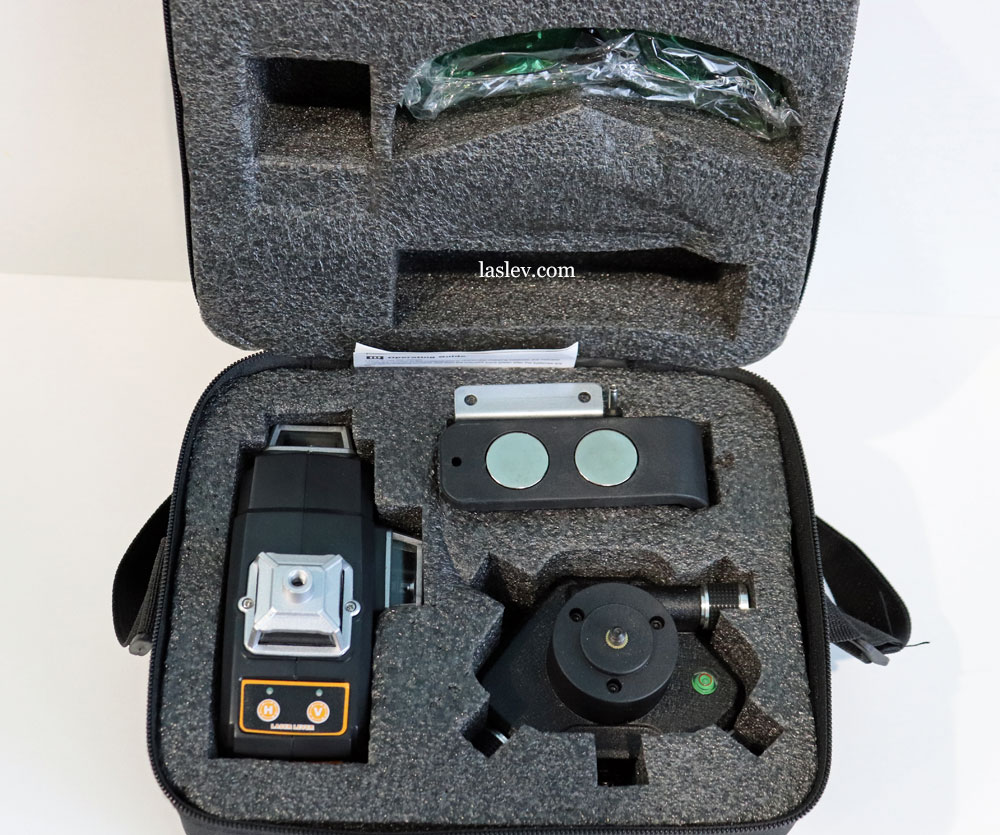
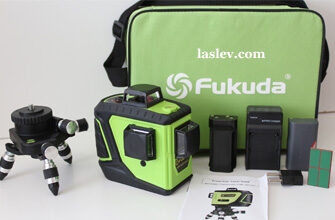
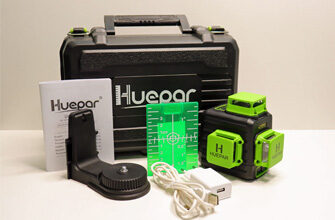
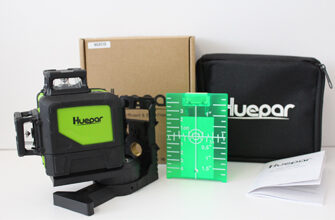
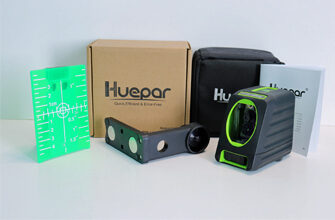
Contents of delivery
The kit is quite good, especially pleasing for the price of a powerful magnetic mount with two huge neodymium magnets.
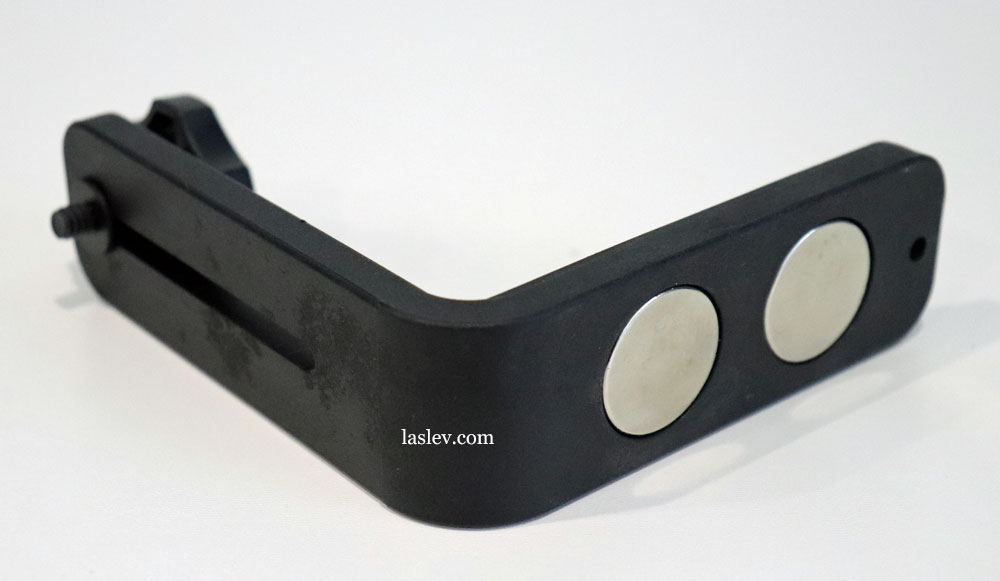
The magnets are arranged vertically in a single line, which makes it convenient when installed on various pipes, including thin ones.
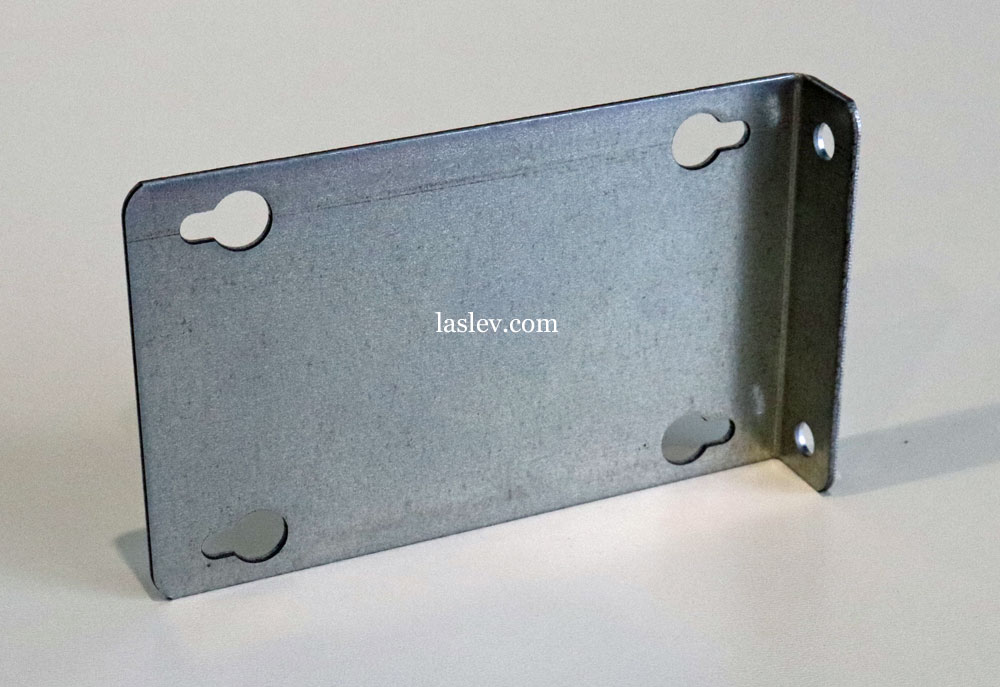
A plus to the magnetic mount is a metal plate that can be attached to self-tapping screws, if, for example, there is no magnetic surface where you can magnetize the mount.
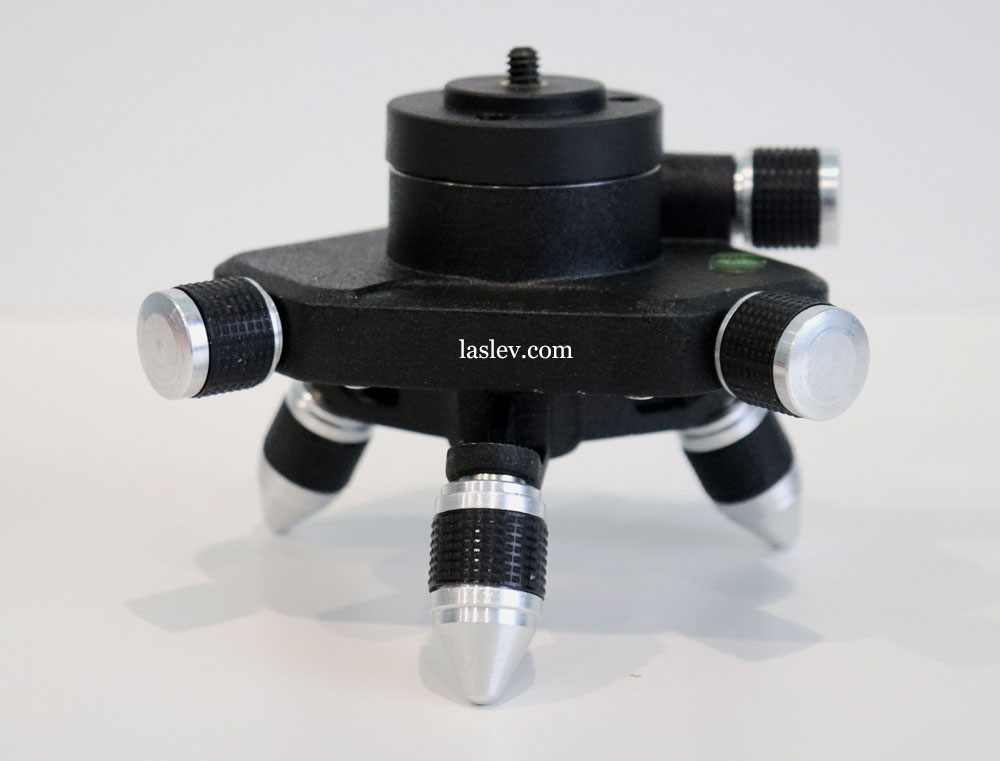
In addition, the kit includes a rotary base with three micrometer screws. It looks very decent quality, but not so smooth. The center screw on the base with a 1/4″ thread has a slight roll.
This is certainly not critical, but still unpleasant.
In the bag, the rest of the little things are neatly arranged in their places: a charger, cheap green laser glasses and a brief instruction in English.
Pros and cons
Very low price, three planes of 360°, plumb line at the crosshair of verticals, green thin lines, network operation, excellent algorithm for switching planes, it is possible to work at an angle.
Mediocre quality of materials, does not meet the declared accuracy, the central screw on the rotary base is crooked, does not work on batteries, in the mode of operation under the tilt the compensator is not blocked, there is no mode of operation with the receiver.
It would be nice if you could make a video on how to calibrate it.
I have the same model and thankfully I noticed it wasn’t calibrated before making expensive decisions on concrete quantities.