- Checking the tilt of the entire plane relative to the horizon
- Checking the straightness of the horizontal laser level beam
- Checking the accuracy of the vertical plane at the laser level
- Checking the 90 degree angle between vertical planes
- First check method
- Second check method
- Video of some methods for checking the laser level
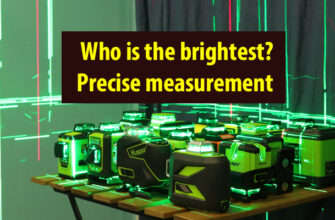
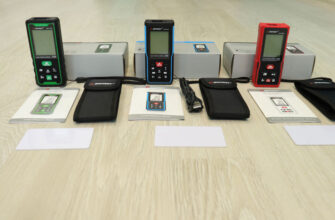
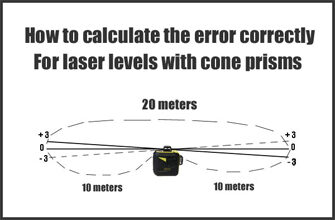
This article will focus on checking the accuracy of laser levels with cylindrical prisms. For example, like the Huepar BOX-1G model. In fact, there are a lot of them. Other laser levels with cone-shaped prisms are checked in a another method.
Checking the tilt of the entire plane relative to the horizon
Install the laser level exactly in the middle between two walls that are approximately 5 meters apart. Turn on the laser level and mark the point indicated by the laser cross on the wall.
Turn the device 180 degrees and mark a point on the opposite wall. Put the point at the intersection of the vertical and horizontal planes.
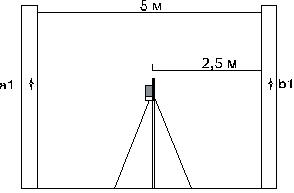
Then we move the laser level to one of the walls and set it at a distance of 0.6-0.7 meters from the wall, and make the same marks on the walls by analogy, as described above.
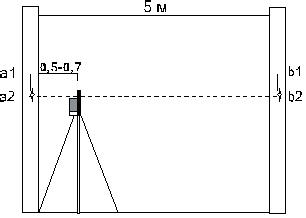
Measure the distance between points a1 and a2. Also between points b1 and b2. Subtract the resulting distance from the other (a1 and a2) – (b1 and b2).
The obtained value is compared with the declared accuracy. If the received value does not exceed the declared accuracy specified in the instructions. This means that your laser level shows the horizontal plane correctly.
Example: when checking, the distance between points was: (a1 and a2) = 4 mm, and (b1 and b2) = 6 mm.
Thus, the error is: (b1 and b2) – (a1 and a2) = 6 – 4 = 2 mm.
We compare the resulting error with the one specified in the characteristics. This error corresponds to an accuracy of ± 2 mm per 10 meters or ± 0.2 mm per meter.
If the accuracy does not match, then you need to contact the service center or make the adjustment yourself.
This applies to laser levels that do not have a 360-degree horizon.
Check the horizontal plane of levels with conical prisms, such as Huepar 603CG. Or levels with cylindrical prisms, but also having a 360-degree horizon, such as the Firecore FIR-GL8-EA, the easiest way is to run all sides of the horizontal plane through a point at a distance of 5-10 meters.
Here you should also remember how to correctly calculate the error.
Checking the straightness of the horizontal laser level beam
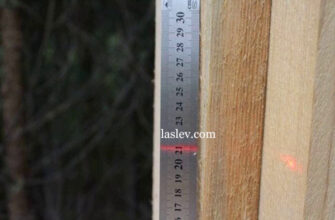
Install the device at a distance of approximately 5 meters from the wall and mark the point at the intersection of the vertical and horizontal beam.
Without changing the location of the laser level, turn it 2.5 meters to the right. (that is, we move the vertical line from the marked point by about 2.5 meters to the side). And look at the left tail of the horizontal beam. If the beam is located relative to the point within the error range, then the setting is correct.
Then turn the device to the left by 2.5 meters, and check the right tail.
Attention: do not move the axis of rotation when checking accuracy.
Checking the accuracy of the vertical plane at the laser level
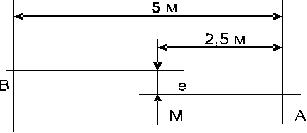
We install the device about 5 meters from the wall and attach a plumb line about 2.5 meters long on the wall.
Turn on the laser level and reduce the line with a rope plumb line.
If the deviation of the vertical line (top or bottom) does not exceed half of the declared value, for example, + /- 3 mm by 10 m, then the accuracy of the line is within acceptable limits.
If the accuracy of the laser level is checked for an error greater than the one indicated in the specifications, contact the service center. Or make the configuration yourself.
Checking the 90 degree angle between vertical planes
Depending on the design of the laser level, the control of this parameter can be divided into two methods.
First check method
If your laser level is made in the shape of a barrel and has a rotary trigger base, for example, the Firecore FIR411G, then it is very easy to check the angle for compliance with the declared value between the verticals.
To do this, install the device in the middle of the room, preferably at a distance from the walls of at least 2 meters. And make marks on vertical lines on the walls.
After that, we turn the” head ” of the level clockwise by 90 degrees and combine the verticals with the points made earlier. So we check all four verticals.
As a result, if all verticals were aligned with points with a margin of error when turning, then the angle between them is 90 degrees.
If, when rotating around its axis, one line passes through a point, and the second has a strong deviation, then the angle of 90 degrees is not exactly verified.
Attention! Do not move the device during the test!
Second check method
Laser levels with cone prisms of the FUKUDA MW-94D-4GX type have a displaced Central axis, so the first method of checking is not suitable here. Since when you turn the lines will definitely run away from the points.
To check this indicator, install the device on the floor and make two marks on the verticals running along the floor. The first point is closer to the body, the second at a distance of about 2 meters.
Or make a single point at the intersection of two verticals on the floor and mark two points on the walls. On vertical lines running at an angle of 90 degrees relative to each other.
Next, turn the body of the level 90 degrees and combine the lines with the marks on the floor. Or set the crosshair to a single point and combine the verticals with two points on the walls.