- Where to buy a laser level profitably and reliably?
- Technical characteristics
- The build quality of the housing
- Protective towers
- Battery compartment
- Laser modules
- LCD screen with backlight
- Compensator
- Laser level control methods
- Toggle switch and control panel on the device
- Remote control
- Controlling with an app on your phone
- Huepar S04CG laser level functionality
- Checking for accuracy
- How to do calibrate at the laser level Huepar S04CG
- Calibration of tilt sensors
- The thickness of the laser line at different distances
- Contents of delivery
- Pros and cons
- Video review of Huepar S04CG
- HUEPAR S04CG or FUKUDA MW-94D-4GX?
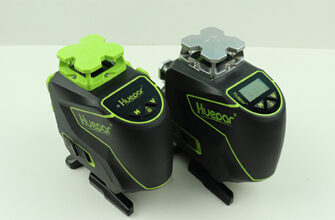
New, unique in its kind 4D laser level Huepar S04CG with optical scheme 2H/2V/plummet.
Today, you will not be surprised by two horizontal planes of 360 degrees. Such models already exist, the same Huepar 904DG or, for example, Fukuda MW-94D-4GX. But only the Huepar S04CG laser level has a screen that displays the angle of inclination of the housing. Yes, by the way, electronic inclinometers can be independently calibrated.
There are some other advantages, for example, the presence of Bluetooth, but about everything in order. Looking ahead, I can only say that the device is definitely worthy.
Where to buy a laser level profitably and reliably?

Ranked first among the best 4D laser levels in 2021.
Technical characteristics
- Projection Accuracy: ± 2mm / 10m (± 1/13 in at 33 ft)
- Working distance (100LUX): ≥ 20m / 66ft
- Range with receiver: ≥ 80m / 260ft in diameter
- Leveling range: 3.5 ° ± 1 °
- Compensator installation time: ≤ 3 seconds
- Laser class: II, (IEC / EN60825-1 / 2014), <1mW
- Wave length: 505-520 nm
- Power sources: Li-ion battery 7.4V 2600 mAh / batteries 4ААх1,5V / from the mains
- Working time (all planes): battery ~ 5h / AA batteries ~ 0.5h
- Charging time: ~ 4.5h
- Charging port: Type-C / adapter 5V = 2A
- Dust and moisture protection: IP54
- TILT function: yes
- Bluetooth: yes
- Tripod thread: 1/4 “
- Working temperature: -10°C ~ + 50°C
- Storage temperature: -20°C ~ + 70°C
- Dimensions of the device with towers: l/w/h – 14.7 x 8.9 x 14.1 cm
- Set weight in case: 2.9 kg
- Laser level weight: 720 grams
- Minimum distance from the upper horizon:
to the floor – 13 cm
to the ceiling – 1.1 cm - Minimum distance from the lower horizon:
to the floor – 1.5 cm
to the ceiling – 12.6 cm - Distance between horizons: 11.6 cm
- Minimum distance from vertical to wall: 1.1 cm
The build quality of the housing
The case is made of high-quality composite plastic, which is almost completely covered with a two-millimeter layer of rubber. The rubber is very dense, so it looks more like soft touch plastic.
The ergonomics of the housing is made in such a way that it is comfortable to hold in your hand. Despite the fact that the housing has a difficult form, it is made very high quality. The pairing of the two main parts is almost imperceptible.

On the side, under the rubber cover, there is a USB Type-C connector for charging the battery installed in the device. But you can also just work from the mains without the battery installed through the same connector.
This is undoubtedly a plus.

Thus, the maximum variability of power sources is realized in the Huepar S04CG laser level. From a lithium-ion battery, from AA batteries, and from the mains. You can also add a power bank here.

By the way, I do not know how it is now, but the lightweight version of this level, the model with the prefix Huepar S04CG-L battery in the kit is different. It can be charged separately. And if you want a 12V battery, I recommend considering the new Huepar P03CG laser level model.
Protective towers
All the protective towers except the lower big “paw” are made of metal. They are attached to four bolts. But the most important thing is that all the towers are attached through rubber gaskets. Moreover, the glass is inserted into a special groove in the rubber gasket, which is on top, which is on the bottom.
Therefore, the penetration of dust and moisture into the interior of the housing through the towers tends to zero.

As for the large lower protective tower in the form of a “paw”, it is made of plastic. And this is not the best solution. In general, not bad, but it feels like you can easily break it if you fall. I could be wrong.
At the bottom of the “paw” there are four rubber supports. Therefore, the Huepar S04CG laser level stands confidently on slippery surfaces such as tiles or laminate.

There is also a 1/4-inch thread for mounting on tripods or other optional accessories included in the kit.
Battery compartment
The battery cover is not removable, this should be attributed to the advantages. It opens by clicking on a black improvised button. Quite an interesting solution.
Yes, by the way, on the battery cover there are abbreviations of all passed certifications, and as you can see there are a lot of them.
But it should be noted that despite the fact that the inside of the lid is covered with a layer of rubber, it does not close very tightly.

Laser modules
It should also be noted that high-quality laser modules are installed in the laser level, which project bright and thin laser lines. This is a big plus.

LCD screen with backlight
This is the most important difference between the Huepar S04CG laser level and other similar devices. In general, laser levels with screens exist, but as a rule, they show only the remaining charge, and information about the enabled mode.
In Huepar S04CG, in addition to all the above information, the angle of inclination of the housing along the “X” axis and the “Y”axis is shown. These are completely different possibilities for solving highly specialized markup tasks.

Compensator
The device has a classic tilt compensation system within 3.5°.
In this interval, the pendulum will be set strictly vertically. If the angle is exceeded, a visual and audible alarm will automatically start. In other words, the laser lines will flash once every half a second with a simultaneous audible alert.
This is done so that the user understands that the markup is currently being performed incorrectly.
In the mode of operation with a locked compensator for marking at any arbitrary angle, the lines also flash. But once every 5 seconds and without sound. This is also a kind of informational notification that a special mode is selected.
Installation of the compensator after switching on or pushing the device occurs within 5 seconds. This is a little more than declared.
Laser level control methods
The Huepar S04CG laser level has several control options, let’s look at all three ways.
Toggle switch and control panel on the device
On the side is a two-position toggle switch that locks the compensator for transport, and also turns the laser level on and off.

By the way, the pendulum is not locked quite tightly, so when shaking, you can hear a characteristic sound. This backlash is allowed, and is not considered critical.
When you turn on the toggle switch, all four planes immediately light up.
Further control is performed by the buttons on the top.

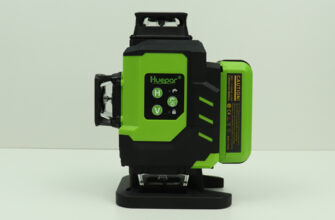
Here everything is simple. The “H” button is responsible for switching the horizontals separately, and the “V” button is responsible for switching the verticals. In this way, you can choose any combination of planes. This is very convenient.
The button in the middle is responsible for turning on the receiver mode and activating the TILT function. (hold the button for 3 seconds while the compensator is locked)
Remote control
The Huepar S04CG laser level comes with a Bluetooth remote control.

To activate the remote control, turn on the laser level and hold down the white power button on the remote control for 5 seconds. The white button should change to green. If this button is red, the remote requires charging.
Buttons “F1” and “F2” are inactive here. According to the manufacturer, they are intended for other new models. What functions will be tied to them is still unknown.
Buttons “H” and “V” completely duplicate the buttons of the same name on the device.
The upper button is the brightness control, but, in fact, it just duplicates the lower button “P” – the mode of operation with the receiver. Thus, both of these buttons switch the Huepar S04CG laser level to a pulsing mode for working with the receiver, at which, as you know, the lines start to burn a little dimmer.
The Bluetooth remote control (model QBR07B) is equipped with a built-in 3.7 V/200mAh Li-ion battery and it is also charged via a USB Type-C connector, which is located on the side.

When the device and the remote control are turned on, a short press on the white power button on the remote control will simultaneously turn off or turn on all planes.
Controlling with an app on your phone
First, you need to download and install a special app called “Huepar” in the Play Market on Android or the App Store on iOS.
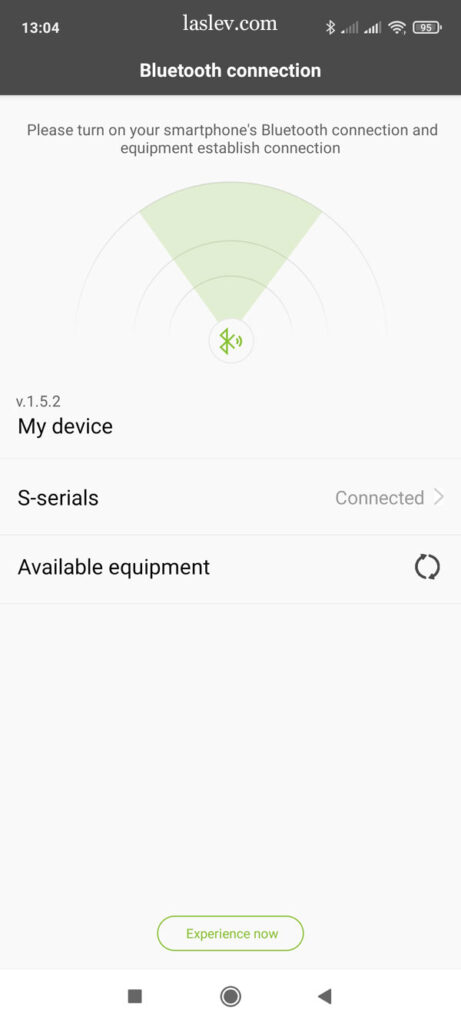
Then open the app and turn on the device. If everything is fine, then you get to the first screen, where you need to click the line “S-serials” (photo below)
Then the application menu will open. There is nothing special here. “Information” and “new products” there are simply listed models, so we will not focus on these buttons. “Settings” – in this menu you can change only the language. We are only interested in the button “S series”
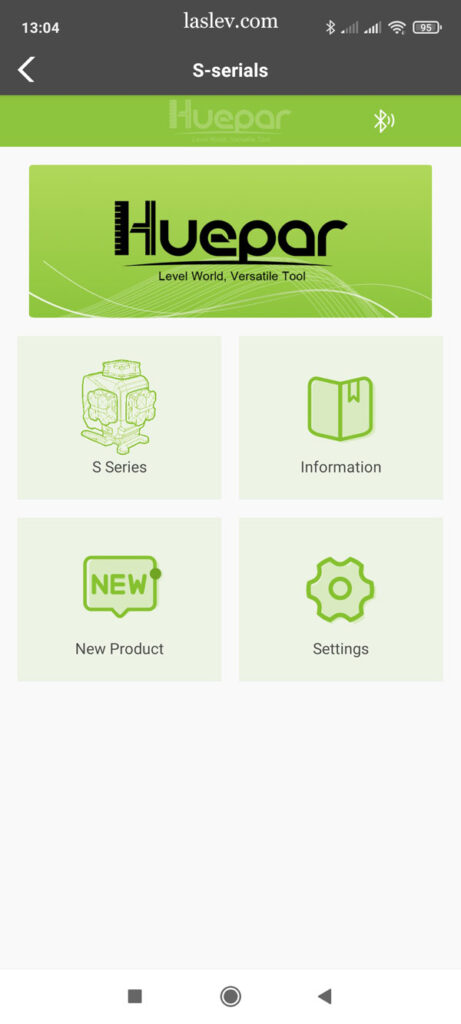
Click it and get to the main control panel of the laser level Huepar S04CG
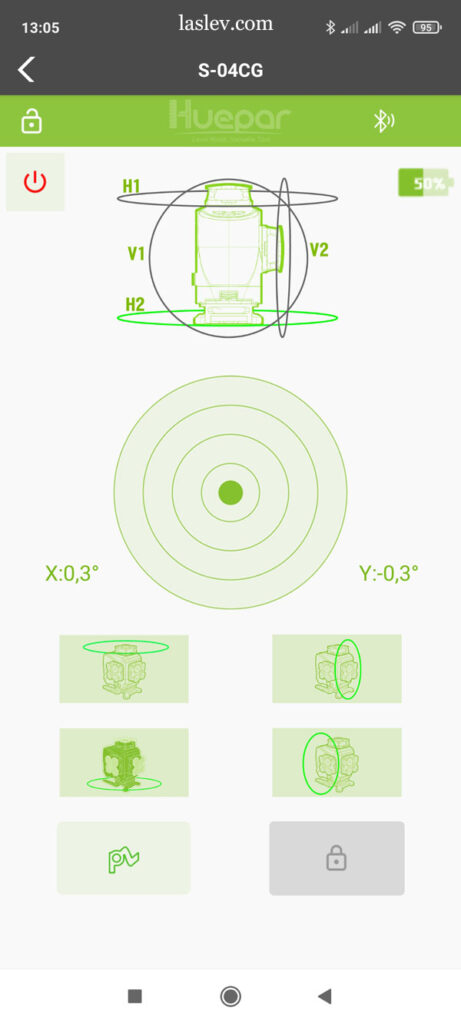
In fact, this is a complete duplication of the display on the device. Here you can select the necessary combination of planes, see which planes are activated, and see the angle of inclination along the “X” and “Y” axes.
You can also activate the receiver mode.
The mode of operation with a locked compensator (TILT) can not be turned on either from the remote control or from the phone.
Another such moment. In the upper left corner there is a power button, if you shortly press it, you can immediately turn on or off all the planes.
Huepar S04CG laser level functionality
Today, this is probably the most functional laser level that has no analogues. It’s only a matter of time, but it’s still a top model.
Two horizontal planes of 360 degrees allow you to work as comfortably as possible, both with ceilings and with floors to choose from. It is also possible to project the verticals as close as possible to the walls.
Marking on the street in sunny weather is also not a problem! A special mode of operation in conjunction with the receiver allows you to work on the street at a distance of 80 meters in diameter.
The TILT function will help you cope with non-standard design tasks where you need to mark up inclined lines.
The LCD display, TILT function and built-in inclinometers will help you set a certain slope of any construction.
Also in this mode, the device will automatically turn off after 5 minutes of inactivity. And every 30 seconds, an audible alert will be heard in the form of a short signal.
In general, the laser level Huepar S04CG = maximum functionality!
Checking for accuracy
The declared accuracy of this model is ± 2mm/10m (±1/13 in at 33 ft). Therefore, the maximum allowable run-up between points at the horizons at a distance of 10 meters should not exceed 4 millimeters. You can see how the error is correctly calculated here.
The photo shows that the upper and lower horizon, when checked by sectors at 10 meters, absolutely exactly fit into the declared corridor.

All vertical planes were checked by a thread plumb line. No deviations were detected.
But do not forget that any laser level may need to adjust the accuracy over time. How this is done will be discussed below.
How to do calibrate at the laser level Huepar S04CG
Almost all 4D laser levels with two 360° horizontal planes have the same adjustment algorithm.
- the lower horizon is usually adjusted by the position of the pendulum,
- adjust all the remaining planes individually.
Setting the position of the pendulum is done with two bolts: longitudinal and transverse. The longitudinal adjustment bolt can be reached by removing the protective tower from the front vertical.

To get to the transverse adjustment screw, you will have to unscrew the device housing. It is located above the toggle switch.
The upper part of the housing is not removed freely! Everything is very tight inside. But there is no need for a full disassembly. The upper part opens so much that you can easily adjust the position of the transverse adjustment bolt.

There is nothing difficult here. By moving these bolts in the body of the pendulum, its center of gravity changes, and when it is switched on again, it is set differently. For more information, see the video at the end of the review.
After adjusting the lower plane with these bolts, we check the accuracy of the remaining planes. And if necessary, we adjust them separately. The adjustment is made by four bolts at each laser module.

Calibration of tilt sensors
The Huepar S04CG and S03CG laser level models provide calibration of the built-in inclinometers. Therefore, if your tilt sensors display incorrect values on the screen, do not rush to despair, it is very easy to fix.
The calibration algorithm is as follows:
- install the device on the most flat horizontal surface
- turn on the laser level with the compensator locked
- hold down the “V” button for 5 seconds. The values on the “X” and “Y” axes will be set to zero. That’s it, the sensors are calibrated.
The thickness of the laser line at different distances
This test showed the following results.
At a short distance of 1 meter, the line thickness was just over 1 millimeter.

At 5 meters from the wall – 1mm!

And at a distance of 10 meters, the lines became a little more than 2 mm! Excellent results! The brightness at all distances is perfect!

The lines always look thicker in the photo. The true thickness cannot be captured due to the high brightness.
Contents of delivery
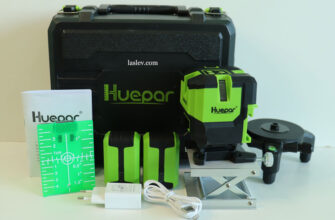
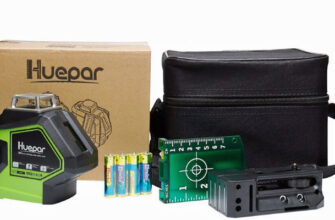
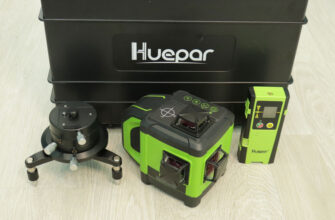
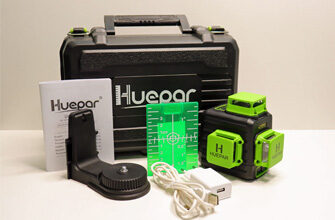
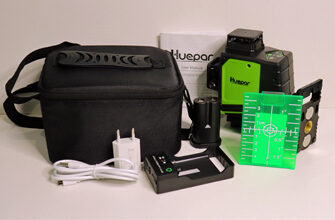
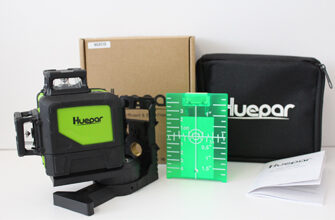
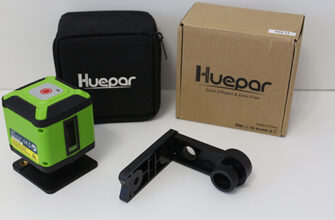
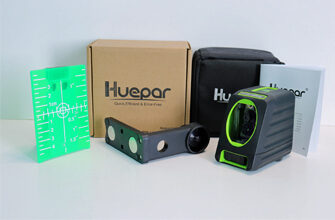
The whole set fits in a small plastic case. The kit includes: 4D Huepar S04CG laser level with Bluetooth, magnetic wall mount, lifting pad, metal plate, remote control, charger, battery, battery box, magnetic target, 4 AA batteries and instructions in different languages.


Pros and cons
Inexpensive for such functionality and delivery set, display of the body tilt angle, high-quality assembly, metal protective towers, good laser modules, bright and thin lines, 4 planes of 360°, full plumb line, switching all planes separately, working mode with the receiver, TILT function, Bluetooth control from the remote control and smartphone, maximum variability of power sources, automatic shutdown, you can independently adjust.
The lower “paw” is made of plastic, you can not turn on the TILT function from the remote control or phone.

Hi, thank you for this review. But, what about brightness adjustment? In every product description of this laser device the visibility adjustment is mentioned. I bought mine for this reason… and it doesn’t work. It’s like you said : same functionality as the pulse button!
Hi! Apparently, this means the mode of operation with the receiver, when turned on, the laser lines begin to burn dimmer. If this brightness (in this mode) is enough, then you can work, this plus will save battery power. If you need it brighter, then you can hardly do it here. I think initially the device turns on with the maximum brightness of the laser lines. Yes, cone prisms are characterized by uneven brightness along the entire perimeter – this is normal. The Huepar DT03CG laser level has a change in the brightness of the laser lines. There will be a detailed review in the coming days.
Hi, I am interested in one question, if you look at the laser for a long time, can a laser level damage your eyes?
Yes of course. Brief glances will not bring harm, but if you look for a long time, you can definitely get a burn of the retina of the eye. Therefore, just do not look at the included laser emitter.
I noticed in the S04CG manual that it calls out an accuracy of +/- 3mm per 10m, instead of +/- 2mm per 10m. I contacted Huepar support about the discrepancy between their site and manual, and they said the manual was correct, though given your review I am curious if it may be the website that is correct.
In your review, you mention about accuracy: “absolutely exactly fit into the declared corridor”. Are you saying that you measured 4mm (or 2mm/10m) as the accuracy of the laser?
Thanks!
Hi! My manual says +/- 2 mm accuracy at 10 m. They may have recently changed the stated accuracy in the manual. But the error in the instructions may not always coincide with the real one, i.e. the device may be adjusted more accurately than stated in the instructions (this is a frequent occurrence), also it happens the opposite for various reasons, including misdelivery. Here you need to see if the error is large, you need to calibrate. My copy is within the stated accuracy of +/- 2 mm at 10 m. At this accuracy, the maximum difference at 10 meters should not exceed 4 mm. That is, in fact, when turning it turns out that we mark 20 meters with an error of 4 mm, which corresponds to the claimed characteristics of +/- 0.2 mm per 1 m. For more information on how to correctly calculate the accuracy of laser levels with tapered prisms, see here: https://laslev.com/useful-articles-about-laser-tools/how-to-calculate-the-error-correctly-of-the-laser-level/
Thanks for reviewing this product from huepar I’ve recently bought the SO3 and didnt find any reviews,only but yours thanks! From ROmania
Witam, czy można prosić o pomoc w sprawie lasera huepar PO3CG?
Jestem zainteresowany zakupem ale nie mogę znaleźć żadnej recenzji na jego temat.
Z góry dziękuję za pomoc
Pozdrawiam
Witam, jeszcze nie ma recenzji, ale na pewno będzie później. Urządzenie powinno być dobre, jak wszystkie inne niwelatory laserowe tego producenta.
Thanks for the comprehensive review. When I used the level the first time, it indicated the tilt was off by 14°, which it wasn’t. There is no information regarding how to recalibrate the tilt sensors outside of your review. This was amazingly helpful and saved me a lot of grief and phone calls.
I’m glad I could help you.
Hi Sergei,
I think you reviews are concise and comprehensive, it has made me very interest in buying the Huepar SO4CG.
Problem I have is calibration, none of the service professionals here in Australia are able to certify the calibration of the Huepar laser, so I am wondering if their is a calibration manual available so could do this myself. There no legal gain it paying for calibration that is not certified.
Appreciating your effort here and thanks for your help. Damon.
Hi Damon. Thanks for the words of encouragement. If I understand you correctly, you are talking about how to get a state-issued certificate of accuracy. The fact is that Huepar lasers are not listed in the Australian National Instruments Register, so no one in Australia can issue you such a certificate. Only Huepar itself can put it on the register if it chooses to do so, but I don’t think they will, because it is a long and rather expensive process, and it will have practically no effect on sales.
If you’re just talking about adjusting (calibrating) the accuracy yourself, that information is in the review.
Thanks for your reply, Sergei.
I don’t think having the calibration certified is problem for doing the actual work by someone like myself (solo, sole trader with no direct employees). It’s only a problem if things don’t work on the job itself. Some routine checking of accuracy/calibration, then a periodic check should be expected.
Having the ability to calibrate the tool yourself is very valuable to a tradesperson.
Ok, my bad, I skim past when you say -see the video for more info on adjustment.
Thanks again, Damon.
Okay, we misunderstood each other a little bit)) it’s okay. Yes, the calibration information is also in this review, check out the content, including how to calibrate the tilt sensors.
Hello,
Which is better? S04CG-LC vs S04CG-C vs 904DG
Thanks!
Hello! You mean S04CG/S04CG-L and 904DG. If so, the most functional is of course the Huepar S04CG without prefixes. I don’t know the ones you mentioned with the additional prefixes “LC” and “C”.
I ordered Huepar S03CG laser level. It came slightly out of calibration. Pendulum center of gravity adjustment is by 2 screws (X and Y plane). The horizontal beam of the X plane I have adjusted perfectly. At 5 meters after rotating the laser by 180 degrees I do not see any deviation. But something strange is happening on Y. The beam seems to be adjusted, then after a while (on the same day) it goes out. Fluctuation is slight (+ – 1mm), within the accuracy of the equipment. However, I would prefer a device that always deviates the same rather than randomly. Could it be some thermal, magnetic fluctuation, or defective diode? But why doesn’t it happen on the X-axis?
Well done! It really isn’t that hard to set up, you can set the accuracy much better than stated, it just takes a little time. I’m a little confused about the diode. You mean the laser diode lights up for a while and then goes out (stops lighting up)?
Hi Sergei. Been looking at some Huepar laser levels. I initially tried out the BOX-1G but found when doing framing I was probably better off with a 360 one, since having to move and reposition the laser takes ages to get the lines just right again. I was also looking at the ones that had remotes/BT, because with DIY it can take days to get through something, so not having to touch the laser at all and mess up the line is another bonus.
I was initially looking at the 603CG as it seems very popular and has a BT model, and can be run off power. I see a fair bit of raving about the S04CG, and it does have a remote instead of having to use a phone which is nice. However, my main concern is the quality of the laser line.
I have read that the 603CG uses a SHARP diode, which apparently aren’t as good as the OSRAM in the S04CG. I’ve read that the line given off by the S04CG is much sharper and has far fewer blurring at the edges compared to the 603CG. As I use the level for packing out a lot of old out of plumb walls, the sharper the better for reading off a tape measure.
Would you say the S04 has a much sharper line than the 603CG? And how does the sharpness of the P03CG compare to both?
Hi! They all have +/- the same lines. If only Huepar S04CG has a little bit thicker line, just a little bit.
Hi Sergei. That seems surprising, I saw a bunch of youtube videos detailing that the S04CG had a sharper (less blurring of the edges) laser line than the 603CG, at least with those who had both to compare.
It can be a little subjective. I saw the opposite.
Thank you for your detailed reviews. They are extremely helpful. I have a S04CG which I bought from an indepedant retailer. The projected lines appear a bit fuzzy or blurred. That is, at 2m and 5m from a wall, the centre and brightest part of the lines are 1.5 – 2mm wide, but there are multiple bands of differing brightness, on either side of the central portion. The lines therefore, appear wider, and don’t have very distinct edges.
Is this phenomenon normal, or is the laser is sub-standard?
I’d appreciate any advice or comments please.
I have photos, but could not find a way to attach them. Huepar have declined to comment, so I suspect that the instrument may possibly be a factory reject or similar, but obviously I don’t know for sure.
Hi! It’s very often occurs in almost everyone, some to a greater extent, some to a lesser extent. It is especially noticeable when the room is dark. If the light is brighter, it becomes invisible. By the way, it occurs to a lesser extent with red lasers, apparently because of the lower brightness. Therefore, it cannot be called a defect.
Hi Sergei. That’s a bit surprising but fair enough. So, if I mostly cared about the sharpness of the lines projected over features, would you recommend the 603CG over the S03 ast that point?
Hi, the 603CG has a good line, so I can recommend it.
The DT03CG uses the same SHARP diode as the 603CG, right? Does it have a thinner, clearer line due to the prisms being coated, whereas all their other models don’t? Just curious.
As I recall, the DT03CG had Osram laser emitters. But things can change, the 603CG used to have Osram laser emitters too, then they were replaced by Sharp. The Osram ones are more expensive, but I must say that the Sharp ones are not bad either. It is impossible to find out what exactly is installed, you will have to disassemble the whole module, and it is not sure that it will be clearly written there. Therefore, in this matter we have to trust the official seller’s instructions.
Ahoj Sergei
Super recenze jen tak dál
Mám otázku: tento model mám cca dva roky. Po zapnutí mi svítí všechny čáry kolega má ten samý a po zapnutí mu svítí pouze horní horizontální čára. Jde to nějak nastavit a definovat která čára mi bude svítit po zapnutí?
Děkuji
Dobrý den, děkuji! Raději se obraťte na elektrotechnika, který dělá pájení elektroniky. S největší pravděpodobností bude potřeba přepájet drátky/spojů, aby se při zapnutí rozsvěcela jen jedna linie.