- Where to buy a laser level profitably and reliably?
- Technical parameters
- Housing Huepar 904DG
- How to disassemble and calibrate
- Checking for accuracy
- Compensator
- Control laser level Huepar 904DG
- In the “closed lock” position
- In the “open lock” position
- The thickness of the laser line at different distances
- Comparison table with competitors
- Delivery set Huepar 904DG
- Swivel base
- Magnetic mount with microlift
- Pros and cons
- Video review 904DG
- Video comparison with analogues
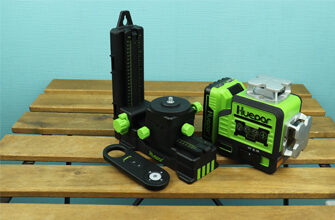
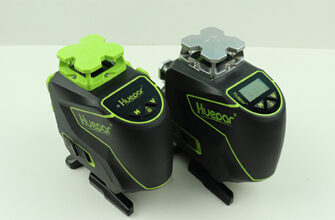
The 4D laser level 4×360 – Huepar 904DG. Which projects two horizontal planes of 360 degrees. And also two vertical planes in a circle.
Plus two points of a plumb. Which are formed at the crosshairs of the two verticals above and below. Very cool functionality isn’t it?
Looking ahead, I want to say. That the level is quite interesting. It has a good basic set and high-quality Assembly. Both inside and out. I also recommend considering the new Huepar LS04CG with two quick-detachable batteries. Well, read about everything in order in the review.
By the way, not so long ago, another new product was released – the Huepar S04CG laser level with a screen that shows the angle of inclination.
Where to buy a laser level profitably and reliably?

In the top 5 best 4D laser levels, it takes an honorable third place.
Technical parameters
- Accuracy: ± 3 mm per 10 meters
- Working distance without receiver: 40 m (at 100 LUX)
- Distance with receiver: 60 m
- Compensator range: 4º ± 1º
- Alignment time: ≤ 3 seconds
- Laser class: II (IEC/EN60825-1/2014), <1mW
- Laser wavelength: 505-520nm
- Power supply: 3.7 V / 5200mAh lithium battery
- Working time: all planes about 4 hours
- Charging port: Type-C
- Tripod thread: 1/4″
- TILT function: Yes
- Remote control: Yes
- Dust and moisture protection: IP54
- Operating temperature: – 10ºC ~ +50ºC
- Storage temperature: – 20ºC ~ +70ºC
- Weight of the device with a battery: 640 gr.
- Dimensions with towers l/W/H: ~ 13,4 / 8,5 / 14,9 cm
- Distance from the lower horizon to the floor: 1.8 cm
- Distance from the lower horizon to the ceiling: 13 cm
- Distance from the upper horizon to the floor: 14.2 cm
- Distance from the upper horizon to the ceiling: 0.8 cm
- Min. distance from vertical to wall: 1 cm
Housing Huepar 904DG
I must say that the build quality of the housing is at a high level. All the details are clearly adjusted to each other. Good thick plastic is used. And no less thick rubber on the main sides of the case.

The Huepar 904DG laser level is a new model. But you can see that the device is built on the basis of an older model Huepar 902CG with two planes of 360 degrees. Or there is the same model with the number “903” with three planes, respectively.
There is a Type-C socket on the side of the housing for charging the level during operation. Without an installed battery, this option is also provided.
You can work without a battery

The lithium-ion battery can also be charged separately from the device. It has the same Type-C input on the case. Agree that this is very convenient. Especially if you have a second battery. That is, one is in operation, the other is charging. For non-stop operation.
When the battery is charging, the red indicator flashes. When fully charged, the indicator turns green.

All protective towers, including the large lower one in the form of a “paw”, are attached to four screws through a thick rubber gasket. Also, a rubber gasket runs along the top of the glass truncated pyramid.
This is an excellent protection against dust and moisture entering the interior of the case.

In the lower part there is a battery compartment with a non-removable cover. You can see the model name on it. And abbreviations of passed certifications and directives. Including for sale in Europe and America.
You can also see information about the battery and laser.

The battery cover closes just like that, without a rubber gasket. This is a minus. Of course, it closes quite tightly. And there are no open spaces in the battery compartment. But if there was a gasket it would be better.

The lower massive “paw” is also a protective tower. Made of thick plastic. Plus, it has four heels made of thick rubber. So that the device does not slip on various floor coverings.
A brass bushing with a 1/4″ inch internal thread is also neatly mounted here. For mounting on tripods and other accessories. Including those included in the package, we will consider them later.

If you look at the inside of the device. Then you can also see the accuracy of execution in everything. All electronic components of the main Board are perfectly soldered.

How to disassemble and calibrate
As a huge plus, you can select a convenient disassembly of the case. And available to everyone, alignment of the level.
Approximately the same case is disassembled at the 4D laser level Svarog IE16. I must say a good device at the same cost. But it definitely can’t boast of such quality of the materials used. It has a plastic skeleton that holds the compensator. And the Huepar 904DG laser level has a metal skeleton.
So if you choose between these two models, the 904DG is definitely more interesting.
Inside there is a steel frame on which the compensator is installed. This is good!
Also, do not forget about such a level as the Fukuda MW-94D-4GX. In my humble opinion. Of all the 4D laser levels on the market. I now mean the optical scheme 2H360º / 2V360º. It occupies one of the leading positions. Also a great device. But back to the setup…
By and large, the adjustment of this level can be made without complete disassembly of the case. You can simply remove the tower of the laser module that needs to be adjusted.
This is done with four small bolts under the hexagon at 1.5 (see the photo below).

It is in this instance that all laser tubes have a gap between the base and the body of the pendulum. In other words, you can make settings. BUT! it often happens that one laser module between the base and the pendulum does not have a free stroke.
That is, it is tightly screwed to the body of the pendulum. In this case, the setup starts with this laser module. Which is adjusted by the position of the entire pendulum. This is the easiest thing to do.
The position of the pendulum corresponds to two adjustment bolt. Under the hexagon on “2”. Which move in the body of the pendulum. Thereby shifting its center of gravity during installation.
This is a cross bolt and a longitudinal bolt. See the photo below.


For example. If it is necessary to raise or lower the horizontal plane. Then you need to screw it inside the pendulum. Or, on the contrary, unscrew the longitudinal bolt outward.
If it is necessary to correct the lateral inclination (roll) of the horizontal plane. It is necessary to screw in or unscrew the transverse bolt. All!
Moreover, it is not necessary to disassemble the case completely!
To access these two screws. You just need to Unscrew the protective towers from the verticals. The device remains in constant working condition. And this is extremely convenient.
Tweaked – enabled – checked the result. And so on, until you eliminate the unnecessary error.
Then the other laser modules are configured separately. Which have a gap between the base of the module and the body of the pendulum.
Checking for accuracy
As indicated in the instructions, the error of this model is ± 0.3 mm/m. Or in other words ± 3mm by 10 meters. How to correctly calculate the error, see here.
Checking the accuracy at 10 meters showed excellent results. When running all four sides of the lower and upper horizon. The maximum run-up between points was only 2 mm! And on the upper horizon, the run-up was almost nonexistent.

All verticals were checked by the thread plumb line. No deviations were detected. The level is perfectly adjusted.
Compensator
The Huepar 904DG laser level has a magnetic pendulum compensator.

As you can see, the compensator is small and quite light. This is undoubtedly a plus. Since heavy pendulums suffer greatly from mechanical shocks. And improper transportation.
The entire structure of the compensator is located on a metal skeleton. And not on plastic, as in the same Svarog IE16.

The compensator in the Huepar 904DG laser level has a working range = 4º ± 1º. That is, in the auto-leveling mode, the level should stand on a surface whose slope does not exceed the operating range. Otherwise, it simply will not be able to automatically level itself. But this applies to all laser levels, without exception.
An alarm system was made specifically for such situations. Visual (in the form of fast flashing lines), or audio. Both are implemented in this model.
Therefore, if you place the device with an inclination greater than 4°. Then you will immediately hear an intermittent beep. And you will see fast flashing lines.
Just put the level on a flatter surface. And the alarm will automatically turn off.
Audio and visual alarms
The speed of setting the pendulum is 3 seconds or more. This is indicated in the instructions. In practice, this is about 5 seconds. Quite a normal average value.
Control laser level Huepar 904DG
A two-position toggle switch is located in the front of the case.

In the “closed lock” position
The compensator is blocked for further transportation. Also in this position, the level is activated with a blocked compensator (TILT function). For marking at any arbitrary slope.
To activate this function, hold down the “V” button on the keyboard at the top for 2-3 seconds. In this mode, all planes can be switched separately. Or use the buttons on the touch panel. Or from the remote control.
In the “open lock” position
The compensator opens and switches to automatic alignment mode. For marking a horizontal or vertical level. In this mode, all planes are also switched separately.
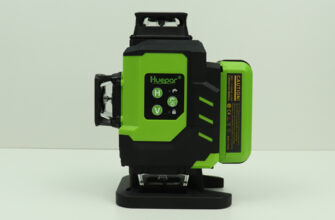
The touch control panel has two “H” and “V”buttons. And three information indicators.
The touch panel has a great response

The “H” button controls the horizons. You can enable them individually or together.
The “V” button absolutely also controls verticals. Or switches them separately. Or includes them together.
You can select any desired combination of planes. Agree that this is very convenient.
The indicators speak for themselves. The first indicator with a “closed lock”. Lights up in red. When activating the mode of operation with a blocked compensator.
Battery indicator in the middle. It starts to glow red when the remaining 20% of the battery charge. If you connect the device directly to charging. Then this indicator will flash red during charging. A upon reaching full charge. It will turn green.
And the third indicator. Lights up blue when the receiver mode is activated. To enable this mode, hold down the “V” button for 2-3 seconds. Lines in this mode will start to light up dimmer.
The receiver mode can only be activated when the compensator is unlocked.
You can also control the planes and turn on the receiver mode from the remote control. Which is included in the package. They can also turn off the level. But only if the TILT function is activated.
To do this, hold down the “V” button for 2-3 seconds. But you can no longer enable this function from the remote control.

Sometimes you may need to re-coordinate the operation of the remote control and the device. In order to coordinate their work. You need to simultaneously hold down the “H” button on the remote control and on the laser level, for 3 seconds. After successful approval, the device will beep.
The thickness of the laser line at different distances
The Huepar 904DG laser level has good LD laser modules installed. Which give out fine lines with a nice soft green color.
When tested for 1 meter, the thickness was no more than 1 mm.

At a distance of 5 meters a little more than 1 mm.

And at a distance of 10 meters from the wall. The thickness was only about 2-3 mm.
Great result!

Comparison table with competitors
| Technical specifications | HUEPAR 904DG | FUKUDA 4D | ZOKOUN IE16R |
| Accuracy, mm/m | ± 0.3mm / 1m | ± 0.3mm / 1m | ± 0.3mm / 1m |
| Compensator range, ° | 4º ± 1º | ± 3° | 4º ± 1º |
| Range without/with receiver | 40*/60m (* depending on the light) | 20*/50m (* depending on the light) | 25*/60m (* depending on the light) |
| Dust and moisture protection | IP54 | IP54 | IP54 |
| Function TILT | Yes | Yes | Yes |
| Working with the detector | Yes | Yes | Yes |
| Remote control | Yes | Yes | Yes |
| Power supply operation | Yes | – | Yes |
| battery | 5200mAh | 4000mAh | 5000mAh |
| Working temperature: | -10°С to + 50°С | -5°С to + 45°С | -10°С to + 50°С |
* – Conditional indicator. Which directly depends on the degree of lighting. Both indoors and outdoors.
Delivery set Huepar 904DG
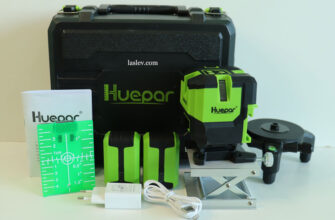
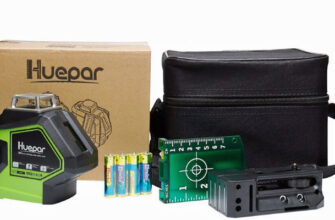
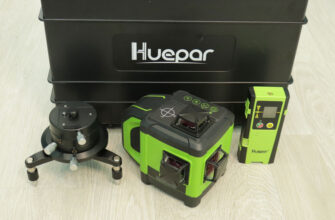
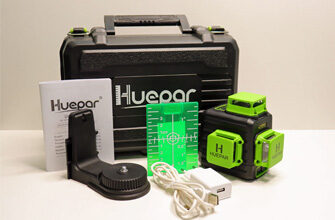
The Huepar 904DG 4D laser level is delivered in a colorful cardboard box. And in a branded case.

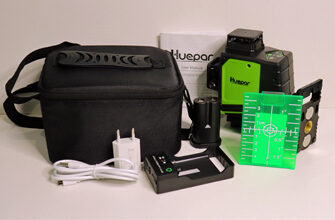
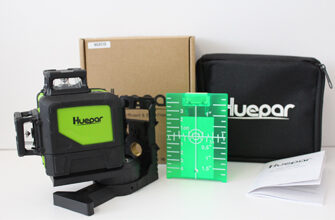
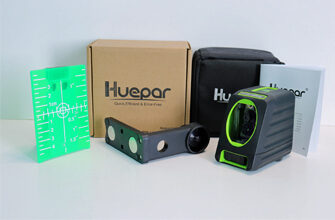
Inside the bag, all the cells for each item are clearly cut out. In addition to the device itself, the kit includes: instructions in different languages, a remote control, a battery, a metal plate, a charger with a 1.5-meter long wire, a swivel base and a multifunctional magnetic mount.
Let’s look at the last two in more detail.

Swivel base
Has a 1/4″ inch threaded screw. As well as a micrometer screw. For smooth rotation of the platform around its axis.

There is a 5/8″ thread on the bottom of the base. And if you unscrew the legs, it can act as a 1/4″ to 5/8″ adapter.

Magnetic mount with microlift
It has a number of “twists”. For a better understanding, see the photo below. By the way, you can buy it separately. With an additional clip for the ceiling profile.

This bracket can be attached to powerful neodymium magnets. They are arranged in a row. This is convenient when mounting on a narrow pipe or profile.
Can also be hung on a self-tapping screw. Or mount on tripod or rod with 1/4″ and 5/8″ threads.

There is also an excellent millimeter and inch scale for the microlift from 0 to 9 centimeters. This is really convenient!

In some cases, the mount can be used with a special attachment. Which has an adjustment in the horizontal plane. To level a small slope of the fixed laser level.


To put it briefly. The green 4D laser level Huepar 904DG contains all the features of 3D laser levels with cone prisms. Only the second horizon was added to the selection. Projected as close as possible to both the floor and ceiling.
Therefore, with this device, the installation of ceilings or floors will be much more convenient.
Pros and cons
Inexpensive for optical circuit 2H*360º/2V*360º, thin and bright green lines, excellent build quality and materials, easy disassembly and configuration, remote control, you can choose any one or a combination of planes, as close as possible to the projection of the planes to the floor, ceiling or wall, mains operation without a battery, battery charging both in the device and separately from it, TILT function, work with the receiver, Type-C charging socket, excellent response from the touch panel, impressive delivery package.
You can’t turn on TILT mode from the remote control, there is no rubber pad on the battery cover, and you can’t run on batteries.

Please tell me if there will be a review of the new laser level Huepar S04CG with Bluetooth?
Hi! Yes there will be a review on this laser level model soon.
If the two vertical lines are not perfectly perpendicular to each other (90 degrees), can this be adjusted?
Hi, Marshall! As a rule, the angle of 90 degrees between the verticals is not a declared characteristic, and if the error is up to 5 mm when checking at 5 meters, then consider yourself lucky.
You can try to adjust it more precisely. This is done with the same bolts that adjust the position of the laser modules individually.
But here you need to understand that by adjusting the angle of 90 degrees, you will simultaneously affect the accuracy of the vertical. Therefore, you need to look for a “golden mean”.
Hello. I find this model best price/performance for home use. Is model S04CG-L (I suppose it is newer?) any better? It bothers me that it has no remote. Thank you in advance.
Hello. Their functionality is the same, the only thing you correctly noticed S04CG-L has no remote control. But Huepar S04CG-L (https://amzn.to/3A1OtH5) has more expensive Osram laser modules, they are brighter and generally better.
Is the lithium battery pack made from common cells, such as 18650? As in the future it may not be easy to find replacement batteries, but if based from common cell like 18650, we can just re-solder our self. Great reviews on this site! Thanks : )
Yes, there are two common 18650 batteries installed in the battery case. The Huepar B03CG and Huepar GF360G have the same battery, only the latter cannot be charged separately. Look at the review of Huepar GF360G there is a photo of the disassembled battery, you can see what’s inside.