- Where to buy a laser level profitably and reliably?
- Technical specifications
- Hilda 4D 16 Lines Housing Quality
- Build and material quality
- Laser modules
- Battery compartment
- Protective towers
- Mains operation and mounting thread
- Size comparison
- Battery disassembly laser level HILDA 4D 16 Lines Green
- Checking for accuracy
- Calibrate of HILDA 4D 16 Lines
- Compensator
- Electrical diagram of thin copper wires in the Hilda 4D laser level
- Control Panel
- Test: the thickness of the laser line at different distances
- Contents of delivery
- Pros and cons
- Video review laser level HILDA 4D 16 Lines Green
- Video comparison with analogs
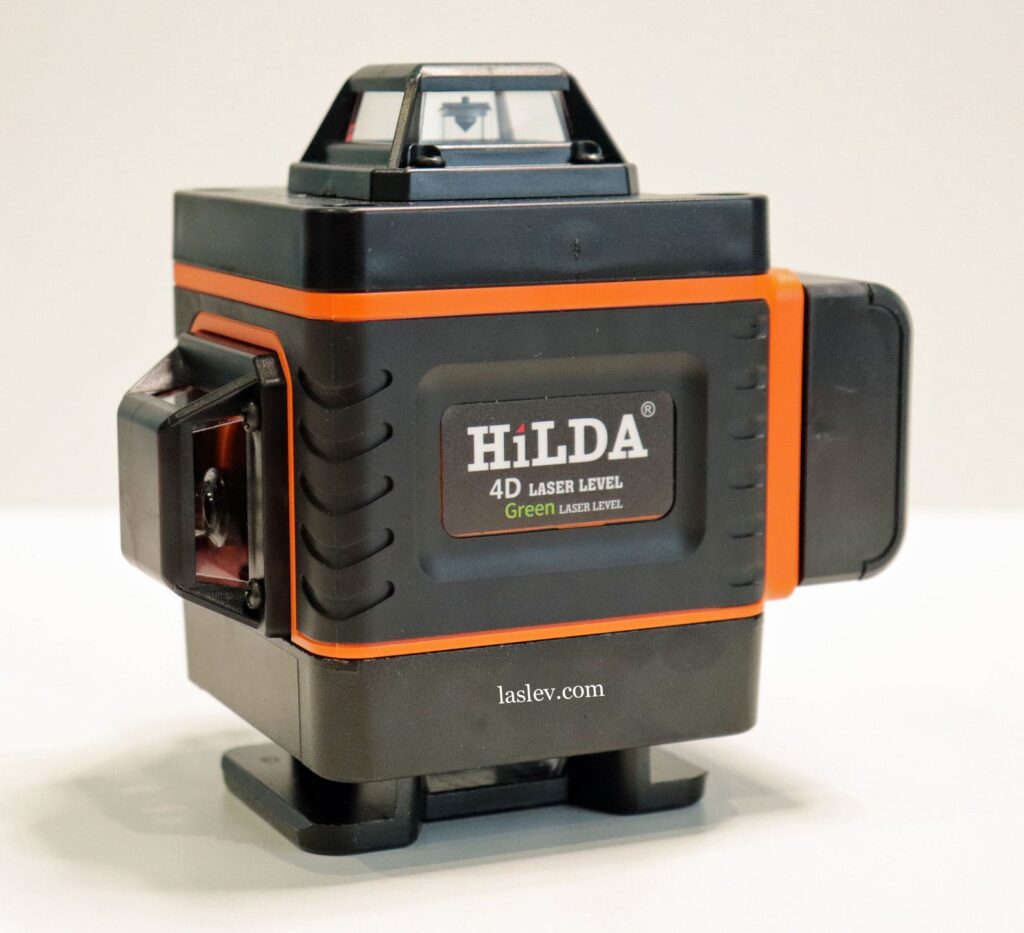
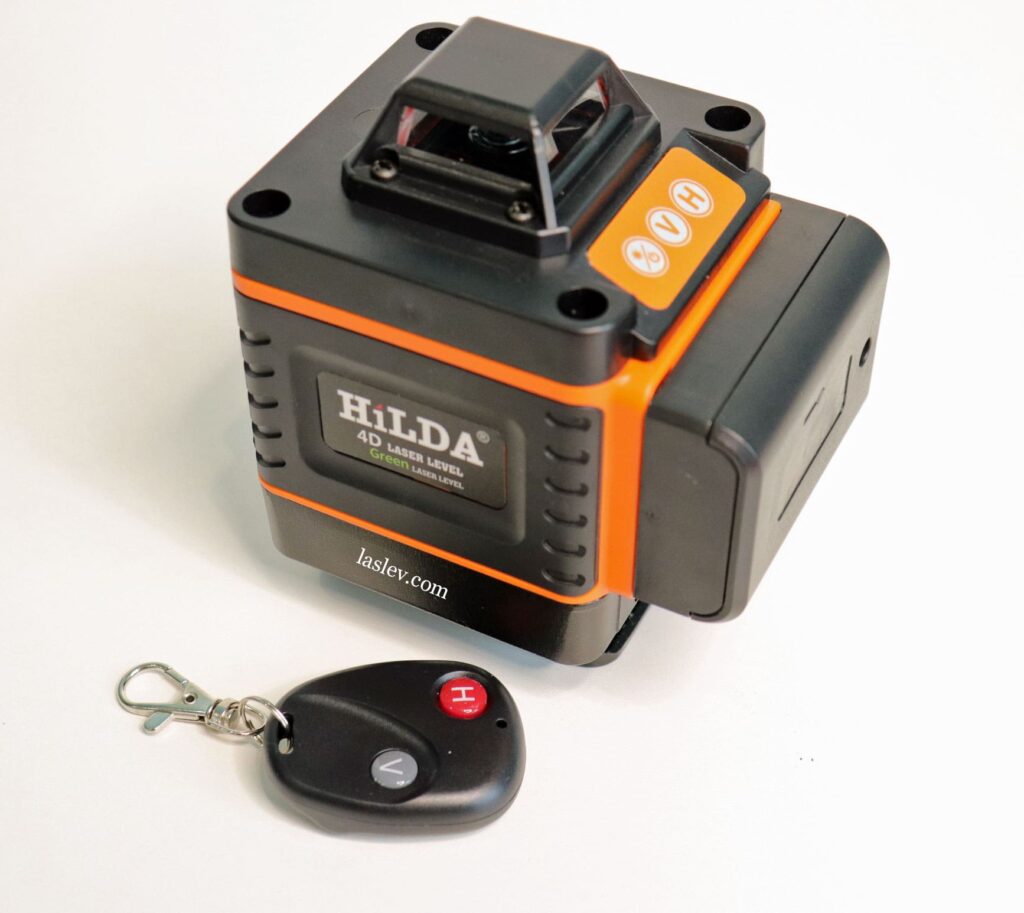
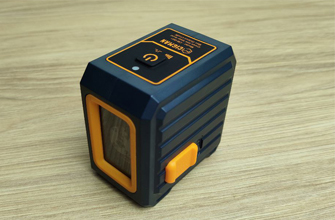
The cheapest green laser level HILDA 4D 16 Lines with an optical scheme of 4×360º. The device projects two horizontal and two vertical planes, all 360 degrees. Also, at the intersection of the verticals, plumb points are formed on the floor and ceiling. Due to its record low price, it is included in the list of the best 4D laser levels this year.
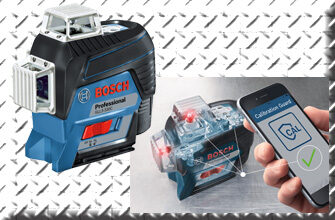
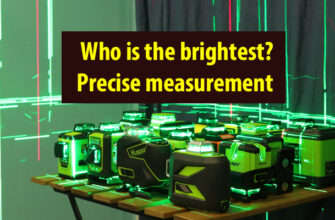
For comparison, you can see one of the most expensive and advanced 4D levels – this is the new model Huepar S04CG with Bluetooth and a screen that displays the angle of inclination of the housing along the two axes “X” and “Y”.
The device was bought for $60. For a green 4D laser level, this is a really funny price. A logical question arises: what is it made of, why is it so cheap? We will talk about this and more in the review. Yes, by the way, the best offers are as always on the buttons below.
Where to buy a laser level profitably and reliably?
Technical specifications
- Accuracy: ± 0.2mm/m (± 1/13 in at 33 ft)
- Range: 25m in diameter (* depending on the degree of illumination)
- Range with receiver: unknown
- Compensator operating range: ± 3º
- Tripod mount: 1/4″ thread + 5/8″ adapter
- Power supply: lithium-ion battery
- Working at an angle: yes
- Laser wavelength: 532 nm
- Working temperature: from -5°C … + 50°C
- Dimensions L/W/H: ~ 12.6 / 9.8 / 12.4 cm
- Weight with battery: 684 gr
- Minimum distance from the lower horizon:
to the floor – 1 cm
to the ceiling – 11.5 cm - Minimum distance from the upper horizon:
to the floor – 11.5 cm
to the ceiling – 1 cm - Distance between horizontal lines: 10.5 cm
- Minimum distance from vertical to wall: 0.8 cm
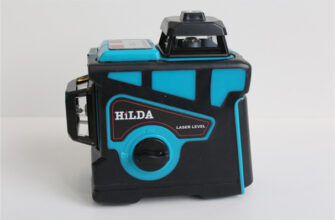
Hilda 4D 16 Lines Housing Quality
Build and material quality
We must immediately say that it is not worth waiting for high quality assembly and materials for such a price – it is simply impossible.
Although, in fairness, if you look at the picture as a whole, it seems like the HILDA 4D 16 Lines Green laser level looks quite neat.
Obviously, the plastic used is cheap, but at least there are no protruding burrs and glue stains. For example, like the younger model of HILDA 3D for $50.
Laser modules
This low cost of the device can only be explained by the installation of very cheap laser modules, which do not cost even one dollar. Therefore, the question of the lifetime of laser emitters at such laser levels remains open.
Although, based on my practice, I can note that very often such cheap laser levels work for a long time from 2 years and above.
On the Internet, you can find many similar models under different names: A. B Crew, Elikliv, PRACMANU, HAVADOU and others. Each of them uses the cheapest laser modules.
Good, high-quality laser LD modules, such as Sharp or Osram, cost from $8 to $12 apiece. Even if you count on the average, at $10, then the modules alone would come out at $40 of the cost price.
But in addition to the modules, you still need: a housing, glasses, a compensator, electronic components, and a battery. And by the way, the delivery package itself is not poor. In general, such a low price, for me personally, still remains a mystery.
Battery compartment
The HILDA 4D 16 Lines Green laser level does not have a battery compartment as such. The battery is simply installed on top of the housing.

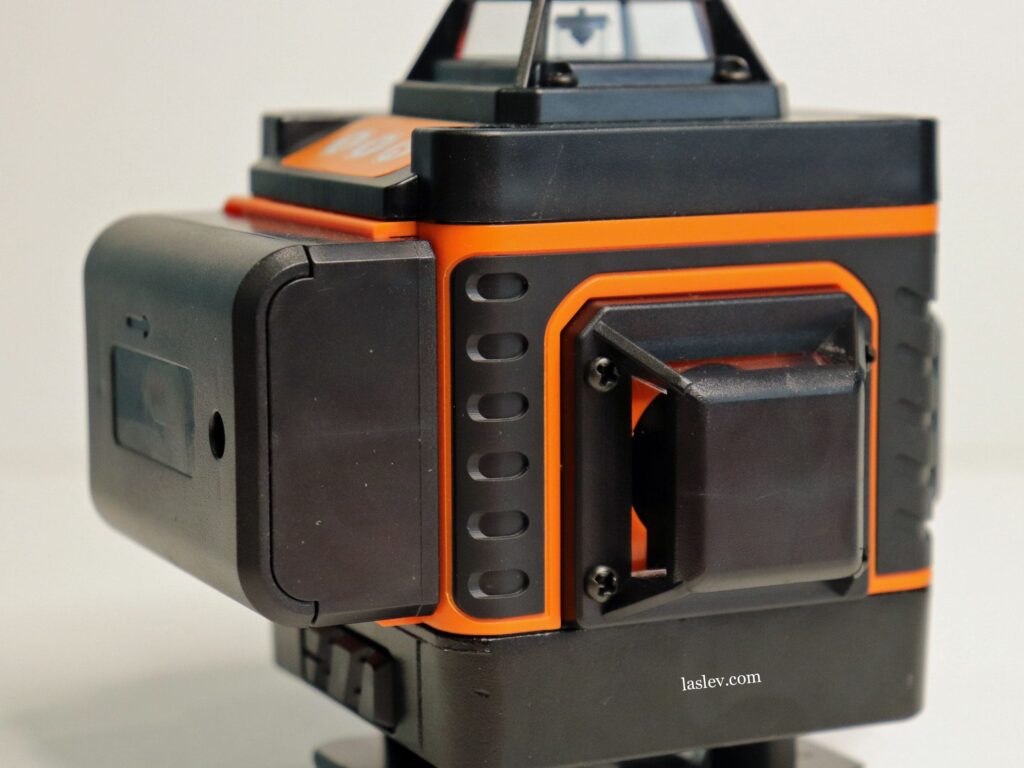
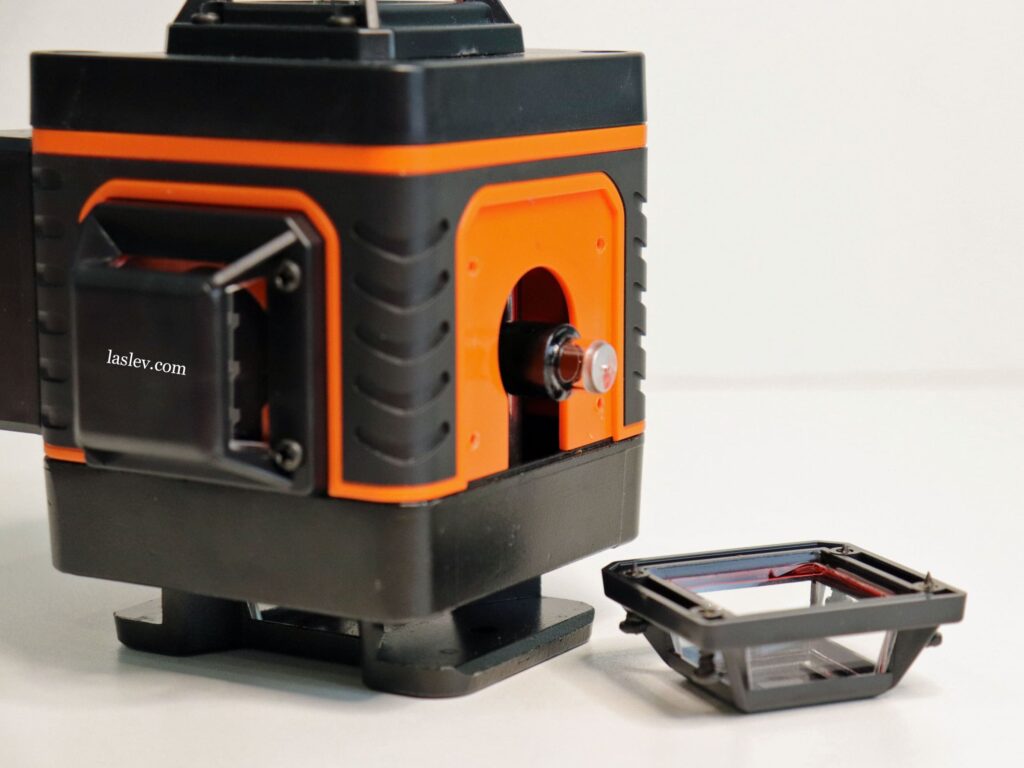
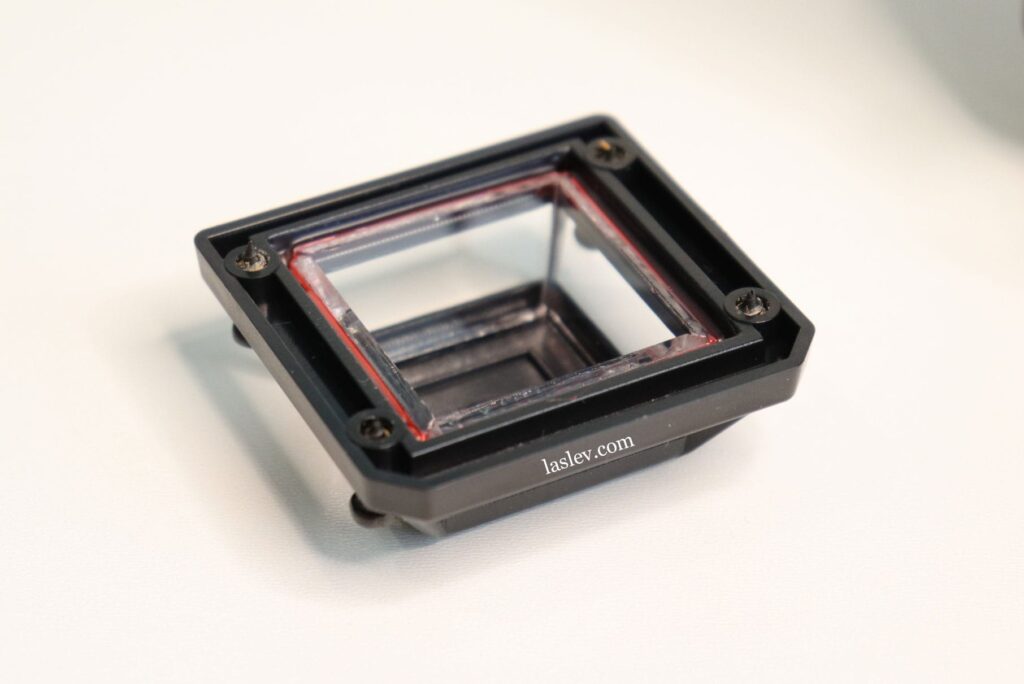
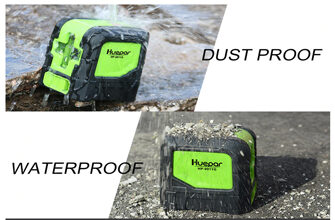
Protective towers
The plastic protective towers are attached with four bolts, but again without any rubber gaskets. For example, as in the higher-quality 4D laser level HUEPAR 904DG.
Such gaskets are simply necessary to protect the internal electronic components from moisture and dust.
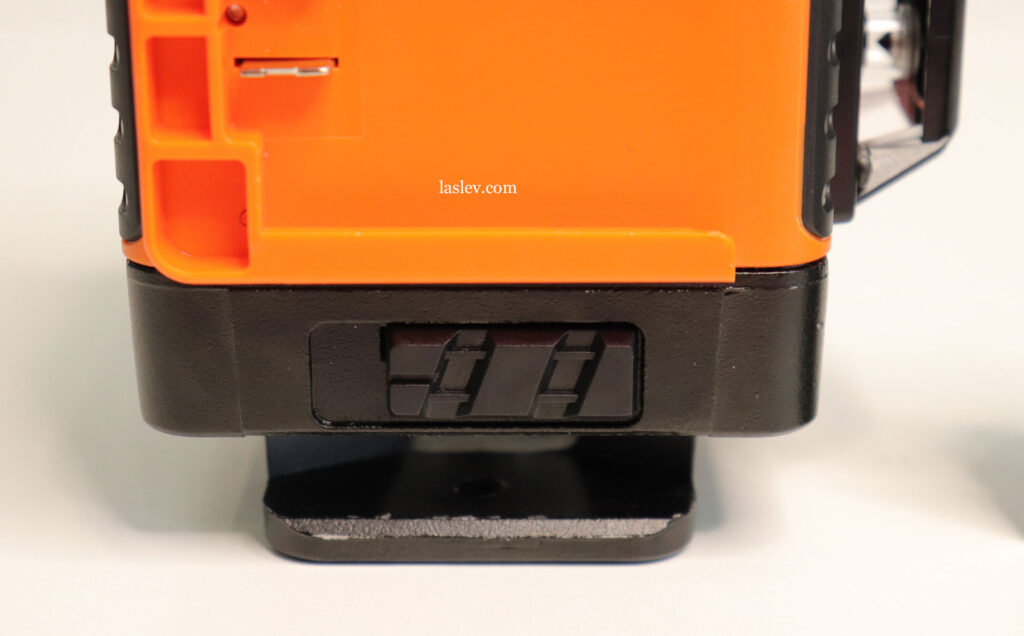
Mains operation and mounting thread
One of the advantages is the ability to operate the device from the network. In addition, the battery can be charged separately from the device.
This is convenient enough for smooth operation, but only if you have a second battery.
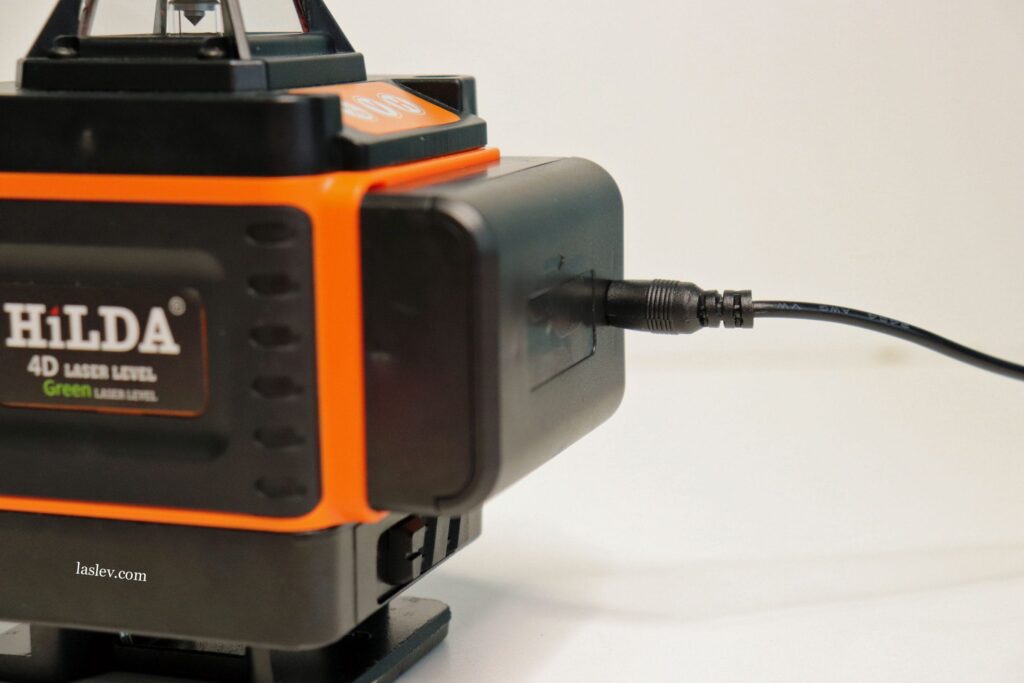
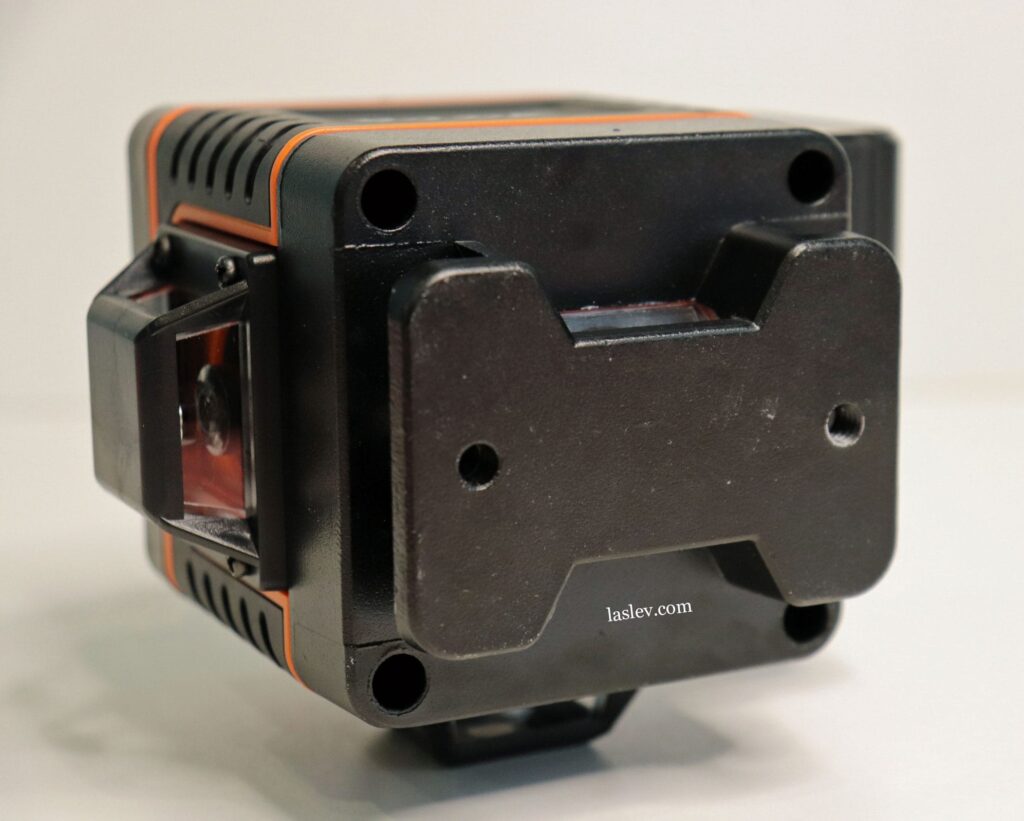
The lower part of the laser level HILDA 4D 16 Lines Green housing is made of metal. It is also the lower protective tower of the module, and a certain platform for installing the device.
There are two small holes on the platform, but only one of them has a 1/4 ” inch thread for mounting on a tripod or any other mount with the same thread.
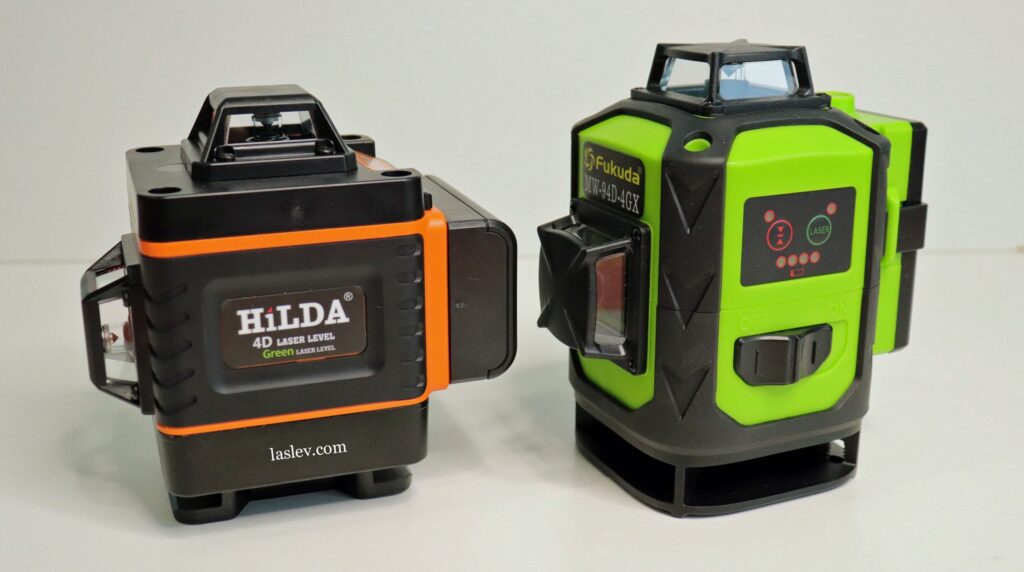
Size comparison
Separately, I want to say about the small size of the HILDA 4D 16 Lines Green laser level. Compared to the professional laser level with the same optical scheme (4*360º) – FUKUDA MW-94D-4GX, it looks very compact.
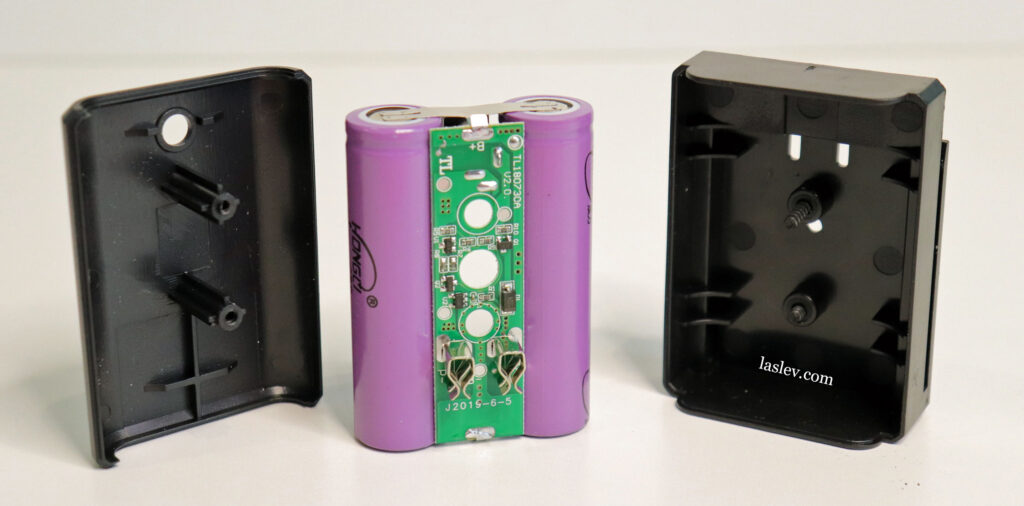
Battery disassembly laser level HILDA 4D 16 Lines Green
The battery is included, very easy to disassemble. It consists of two separate rechargeable 18650 batteries. Therefore, if desired or necessary, these batteries can be easily replaced.
Checking for accuracy
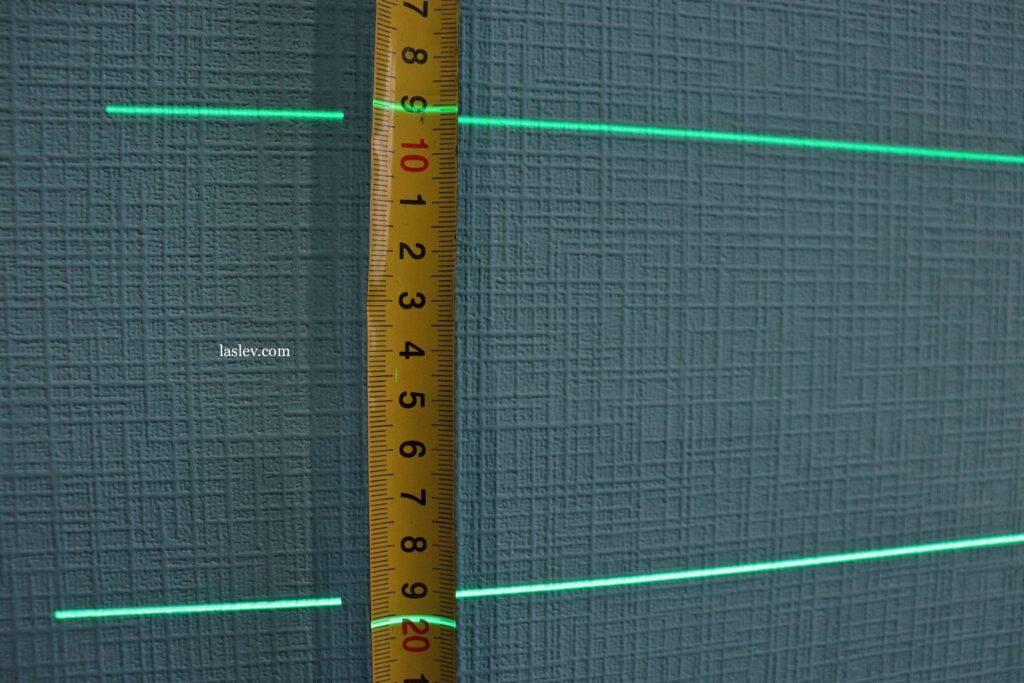
The manufacturer declares a fairly high accuracy: ± 0.2 mm/m or ± 1/13 in at 33 ft.
This means that when checking all sectors of the horizontal plane, the difference between the points should not exceed 4 millimeters at 10 meters.
You can see how the error is correctly calculated here.
in reviews, you can often find negative statements about the accuracy of the laser level HILDA 4D 16 Lines Green. In the photo below, check the accuracy of the horizon of this particular instance.
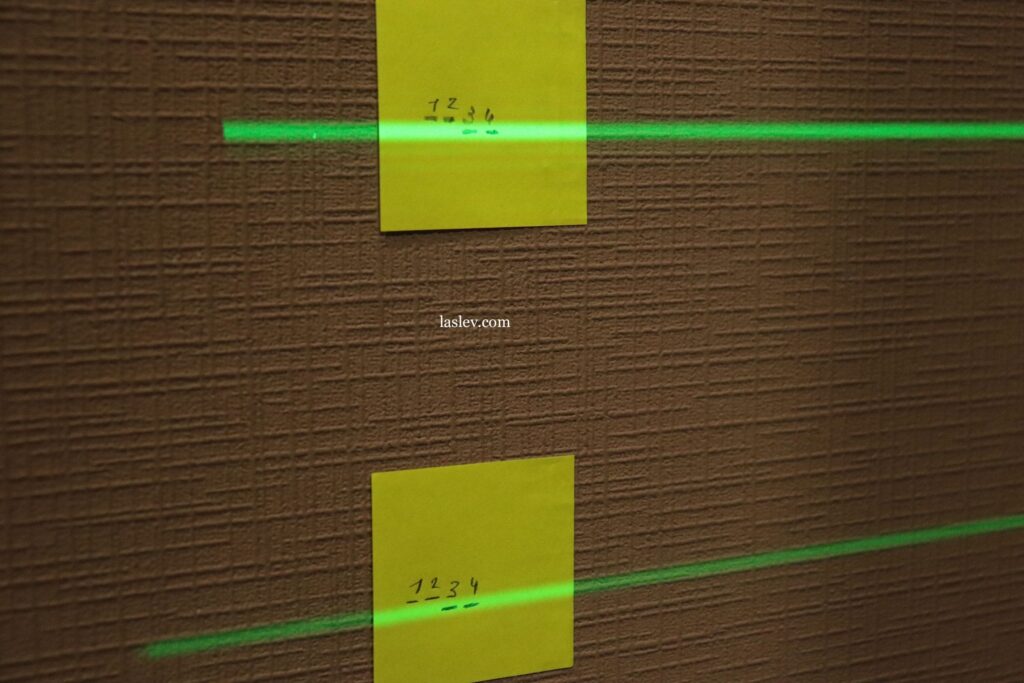
As you can see, both horizons are perfectly adjusted! This is even somewhat surprising, since the laser level came with an unlocked compensator.
Checking the verticals, oddly enough, showed the same excellent result.
The only thing that was noticed during the check was some bug with switching planes: the “V” button switched the horizons, the “H” button, on the contrary, the verticals. In general, for a while there was a complete confusion with switching planes and modes, then everything suddenly became normal. What it was, I never understood.
The laser level HILDA 4D 16 Lines Green was very accurate. But unfortunately, this is not always the case. Therefore, let’s look at how it is adjusted.
Calibrate of HILDA 4D 16 Lines
The calibrate of this laser level is quite simple, but you need to know some sequence of settings.
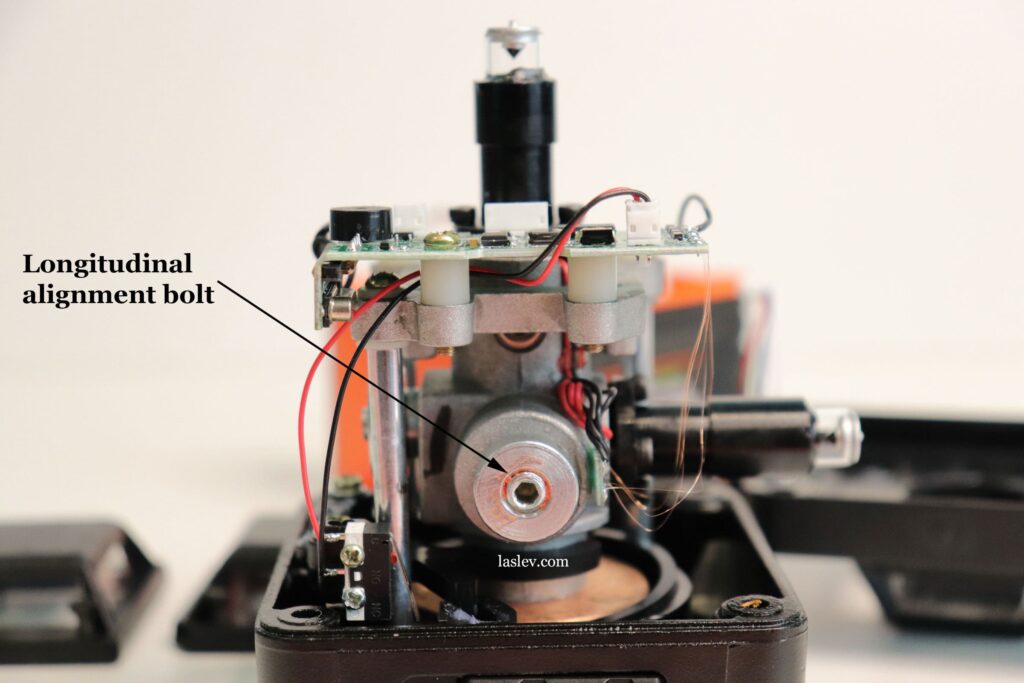
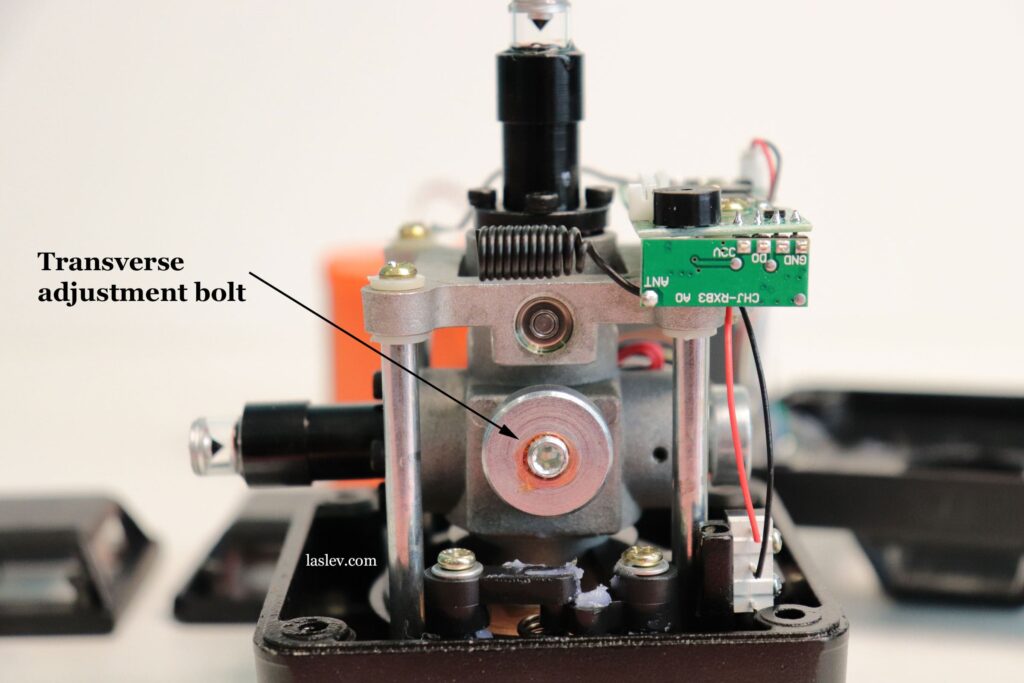
In this model, the lower horizon is adjusted by the position of the pendulum, that is, by the transverse and longitudinal adjustment screw.
All other laser modules are adjusted separately – by four bolts under the hexagon at the base of the laser tube.
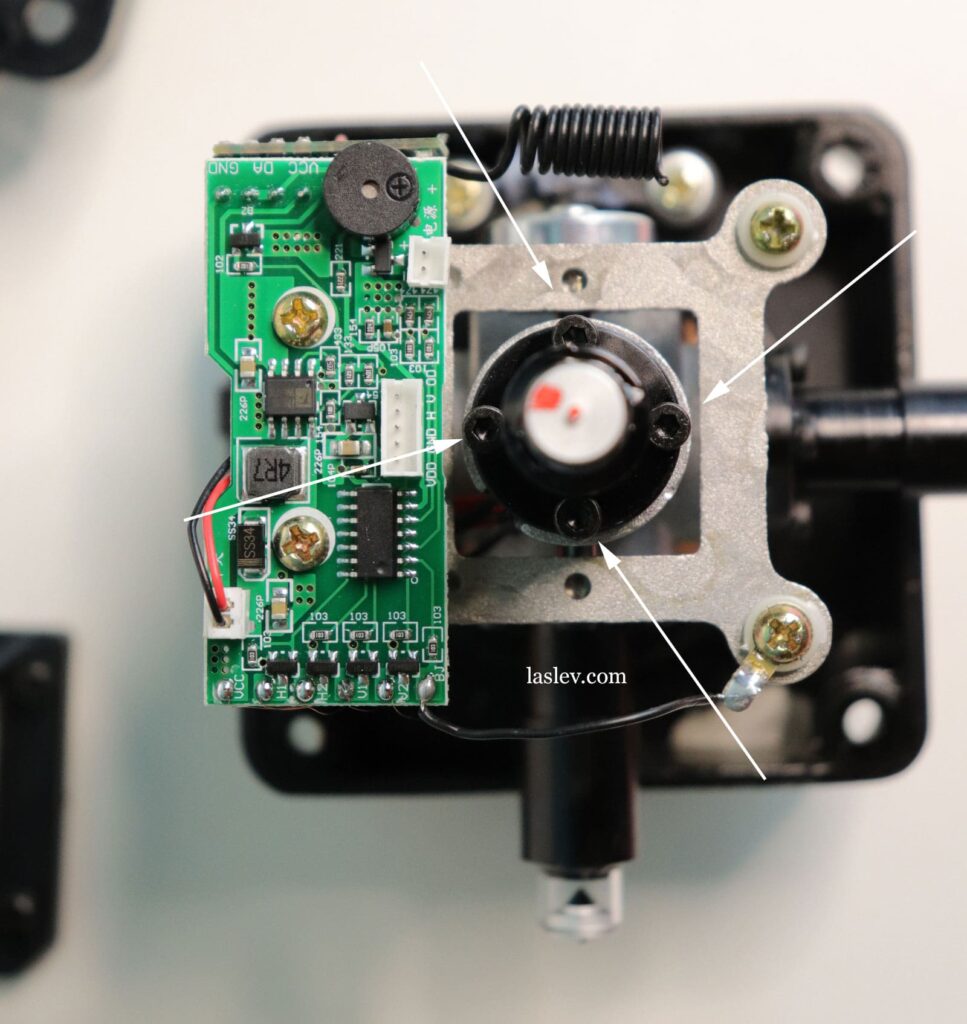
Thus, if you have the lower horizon shows accurately, and other planes have a large error, then there is no need to disassemble the entire housing.
Simply remove the protective tower of the module whose position you need to correct, and make an adjustment with 4 bolts.
If there is a big error at the lower horizon, then first you need to disassemble the housing: unscrew the 4 screws from the top, then the 4 screws from the bottom, and unscrew both towers from the verticals.
Then quietly remove the main part of the housing, it is not difficult. But you still have to disconnect the power connectors and the keyboard, then reconnect and insert the battery. It’ll be a little inconvenient, but it’s real.
Next, use the longitudinal and transverse pendulum bolt to adjust the position of the lower horizontal plane. Only after setting the lower horizon can you start adjusting the other planes separately. Previously assembled the case back.
Attention! After calibrate the lower horizontal plane, be sure to check the accuracy of all other planes.
To ensure that the adjustment bolts do not twist out over time from small vibrations, I recommend that you lubricate them after adjustment with ordinary nail polish.
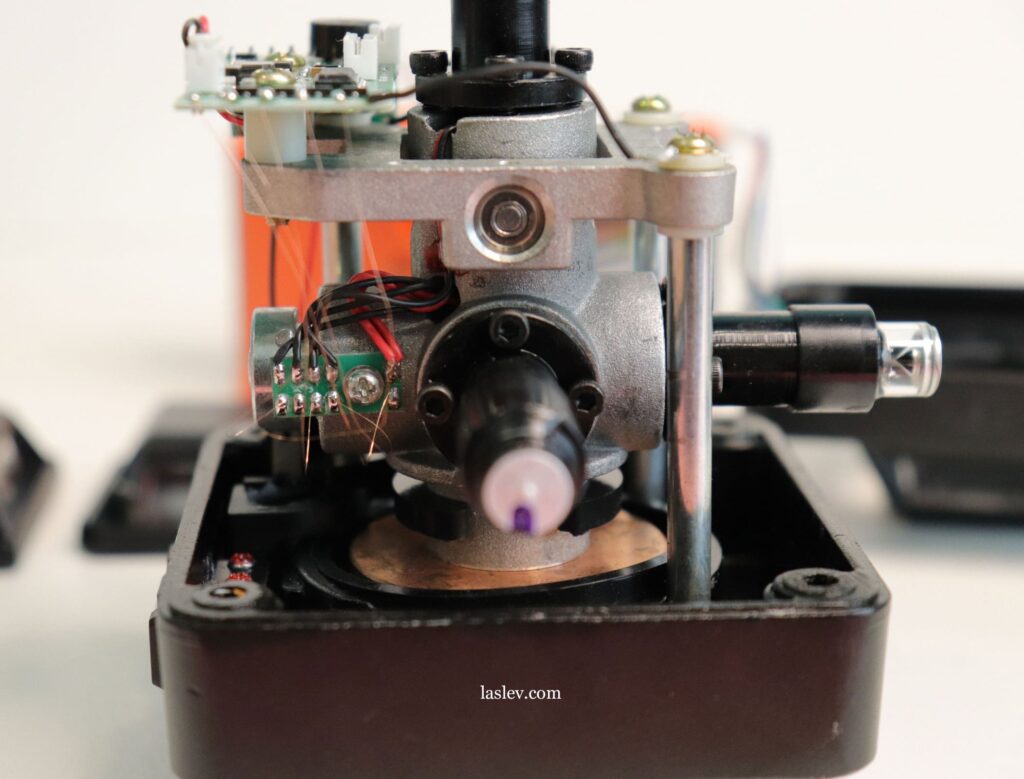
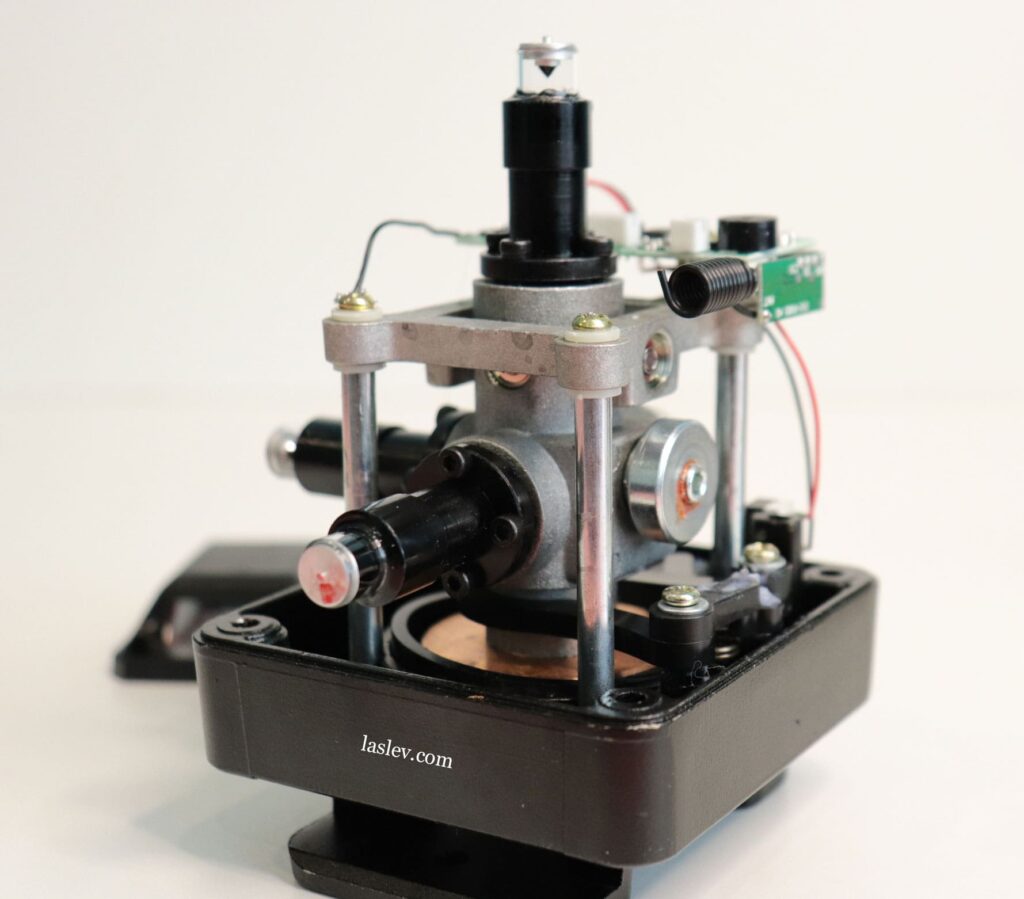
Compensator
Inside the HILDA 4D 16 Lines Green laser level, there is a pendulum-type compensator on magnetic dampers with an operating range of ± 3º.
If the angle of inclination is higher than 3 degrees, then the lines with the sound will automatically start flashing quickly.
This audible and visual alarm serves as a warning of incorrect markup.
Just put the device on a flat surface is necessary to disable the alarm.
The time for installing the compensator in the working position takes 5-6 seconds. This is normal, slightly above average.
One of the advantages is the metal skeleton on which the compensator is installed. Also, this design is convenient when adjusting the laser level.
It is necessary to say about the quite massive pendulum of the compensator. This is not very good, because such heavy compensators can fail faster with mechanical blows.
Electrical diagram of thin copper wires in the Hilda 4D laser level
If the device is disassembled, or if it is hit hard, the thin copper wires may come off. There are five of them in this model.
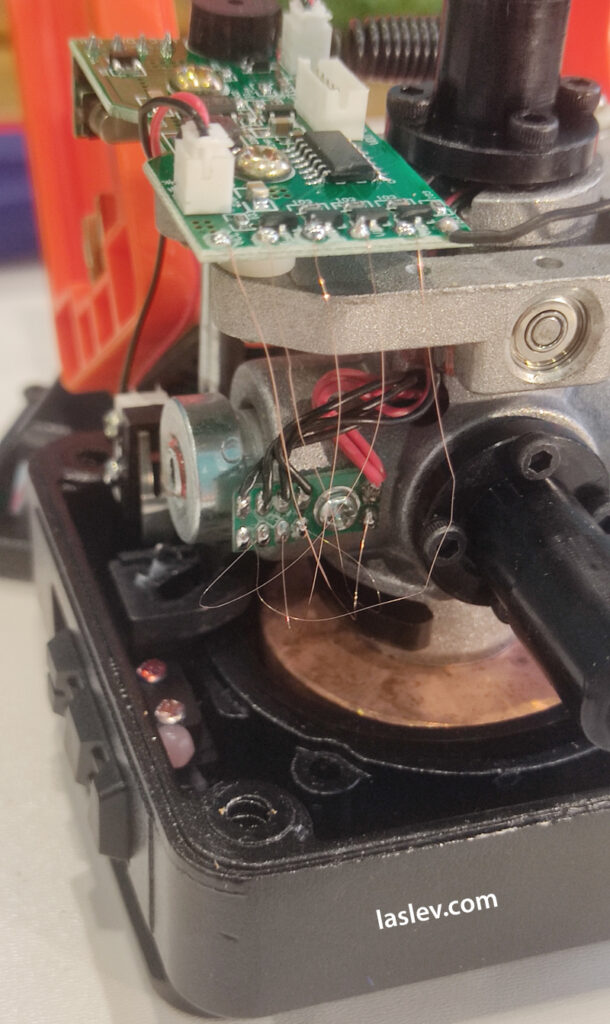
And if more than two wires come off, you may need an electrical circuit to solder them back on.

Control Panel
Like many current laser levels, it uses a touch-sensitive control panel. However, it has some problems with the stability of the response. The panel may not always respond to a touch and may not always respond correctly.
For example, when you click on the “H” button, you can suddenly turn on the vertical, and vice versa.
Again, if you do not judge strictly, then for this money it is quite a tolerable touch panel.
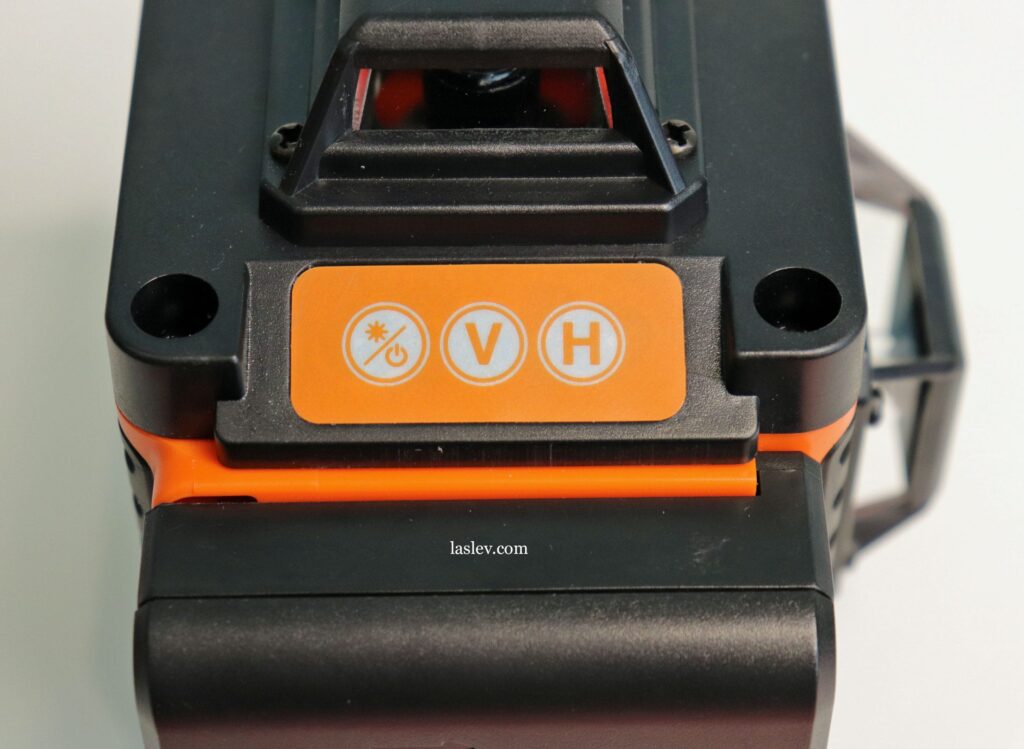
Button “H” – switches the horizons separately: 1 lower, 1 upper, or both together.
Button “V” – switches the verticals: individually or together. Thus, you can choose absolutely any combination of planes.
Button “*/o” – when pressed shortly, it lowers the brightness of the glow, very similar to switching to pulsating mode for working with a receiver on the street, but there are no receivers for them. So it’s probably just a brightness adjustment.
And its second purpose is to activate the TILT function (to turn it on, you need to hold the button for 2-3 seconds).
Be careful, the compensator is not blocked at this moment.
Behind the battery, there is a toggle switch to turn on and off the laser level. When turned off – the pendulum is locked (for transport), when turned on – the compensator is unlocked and automatically set to the working position.
Also, all planes can be controlled from the remote control that comes with the kit. The remote control has only two buttons “H” and “V”, everything is simple and clear.
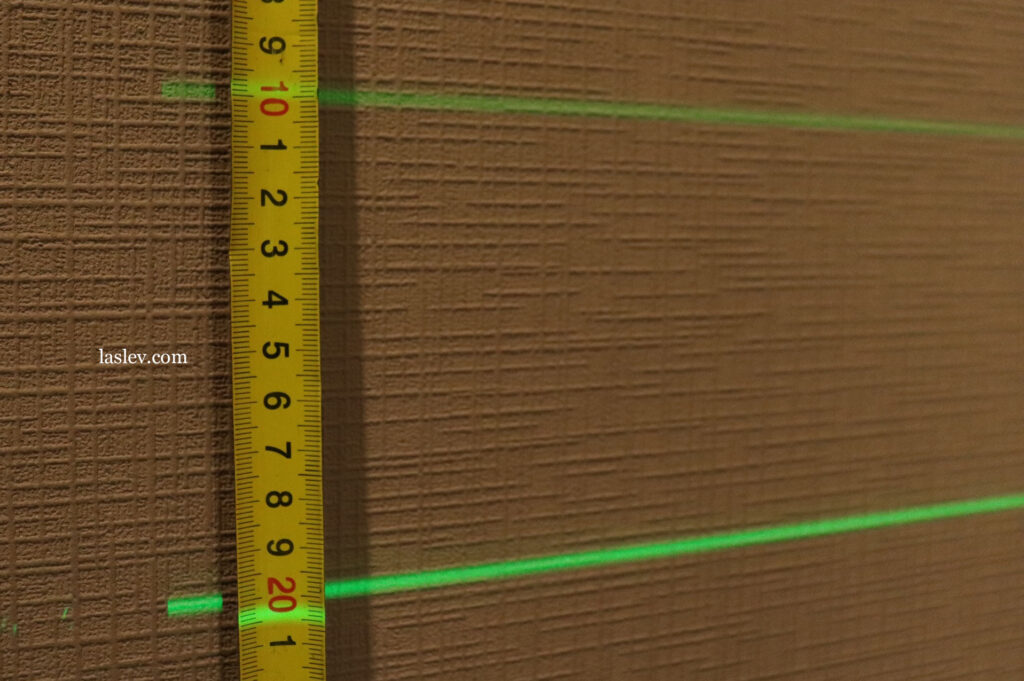
Test: the thickness of the laser line at different distances
Despite the very cheap laser modules, the projected laser lines are quite thin. And so, testing at different distances showed the following results:
- At 1 meter from the wall, the thickness was only 1 mm
- At 5 meters, slightly more than 1 millimeter
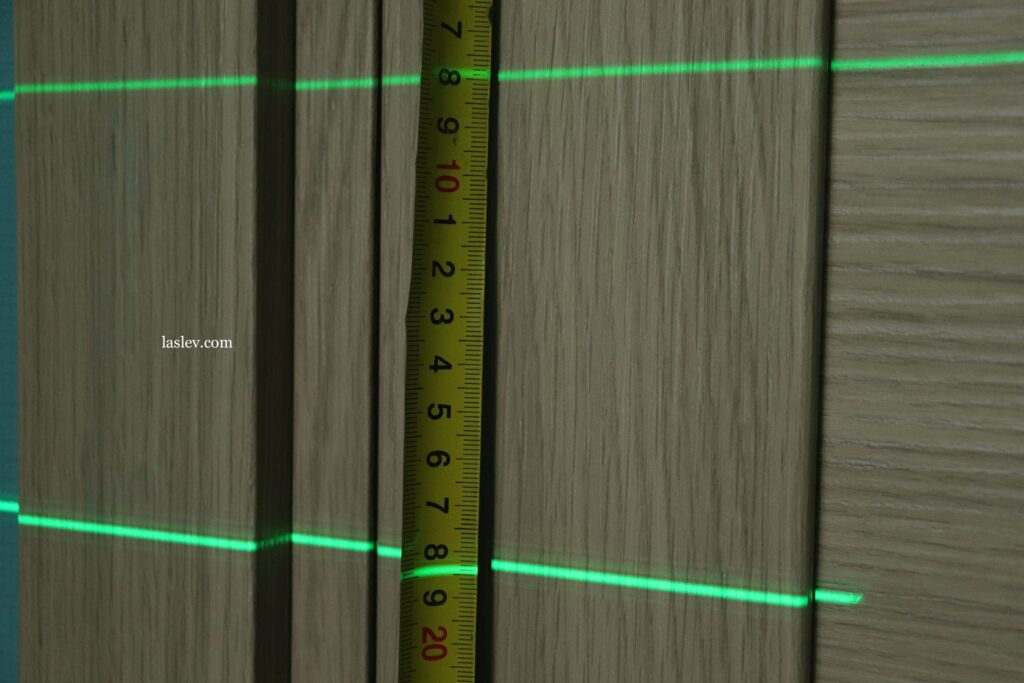
- And at 10 meters about 3 millimeters. This is a great result!
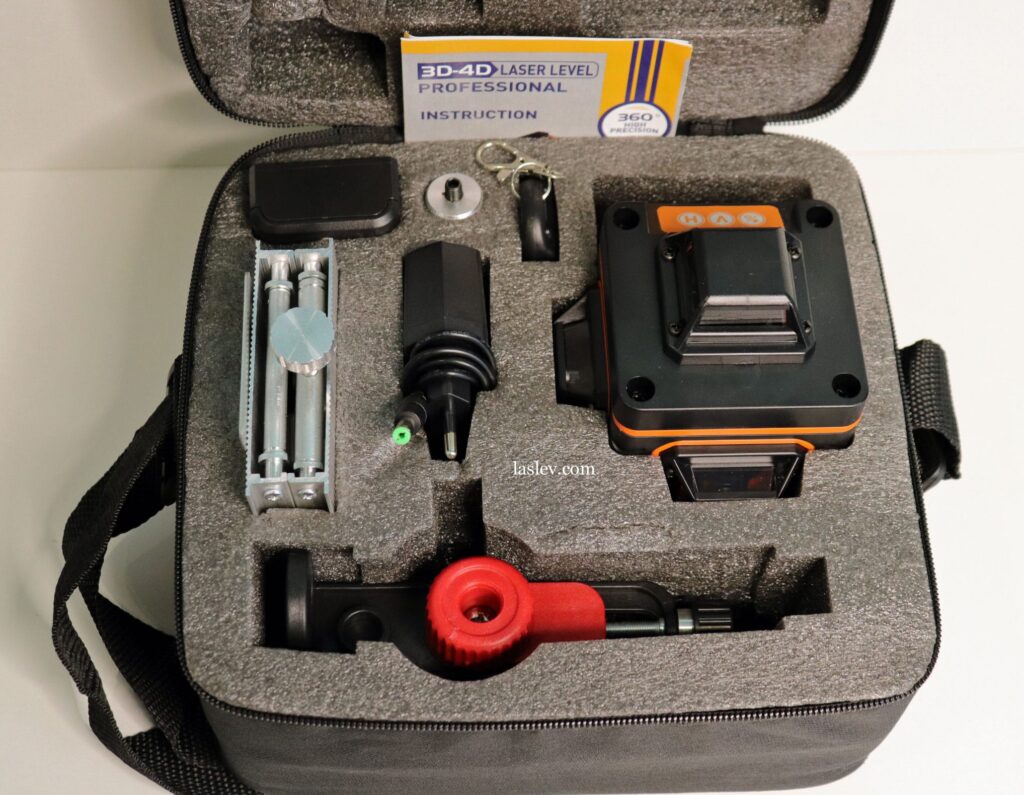
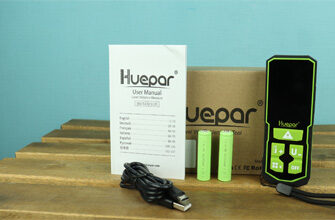
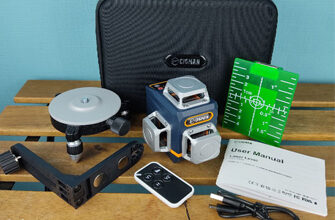
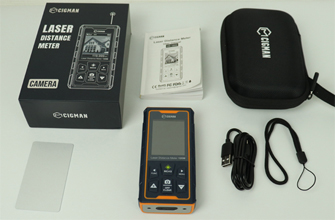
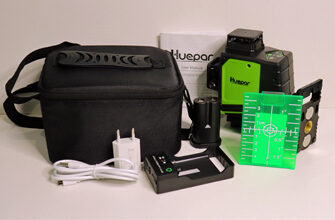
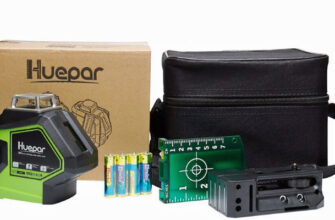
Contents of delivery
The laser level HILDA 4D 16 Lines is delivered in a bag with thick walls, which protects the device well from mechanical influences.
The basic kit, in addition to the main device, also includes:
- an adapter from 5/8″ to 1/4″,
- one battery,
- charger,
- metal plate,
- remote control,
- manual,
- lifting platform,
- magnetic wall mount.
The device can be attached to the magnetic mount through a thread in the base or through a special adapter for the protective upper tower.
The bracket itself is not of the best quality. It does not fix the device well on the thread. Plus, on smooth magnetic surfaces, it slides down under the weight of the device.
This is also due to the fact that there are no rubber pads near the magnets, for example, as in the magnetic mount of the Huepar B03CG laser level.

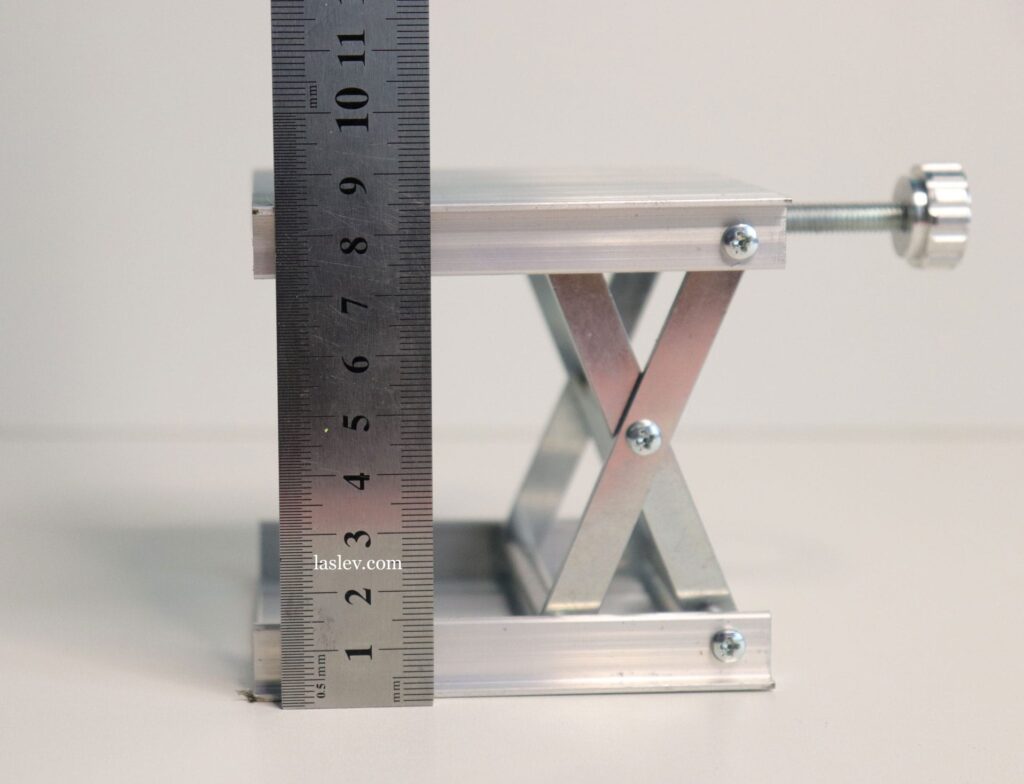
The platform with a mechanical elevator has a lifting range of the working surface from 2.5 to 8.5 centimeters. A simple but quite convenient thing for working with floors.
Pros and cons
Here, the expression”price – quality ratio” is very appropriate.
If we consider it for household rare work, then it is quite suitable laser level.
If we talk about working for every day, it is better to look in the direction of higher-quality analogues.
very cheap, 4 planes of 360°, green laser, separate switching of planes, remote control, work from the electrical network, TILT function, simple disassembly and adjustment, thin lines, not bad kit.
low quality of assembly and materials, does not work on simple batteries, periodic bugs of the touch panel, there is no battery compartment, when the TILT function is activated the compensator is not locked.


Hi, thank you for the review. Can laser level be used outside?
Hi! This model of the laser level does not have a mode of operation with the receiver, so it is not suitable for working from the outside.
The only thing of course is that they can work at dusk or use other methods of working with the laser level outside.
Thanks for all the good information, Sergei. I just received a Hilda 4D unit today. I found a super deal on Amazon (U.S.) for $72 less 20% off, so under $60 total, and didn’t have to think twice after reading your review. The current unit looks a little different from the one you reviewed….the battery cells are now inside the case and can be removed one by one through a bottom access door, so you can charge them in the unit or in your own external charger. Still no capacity info on the cells, but I’m wondering if they follow the typical color-coding conventions, where purple might be about 2500mah. The Amazon page photos show the current version. Regards
Thank you for your appreciation, Rod! Yes, these cheap 3D/4D laser levels have changes very often, it’s normal practice). Apparently they are always looking for ways to make the unit more interesting, but at the same time to keep it cheap. If not for frequent work quite a good option with excellent functionality.
Hi thank you for the review. My level laser is stuck in the Tilt Mode. I have pressed the x/o Button for 3 seconds to activate the Tilt Mode and later i pressed this Button for 3 seconds to deactivate this Mode but it won’t Turn off
Turn the unit off and on again with the toggle switch. The tilt mode must be exited.