- Where to buy laser measure profitably and reliably?
- Technical Data
- Build quality
- Functionality of each button
- Button #1 “READ”
- Button #2 “+”
- Button #3 “-“
- Button #4 “cube”
- Button #5 “floppy disk”
- Button #6 “U”
- Button #7 “OFF/CLEAR”
- How to turn on the timer on the distance meter
- Checking stability and accuracy of measurements
- How to calibrate the Huepar LM120A distance meter
- Possible laser rangefinder errors
- Package Contents
- Pros and cons
- Video review of the Huepar LM120A rangefinder
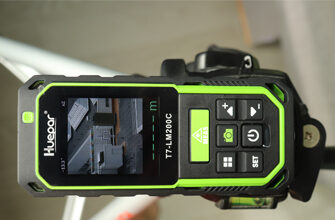
The Huepar LM120A is a cheap laser distance meter with a range of up to 120 meters indoors. Of course it is not realistic to measure this distance outdoors, but you need a distance meter with a video camera and a spotting scope like the Huepar T7-LM200C.
The Huepar LM120A laser distance meter has passed all necessary certifications: CE, RoHS, FDA, FC.
If you compare the LM120A with the budget model Huepar S60, I would personally choose the latter because it has a number of advantages, such as a removable battery, updated calculation algorithm, two-axis built-in tilt sensor and more. For more, check out his review or the comparison video below.
The only thing the S60 doesn’t have, but the Huepar LM120A does, is the “painter” function and the timer. By the way, how to turn on the timer in the manual is not written, but in this review you will learn everything.
Where to buy laser measure profitably and reliably?

Technical Data
-
Measuring range: 0.05-120m (0.16-394ft.)
-
Accuracy: ±2mm (±1/16inch)
-
Units: m/in/ft/’ “
-
Calibration option: yes
-
Additional measurements: 7 options.
-
Built-in memory: 30 cells
-
Angle measurement range: ±90°
-
Number of reference points: 3 (up/down/stand)
-
Laser inoperative switch-off: 20 seconds
-
Rangefinder auto off: 150 seconds
-
Power source: Built-in Li-ion 3.7V 850 mAh
-
Number of measurements per battery charge: 8,000 pcs.
-
Tripod thread: 1/4″-20
-
Protection against dust and moisture: IP54
-
Laser class: II, 635nm, <1mW
-
Display: 5 lines
-
Dimensions and weight: 112x50x25mm/110 grams
-
Operating temperature: 0°C…+40°C (32°F…+104°F)
-
Storage temperature: -20°C…+60°C (4°F…+140°F)
Build quality
The housing of the Huepar LM120A laser distance meter is very similar to that of the SNDWAY H-D510A rangefinder, which also has a non-removable built-in battery. And as it turns out, they have identical functionality.
The only difference is that Huepar LM120A has a 1/4″ thread for a tripod mount, which is actually a big plus.

If we talk about the quality of assembly and materials, both rangefinders are very neatly assembled, and good plastic is used.
The keyboard of both is presented in the form of a monolithic rubber cover, which, by the way, likes to attract fine dust.

Another disadvantage of this keyboard is the small buttons, which are not always convenient to press when wearing gloves. But this is all a trifle.
On the side of the case under the rubber cover there is a micro-USB port for charging the Huepar LM120A laser rangefinder.

In the front, as always, there is a hole through which the laser beam passes, and next to it is a bigger window, the receiver of the return laser beam.

Functionality of each button
The keyboard of the Huepar LM120A laser distance meter contains 7 buttons, but the functions tied to these buttons, as you understand, are of course more.
Let’s go through all the buttons and take a look at all the functions and other features, including rangefinder calibration.
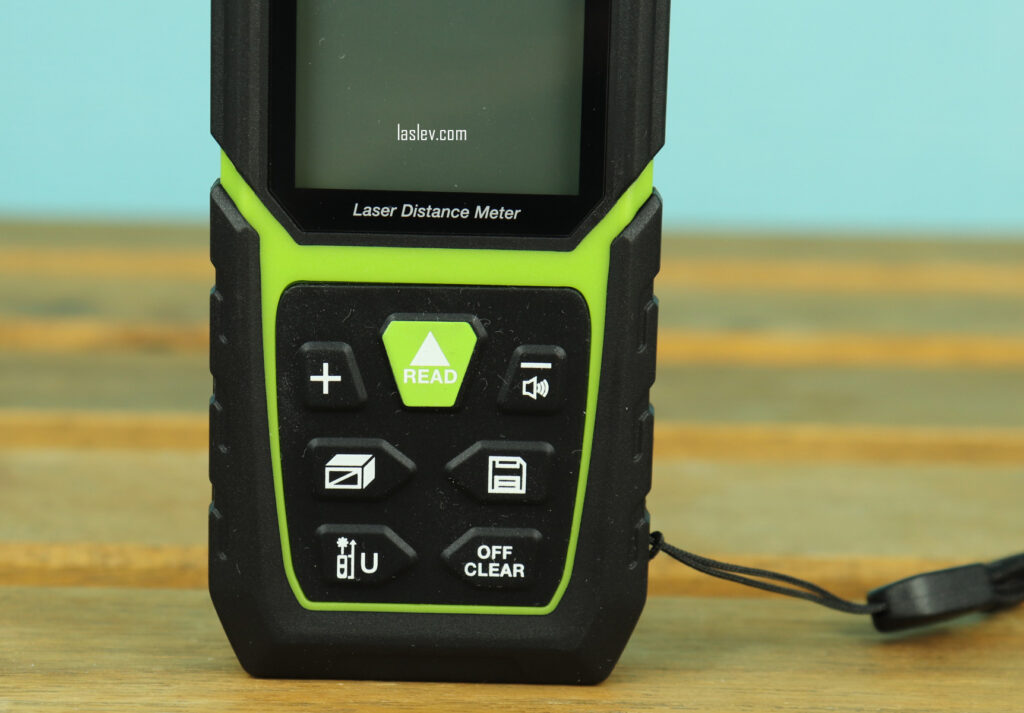
Button #1 “READ”
The first thing this button does is turn on the rangefinder. When it is on, pressing this button takes a measurement.
There is another function which is activated by pressing this button for 2 seconds, it is the “min/max” function. The Meter switches to the tracking mode (constant measurement).
It is very convenient to find out the shortest and longest distances, e.g. perpendiculars and diagonals.
Let’s say you want to calculate the shortest distance to a wall (perpendicular). You activate this function and start scanning the area on the wall where the perpendicular line supposedly runs (move the point up and down the wall). Then you measure in any place, after which the screen will display three values: the maximum value (max) above, the minimum value (min) below – it will be the perpendicular, and the third in the final line – the measurement itself.

If you calculate the diagonal from corner to corner of the room, then look at the maximum value, respectively.
Button #2 “+”
It is responsible for adding the results. You can add both simple rectilinear measurements and volumes and areas.
This nuance, when adding simple segments – the sum is automatically displayed in the final line without additional confirmations. But if you add areas or volumes, you need to press the “READ” button one more time, so that the sum of areas or volumes appears in the summary line.
Also, you can add “S” or “V” as well as subtract. But if there are more than two actions, for example S1+ S2- S3+ S4- S5 = S, then do it all in one session before confirmation.
Button #3 “-“
A long press turns on or off the action sound, and a short press subtracts the values.
Button #4 “cube”
There are 7 additional functions tied to this button, including several indirect calculations on Pythagoras’ theorems. And so, let’s take a closer look at them.
1st push. Quick calculation of the area by two sides. You measure the length and width of the room (or other) in the final line displays the area in meters square. The whole action takes literally 5 seconds, very fast and convenient.

2nd push. Calculation of volume. You measure the length, width and height of something, everything, in the final line displays the volume in the selected units, if it is meters, then in cubic meters, respectively.

3rd push. The “painter” function is a very convenient and fast way to calculate the area of a large number of walls. You first measure the height of the room only once, and then measure the lengths of all the walls one by one, and it will automatically display the sum of all the areas in the final line. In the formula it will look like this: h * (a + b + c + d…) = total S m2. You can see how this function works in the video below.

4th push. Calculation of the distance through the obstacle with a single measurement through the hypotenuse and the angle.
But here in my copy it turned out not very nice moment, I found out that the built-in inclinometer gives wrong values, why the results on the screen are not quite correct.
Above the length of the hypotenuse, below the angle of inclination, then the height of the short cathetus, and in the final line the horizontal length (the second cathetus)

Later I found out that if you turn the Meter on its side and change its tilt in this state, the angle on the screen is already displayed correctly, and, accordingly, the calculations are also made correctly.

It feels like my distance meter has the tilt sensor installed on the other side.
5th press. Quick calculation of the diagonal, both vertically and horizontally. For example, you measure the length and width of the room, in the final line you get the length of the diagonal.

6th press. Calculate the length of the inaccessible section using three measurements.
For a more accurate calculation, it is better to measure from a tripod.
First measure to the upper point of the segment, then to the lower point, and the third measure as accurately as possible at 90 degrees. This will also determine the accuracy of the calculation.
The final line will show the length of the segment.

7th press. The function will help you calculate the height of a pole or other object using three measurements. The first measurement is made to the top point of the pole, the second is strictly under 90 degrees (this will determine the accuracy of the measurement), and the third measurement is made to the bottom point of the pole. In the main line you will see the height of the entire post.
The use of a tripod is required for less error. The measurement must be taken from a single point.

Button #5 “floppy disk”
Recording the measurement result to the internal memory of the device. There are a total of 30 memory locations available for recording.
While the Huepar S60 laser distance meter records all results automatically (also 30 locations), the Huepar LM120A laser distance meter requires manual recording. You have taken a measurement, if you want to remember this result, press the button for 2 seconds, and only then will the result of the measurement be stored in the rangefinder memory.
Button #6 “U”
A short press changes the reference point: from the lower edge of the rangefinder (default), from the upper edge, and from the thread (from the tripod).
A long press changes the units: m/in/ft/’ “.
Button #7 “OFF/CLEAR”
Drops the result lines alternately on the screen or returns to the start screen, where the values are zero. And when pressed for a long time, it disables the rangefinder.
How to turn on the timer on the distance meter
It is not mentioned anywhere in the manual, but on the Huepar LM120A laser distance meter you can turn on the timer for delayed measurement. To do this, press the “#4 with cube” button for a few seconds and then you will get to the timer screen.

The timer can be activated at any measurement. The only thing, if you turn it on for indirect calculations, then the report starts automatically from 5 seconds.
If it is activated for simple linear measurements, it can be set with the “+” and “-“ buttons from 3 to 60 seconds.
Checking stability and accuracy of measurements
The test showed that the Huepar LM120A laser distance meter reads very fast and stable. For simple linear measurements, the accuracy is fully within the stated specifications.
Out of 10 measurements from the same location, all 10 showed the same result. Conclusion – an excellent stability!

Even if your Meter does not work correctly to within -9 to +9 millimeters, you do not need to discourage, because you can easily calibrate it by yourself in 5 seconds. Let’s see below how to do it.
How to calibrate the Huepar LM120A distance meter
The algorithm for adjusting the accuracy is as follows:
- Turn off the Meter.
- Press and hold the “READ” and “OFF/CLEAR” buttons simultaneously until the calibration menu appears.
- Use the “+” and “-“ buttons to set the desired correction in millimeters between -9 and +9mm.
- After setting the correction, press the “READ” button to set the new settings.
Here are four simple steps to calibrate the accuracy of the Huepar LM120A laser distance meter.

Possible laser rangefinder errors
The following errors may occasionally appear on the rangefinder screen when measurements are not correct. (see table)
| Error | Reason | Solution |
|---|---|---|
| Err | Measured outside the stated range | Measure within the permissible measuring range |
| Err1 | The reflective signal is too weak | Choose a surface with a higher reflection coefficient. Use a reflective plate |
| Err2 | The reflective signal is too strong | Change the measuring surface or use a special reflective plate |
| Err3 | Low battery voltage | Charge the battery |
| Err4 | Ambient temperature exceeds the stated operating range | Use the device at the specified temperature |
| Err5 | Pythagoras measurement error | Make sure that the hypotenuse is longer than the cathetus |
| Err6 | Angle sensor mistake | Contact the service center |
Package Contents
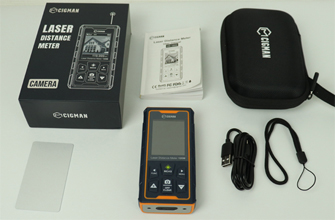
The Huepar LM120A laser distance meter is shipped in a branded cardboard box, which includes:
- distance meter
- reflective plate
- protective case
- hand strap
- charging wire
- multilingual manual

Pros and cons
Inexpensive, good build quality, high measurement speed, good functionality, there is a timer, tilt sensor, large screen, excellent measurement stability, there is a thread for attaching to a tripod, easy to set the accuracy.
The keyboard cover attracts dust, small buttons, non-removable battery. In my copy, the angle meter is not correct.
