- Where to buy laser measure profitably and reliably?
- Technical specifications
- The build quality of the housing
- All functions of the Sndway SW-S120 laser measure
- Control buttons
- Button 1
- Buttons 2 and 4
- Button 3
- Button 5
- Calculating the area
- Calculating the volume
- Calculating the distance through an obstacle
- Indirect height calculation
- Calculation of the segment under the slope and diagonals
- Calculate the height by means of three measurements
- Calculating the length of an inaccessible segment
- Calculating the area of a triangle
- Button 6 laser measure Sndway SW-S120
- Button 7
- Button 8
- Button 9
- Button 10
- How do I calibrate the laser measure Sndway SW-S120?
- Possible errors of the SW-S120 rangefinder
- Connecting laser measure to a computer and working with the program
- Contents of delivery
- Pros and cons
- Video review of laser distance meter Sndway SW-S120
- Video tests for stability and accuracy of measurements
Today, it is one of the best low-cost laser measure from China with a built-in video camera and digital level. In addition to the wide functionality and the ability to connect to a computer, the Sndway SW-S120 has a price much lower than that of the more famous Leica DISTO X4 rangefinder.
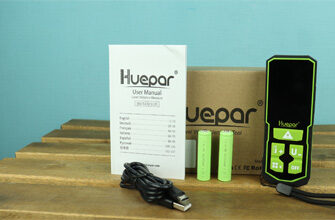
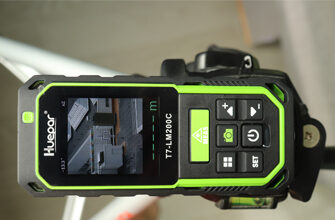
But it is also worth highlighting a very high-quality main competitor, at an excellent price. This is the model T7-LM90C laser distance meter. The measuring range is 90 meters, but there is a Huepar T7-LM200C, which measures the distance up to 200 meters.
All of these laser rangefinders are great for outdoor work in daylight or sunlight.
The Sndway SW-S120 laser distance meter, in addition to simple measurements up to 120 meters, has a huge functionality, as well as the ability to independently calibrate the rangefinder. All this will be discussed in detail in this review. The buttons below lead to the best offers of this model.
Where to buy laser measure profitably and reliably?

Technical specifications
- Accuracy: ± 2mm
- Measurement range: 0.05 – 120 meters
- Measurement units: meters / feet / inches
- Video camera (vizier): yes
- Reclining heel: yes
- Charging: yes
- Computer connection: yes
- Digital level: yes
- Tripod mount: 1/4 inch
- Number of reference points: 4
- Memory: 100 measurements
- Timer: yes
- MIN / MAX (tracking): yes
- Calibration: yes
- Power supply: Ni-mh 3×1.2V 800 mAh (included) or AAA batteries x 3pcs
- Size: 125x54x27 mm
- Weight with batteries: 155 gr
- Storage temperature: -20°С to + 60°С
- Working temperature: 0°С to + 40°С
- Addition / subtraction / area / volume / Pythagoras: yes
The build quality of the housing
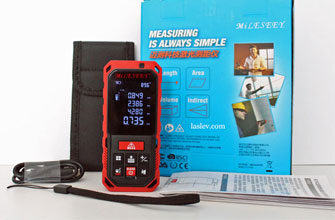
The assembly of the Sndway SW-S120 laser distance meter housing deserves high praise. All parts are connected with high accuracy, hence the not small degree of protection against moisture and dust IP54 according to the international classifier. Only the MileSeey S2 laser measure has higher protection, but it does not have a camera.
In the lower part of the rangefinder there is a folding heel, which is used for making measurements from corners and crevices.
The only thing is that when you open the heel, there is no automatic switching. You need to manually switch the countdown from the heel, but this small drawback can be forgiven.

At the top, the technically important elements of the rangefinder are neatly arranged, namely the reverse radiation receiver, the laser emitter itself, and the video camera.

Behind the Sndway SW-S120 laser distance meter is a battery compartment (for three accumulators or three AAA batteries) and a metal sleeve with a 1/4″ thread for mounting on a photo/video tripod.
Mounting the device on a tripod is simply necessary when measuring over long distances.

Overall, the design of the SW-S120 laser measure is very pleasant and ergonomic. The large color LCD display also adds to the solidity of this model.
The buttons are made in such a way that it is convenient to press them with gloves. But the material from which the buttons are made is very controversial, and this is probably the only negative in this rangefinder.

The buttons are made of some soft material that just attracts dust. Therefore, various fine dust-like dirt quickly sticks to them. But I must say that it is easily cleaned with a damp cloth.
This is another drawback. Otherwise, for the money, this is a very cool laser rangefinder, as you will no doubt see after reading the review to the end.
All functions of the Sndway SW-S120 laser measure
The SNDWAY SW-S120 laser rangefinder has quite a few specific functions and capabilities, so it would be nice to have a detailed instruction manual.
I would like to start with the fact that the built-in inclinometer works constantly at any measurements, which is not always found in other laser measures.
In fact, this is very convenient, especially for indirect measurements by the Pythagorean theorems. When the accuracy of the measurement depends on one of the measurements, which should be made at the maximum right angle.

The SNDWAY SW-S120 laser tape measure allows you to work comfortably not only indoors, but also outdoors in daylight or sunlight.
It is only necessary to turn on the video camera, and the screen will display an image of what is happening with a sight in the center of the screen.
With this crosshair, you go to the object to which you want to make a measurement, and just make it.
It should be noted that the image quality is good, and it perfectly helps to make measurements on the street at all 120-meter distances.

In addition, the SW-S120 rangefinder can be connected to a computer via a USB cable and a special program. In it, you can organize all your calculations or make single measurements directly from your computer. For more information about the program, see below.
Also, when you connect the USB cable to the computer, the accumulators installed in the rangefinder will be charged. And if you pick up a USB plug (it is not included), then the rangefinder can be charged from the electrical network.
Do not charge the device with simple batteries!
Control buttons

Button 1
Responsible for turning on the rangefinder and single measurements. Also, pressing this button for 2 seconds – activates the MIN/MAX function. This is a very convenient function when measuring perpendiculars and diagonals.
For example: you need to find the shortest distance to the object (perpendicular). Select the min/max function and start scanning the approximate area where this perpendicular can pass.
At this point, the rangefinder performs constant measurements (tracking). Then you take a measurement in the neutral zone. And the screen displays three values: the measurement itself, min-value and max-value. In this case, the min-value will be the perpendicular.

Buttons 2 and 4
Navigation buttons on the device menu. They move the cursor up/down. The second function of these buttons is addition and subtraction. Moreover, you can add or subtract not only distances, but also areas and volumes.

Button 3
This key brings up the rangefinder menu, where you can configure:
- Display backlight time
- Laser shutdown time inactive
- Time of full automatic shutdown of the laser measure inactive
- Enabling / disabling the sound during measurements
- Setting up measurement units: meters / feet / inches and others
- Setting the inclinometer measurement units: in degrees or as a percentage
- Self-calibration of the laser distance meter ( see the review below for how to do this )

The second purpose of this button is “equal” (=). It is used when you subtract areas from each other or volumes.
Button 5
The most functional button. To select the desired one from the eight additional calculations, you need to press it sequentially.
Calculating the area
The 1st press brings up the function of quick calculation of the area on two sides.

Calculating the volume
The 2nd press activates the mode of quick calculation of the volume on three sides: length, width, height.

Calculating the distance through an obstacle
The 3rd press brings up one of the most interesting functions. This is the calculation of the distance through the obstacle. Using the known angle and length of the hypotenuse. The length of both cathets is calculated using trigonometric formulas.
This calculation is done very quickly. In a second, you get data with fairly high accuracy.
The measurement is made with just one click, after which the data on all values is displayed on the screen.

Indirect height calculation
4th press: indirect height calculation function. From one point, the hypotenuse is measured, and the second is measured by the lower cathet.
Important! the second measurement should be made at a maximum angle of 90 degrees.
Here, a constantly working tilt sensor is very convenient, which will show at what angle the measurement is currently taking place.
In general, all these indirect calculations are very understandable, since everything is very clearly shown on the rangefinder screen.
At the top, a general drawing of the calculation (function) is shown. The green color shows which segment in this function is calculated. Below on the left shows what measurements and what segments you need to make. The order of measurements is observed from top to bottom, and so for all indirect calculations.

Calculation of the segment under the slope and diagonals
The 5th click causes an equally interesting calculation. It is rare, and mostly only in expensive rangefinders. This is about the same as the previous function, only it is not the cathet that is calculated, but the hypotenuse itself.
The function is suitable for calculating inaccessible sloped segments and any vertical or horizontal diagonals. Agree it is convenient.

Calculate the height by means of three measurements
The 6th press enables the function of calculating the inaccessible height using three measurements. For example, you need to know the height of a post or tree. Select this function and make measurements in the specified order, as shown on the screen from top to bottom.
Again, in the second measurement, you need to set the rangefinder as accurately as possible at 90 degrees to the measured plane, so that the result is obtained as accurately as possible. It is also recommended to take this measurement from a tripod. This will minimize the error as much as possible.

Calculating the length of an inaccessible segment
The 7th press also activates a rare function in rangefinders for such money. This is the calculation of the length of an inaccessible segment.
For a simple understanding of this calculation, I will give an example: let’s say you need to calculate the distance between the 3rd and 4th floor. You just select this function and stand on the ground with a tripod to make this measurement and that’s it!
And in this calculation, at the last measurement, the measurement should take place at a right angle. Therefore, a constantly switched on inclinometer will again help to make a measurement with maximum accuracy.

Calculating the area of a triangle
The 8th click opens the calculation of the area of the triangle. And this function is also found only in expensive advanced models of laser distance meter.
You need to measure the three sides of the triangle in turn. The resulting line will display the area of this triangle in square meters. Very convenient, isn’t it?

These are all the functions that are associated with this button.
Button 6 laser measure Sndway SW-S120
The first short press turns on the digital level, which has a good response without lagging.

If you hold this button for two seconds, the function of breaking the distance into certain segments is activated. Their length is set by buttons 2 and 4.
You can specify two different lengths. The distance or approach to the specified value is shown on the screen by arrows and the remainder of the distance to the specified point.

Button 7
Turns on and off the video camera with a scope, for working with the Laser distance meter Sndway SW-S120 on the street in daylight or sunlight.
The thing is that the laser point in the daytime on the street will not be visible at 15-20 meters, but with such a digital vizier, this problem is very easy to solve.

Button 8
The image on the button speaks for itself. Short-term clicks will change the starting point. By default, it stands from the end of the laser distance meter Sndway SW-S120 housing.
You can set the count: from the end of the folding pin, from the beginning of the device, and from the center of the thread for mounting on a tripod. This results in 4 reference points.
All switches are displayed on the screen in the upper-left corner, you will always know from which point of the housing there is a counting.
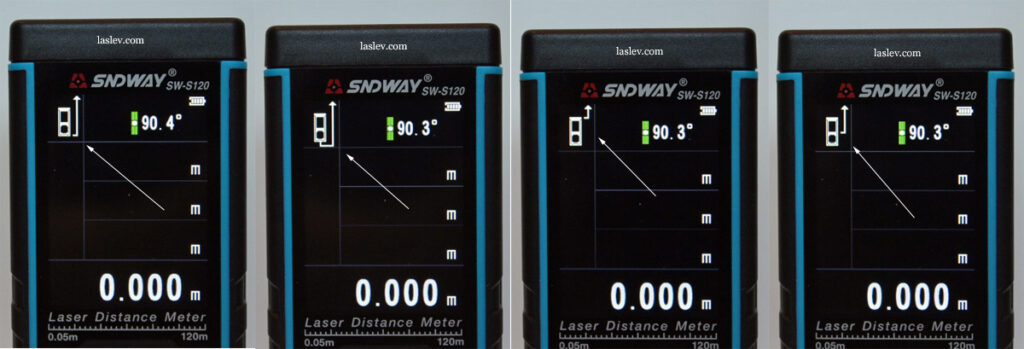
If you hold this button down for a couple of seconds, a timer will start to delay the measurement time from 3 to 60 seconds.
This is very convenient if you need to make a measurement in a space where there are no obstacles. For example, it can be a field or a large hangar. When there is no partner who would hold the reflecting plate on the point.
Laser measure Sndway SW-S120 is placed on a tripod. Next, a timer is set for the time for which you will have time to move to the desired point with the plate on which you need to make a measurement.

Button 9
OFF/CLEAR – when pressed briefly, it erases the results one by one. If you hold the button – the device turns off completely.
Button 10
This key writes the measurements that need to be saved to the internal memory of the device. The memory is designed to write a hundred cells, which is more than enough.
In order to record a certain result in the rangefinder’s memory, you need to press and hold this button for about 2 seconds after taking the measurement. A beep sounds and the floppy disk icon at the top of the screen flashes quickly.
If this is not done, the recording will not occur.

You can view the recorded values by briefly clicking on the same button. And if you want to delete the cells, then you need to press the OFF/CLEAR button in the view mode.
You can also upload all the saved results to your computer for further processing.
How do I calibrate the laser measure Sndway SW-S120?
To enable the calibration menu, you need to perform some manipulations with the device. And so, let’s look at the whole process step by step.
- Turn off the laser distance meter.
- Press and hold the 10 button with the floppy disk. Next, while holding down the button 10, briefly press the “READ” button, then release the button 10. Wait for the rangefinder to enter the main interface.
- Briefly press the “MENU” button and select “calibration”. You can calibrate the laser measure within the following values: – 0.009m to +0.009m.
Possible errors of the SW-S120 rangefinder
Sometimes, with some measurements, various errors may appear on the screen. They are indicated by a certain number. The most common errors and ways to solve them are listed in the table below.
| Error code | Reason | Possible solution |
| Err1 | The signal is too weak | Take a measurement on a surface with better reflectivity |
| Err2 | The signal is too strong | Aim the beam at a target with a lower reflectivity |
| Err3 | The battery charge is too low | Install new batteries |
| Err4 | Exceeding the operating temperature range | Take measurements at a suitable temperature |
| Err5 | Incorrect measurement or error in the Pythagorean equations | Take the measurement again. Make sure that the hypotenuse is longer than the second known side of the triangle. |
| Err6 | Memory error | You need to contact the service center |
| Err8 | The measurement error of the slope | Contact the service center |
Connecting laser measure to a computer and working with the program
Laser distance meter SNDWAY SW-S120 is able to download all the data on the saved measurements. To do this, you need to install a special program on your computer, which is included in the package.
After a simple installation procedure, you should have this interface.

Next, connect the device via a USB cable. After that, a picture of the rangefinder appears in the program window and the keys are activated, except for “Export to Excel” and “Print”. These buttons will light up as soon as the data is uploaded to the program.

Next, click the “Export Records” button to download all the saved measurement data. All data is placed in the corresponding cells.

After uploading the data, for convenience, you can change the columns and enter your own measurement names. For example, as in the screenshot below.

After that, we simply print out the calculation of the object, or export it to Excel for further calculations or send it by email.
It should be noted that all measurements are described in detail. That is, not only the final result “S” or “V” is written, but also all the intermediate measurements are written: length, width, height. Agree, it is convenient.
The “Read” and “Clear” buttons in the program interface allow you to make a single measurement directly from the computer. I do not know how long it may be necessary, but nevertheless there is such a possibility.
A simple but very convenient program.
Contents of delivery
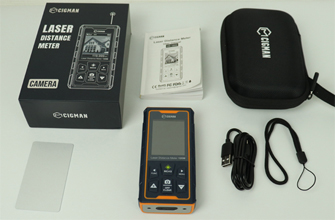
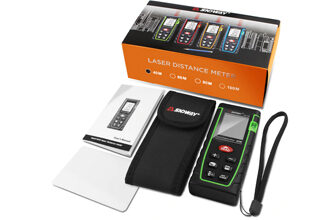
- branded box,
- high-quality thick case with strap attachment,
- software disk,
- USB cable,
- 11x7cm reflective plate,
- hand strap,
- manual in English.

Pros and cons
Inexpensive, incliner, measuring up to 120 meters, built-in camera, battery with charging option, connect to computer, folding pin, it is fixed on a tripod, 4-point, digital level, the presence of a large number of indirect calculations including rare, memory for 100 cells, user-friendly menu, calibration, timer, color interactive display, high speed measurements.
Soft buttons, no automatic switching to the flip pin.

just wondering if there is a user manual on line for the sw-s120 as one did not come in the box. I am trying to use the unit to add and subtract measurements in one process.?
Kevin, all the instructions are in fact in the review (all the possibilities are disclosed). In one action, you can add and subtract the results from each other. For example: 1 measurement of the area + the second measurement of the area – the third measurement of the area + the next and so on. The same can be done with volumes or simple linear calculations.
How long have you been using the SW-S120? I am upbeat about the 120m range in daylight, but skeptical about how long the device will last. I bought a green laser Sndway S100G just 10 months ago, and it has failed. The postal cost to and fro for repair will be too expensive, besides, the “100m” meter could not measure anything beyond 40m in daylight. I found out this is because the reflection of green laser light is too jumbled in sunlight to be decoded. Red lasers are supposed to carry data further, which is why I would like to buy the SW-S120.
Hi! I had it a long time ago. I used it for about 2 years, then gave it to a friend, it still works for him.
Hi Sergei,
The video camera no longer works on the sndway sw-s12o any ideas?
Hi, Kevin. It’s hard to tell, you have to open up the laser distance meter and look at it. I think anyone who does radio electronics can help you figure it out. Maybe there is such a person among your acquaintances.
“Connecting laser measure to a computer and working with the program”
What operating systems are supported ?
I connected it to a Windows laptop. I haven’t tested the others.