- Where to buy laser measure profitably and reliably?
- Technical specifications
- CIGMAN CD-120G laser distance meter housing
- Display
- Video Camera
- Functionality and breakdown of each button
- Standard and indirect calculations
- Distance measurement
- Area calculation
- Volume calculation
- Painter function
- Remote area measurement with camera
- Calculating the inaccessible distance with a single measurement
- Height measurement from 2 measurements
- Diagonal calculation
- Inaccessible height measurement with 3 measurements
- Measuring an inaccessible segment using 3 measurements
- Area of a triangle
- Calculating the area of a trapezoid
- Height of “hill”
- Calculating the length of an inclined segment
- Height measurement through angles
- P2P function
- Postponement of segments
- Two-axis spatial digital level
- The area of the circle
- Cylinder volume
- Digital Roulette
- Checking the stability and accuracy of measurements
- How to calibrate the CIGMAN CD-120G
- Possible laser distance meter errors
- Supply package
- Pros and cons
The new powerful CIGMAN CD-120G laser rangefinder with digital sighting, unique features and unprecedented IP68 dust and moisture protection, which ensures complete dustproofness and protection against prolonged immersion in water.
The CIGMAN CD-120G Laser Distance Measure is on a par with such advanced rangefinders as the Leica DISTO D810 touch and the Leica S910, but at a much lower price.
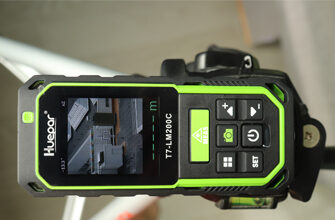
If we talk about the same price segment, the closest competitor will be Huepar T7-LM200C Laser Distance Measure, they are very similar in functionality, but in quality, in tactile sensations personally I liked Sigman more, although the first one is also very cool.
The device is equipped with a bright green laser, a video camera with 4x zoom and a high-precision 360° dual-axis tilt sensor, which allows you to make accurate measurements outdoors in bright daylight, and use P2P measurement technology – remote calculation of the distance between any two points! You can count on your fingers the number of rangefinders that have this feature in their arsenal.
The high quality of the device is also confirmed by the large number of certifications passed: CE, RoHS, FDA, FC.
All-round rotatable IPS display, measuring the area of a distant object, curve calculation – there’s a lot more to it than just that, but we’ll go through it all in order in the review below.
Where to buy laser measure profitably and reliably?
By the way, I have a special promo code for you for a discount from the official seller – 15% off code: laslev15

Technical specifications
- Measuring range: 0.05 – 120 meters
- Accuracy: ± (2mm+d *1/10000), where d is the length of the measured distance.
- Laser type and class: 500-800 nm, Class II <1 mW
- Display: 2.4-inch color IPS screen
- Auto screen rotation: yes (all directions)
- Additional measurements: 22 options
- Built-in memory: 100 cells
- Inclinometer measurement range: ±90°
- Tilt sensor accuracy: ±1°
- Number of reference points: 3 pcs. (top/bottom/tripod)
- Units: meters, feet, inches
- Sound and vibration when measuring: Yes (switchable)
- Rangefinder auto shut-off: Yes (customizable)
- Laser Auto Power Off: Yes (customizable)
- Power Supply: 3.7V 2000 mAh Li-ion
- Charging Port: DC5V 1A Type-C
- Tripod thread: 1/4”
- Dust & Moisture Protection: IP68
- Video Camera: Yes
- Camera Magnification: 1X/2X/4X
- Timer: Yes
- Two-axis digital level: yes
- Dimensions and weight: 128x60x29.5 mm/194 grams
- Operating temperature: 0°C…+40°C
- Storage temperature and humidity: -20°C…+60°C, 20%-80% RH
CIGMAN CD-120G laser distance meter housing
The body of the rangefinder is made of high quality ABS plastic, which is almost all covered with dense, pleasant to the touch rubber.
There are metal inserts on the sides, which fit very organically into the overall design of the device and look very cool.

The membrane keyboard has 6 buttons with a crisp, firm press and excellent response. The keys are large enough to work comfortably with gloves.

Neatly mounted on the back of the case is a brass bushing with a 1/4” thread for mounting the rangefinder on a tripod.

On the bottom is a USB Type-C socket for charging the lithium-ion battery. The corresponding wire is included, but without a plug.

At the top are the windows of the emitter, the receiver of the back-reflected laser beam from the object, and the aperture of the video camera.

Display
The CIGMAN CD-120G Laser Distance Measure is equipped with a modern 2.4-inch color IPS display, from which the readings are perfectly readable in any light. In the settings you can change the brightness of the screen, which is also not superfluous.
Another feature of this screen is that no matter how you rotate the rangefinder, the screen will adjust for a more comfortable reading.


Video Camera
Laser rangefinder CIGMAN CD-120G is perfect for working outdoors in clear weather, because it has a built-in video camera with 4x zoom and crosshairs in the center.
That is, you do not need to see the laser dot, and in principle you will not see it in sunny weather and at 15 meters. You just aim at the target with the crosshairs on the screen and take a measurement. It’s simple.

Functionality and breakdown of each button
The different functions and settings here are really a lot, let’s go through each button and the rest of the sections in order.

“MEAS” button – switches the rangefinder on when pressed. It is also used for measuring. If the button is pressed for a couple of seconds when the device is on, the “min-max” function is activated. Also this button is used in navigation, as a button to confirm the selection.
“FUNC” button calls the menu of various additional indirect calculations, we will consider them later. It is also a navigation key.
“MENU” button accordingly calls me different settings of the CIGMAN CD-120G rangefinder and is also a navigation key .
“+” and “-” keys are responsible for adding or subtracting the measurement results. And again they are involved in navigating through both menus.
And the “OFF/CLEAR” button has three meanings. When pressed, it turns the rangefinder off. It clears the screen from previous measurements and turns the camera on when pressed briefly.
By the way, you can turn on the camera during any indirect calculation by first selecting the measurement option and then pressing the camera button.
And so, let’s first open the settings menu by pressing the “MENU” button.
Here we are offered the following settings:
1 – Selecting the reference point. There are three: from the front of the rangefinder, from the back, and from the tripod mount threads.

To make a selection, press the “MEAS” button, then the line on the right becomes gray. Then, use the “+” and “-” navigation keys to select the desired item and confirm your selection by pressing the “MEAS” button so that the check mark is on the desired item.
Press the “OFF/CLEAR” button to exit to the left menu to move to other settings.
Attention! Remember this algorithm, it will be valid everywhere in this menu.
2 – UNIT – selection of units of measurement and their rounding.

3 – UNIT Angle – selects whether to display the angle on the display in degrees or percent.

4 – Speaker – enable/disable sound during measurement.

5 – Vibration – enable/disable vibration during measurement.

6 – Brightness – selection of display brightness in 4 options.

7 – Timer – selection of time delay during measurement, several options to choose from.

8 – Disable screen backlight when idle.

9 – Disable laser when idle.

10 – Disabling the rangefinder completely when idle.

11 – Calibration – here it is very easy to make corrections if the rangefinder does not measure accurately.

12 – Memory – 100 last measurements are stored here. What is convenient is that all measurements are marked with icons of functions through which they were made.

13 – Reset to factory settings. Everything is clear here.

Here are all the settings tied to the “MENU” button.
Now let’s see what else this rangefinder can do with the “FUNC” button, this is the most interesting part. Here you can find all the additional indirect calculations.
And they are presented very conveniently, each function has its own detailed picture. On which green lines show where to make measurements, and black lines are the distance that will be calculated and displayed in the final line.
Standard and indirect calculations
So, with a brief click we open the icons, there are 21 of them, let’s analyze each one in order.
Distance measurement
Here everything is simple, point the laser point at an object, press the “MEAS” button and the screen displays the distance to it in the selected units. The values can be added or subtracted from each other.

Area calculation
You measure the length and width and the area in meters square is displayed on the screen in the final line. In addition, the perimeter of the area is shown in the 3rd line. You can also add or subtract areas from each other.

Volume calculation
Measure the length, width and height of something and get the volume in meters cubed. Volumes can be added or subtracted from each other.

Painter function
This is a quick sequential calculation of wall area. First you measure the height, then alternately the length of all available walls – the total area will be incremented in the main line.
When you have completed three measurements, press the “MEAS” button again and the 3rd line will be cleared for a new measurement of the length of the next wall.

Remote area measurement with camera
A very interesting function. It is better to perform measurements from a tripod.
Algorithm of measurement is as follows: when activating the function, you place the object in the crosshairs, then press the “MEAS” button once, making some kind of fixation. Then you bring the red arrow by buttons “+” and “-” to the edge of the measured object. Then by buttons “FUNC” and “MENU” you switch to other arrows, and also bring them, by buttons “+” and “-”, to the edges of the measured area of something. After that, when the object is “captured” you make a measurement by pressing the “MEAS” button – the area in meters square will be displayed in the final line.

Calculating the inaccessible distance with a single measurement
You measure from a tripod! You measure the hypotenuse of an imaginary triangle. Using the known length of the hypotenuse (A) and the known angle (a), you calculate the two cathetuses (C) and (B).

Height measurement from 2 measurements
It is done from one point: you measure the hypotenuse (A) and the lower cathetus (B), the length of the cathetus (C) is shown in the final line.
Important! For an accurate measurement, the cathetus (B) is measured at right angles to the cathetus (C)

Diagonal calculation
Here everything is simple from one corner measure the cathetes (B) and (C), in the final line get the length of the hypotenuse, it will be the diagonal in a rectangular or square room.

Inaccessible height measurement with 3 measurements
For accurate measurement, the calculation is done from a tripod. You measure the distance (A), then strictly at right angles bisect the length (B), and measure the length (C).
The value (D) will appear on the final line

Measuring an inaccessible segment using 3 measurements
It is taken from a single point. The last length measurement (C) is taken at right angles to minimize the error. The measurements are made in order (A)…(B)…(C). In the final line we get the length of the segment (D).

Area of a triangle
We measure all sides of the triangle one by one, and get its area in meters square. All of this is easily done with the Laser Distance Measure CIGMAN-CD-120G

Calculating the area of a trapezoid
Just two measurements of lengths (A) and (B) and the area of the trapezoid is on your screen.

Height of “hill”
Use this function to calculate the height of a hill or some large pile. It is again performed from a tripod.
Make the first measurement to the reference point REF – the rangefinder should switch to continuous measurement mode, (if this does not happen, try after the first measurement quickly, immediately press again the button “MEAS” I had it exactly so) then scan the “hill” up to the top point and make a measurement. In the final line the height is displayed.

Calculating the length of an inclined segment
This is another rare feature that is only found on expensive rangefinder models. For accurate results it is recommended to measure with a tripod.
Only two measurements are enough, namely to the upper and lower edge of the calculated slope segment and its length is displayed on the screen in the final line.
The height of the imaginary triangle is also displayed in the third line.

Height measurement through angles
With this function you can measure the height of trees. First measure the side (B) – the length of the side (B) and the angle value (b) will be displayed, then press the “MEAS” button again and the rangefinder will go into continuous measurement – scan the height of the tree up to the top point and measure. The height will be displayed in the final line.

P2P function
This is one of the coolest features found only in expensive professional rangefinders, the CIGMAN CD-120G is no exception.
It allows you to calculate the distance between any two points in space.
It is done exclusively from a tripod. The device must be fixed, as it performs a special calibration before starting measurements.
Otherwise, everything is simple – after successful adjustment, you take two measurements at one and another point, and the length of the segment is displayed on the screen.

Postponement of segments
Use the “+” and “-” buttons to set the segment value (a) then (b) and confirm with the “MEAS” button and press it again. Continuous measurement is switched on. Move the rangefinder on the plane, when approaching the set value, the corresponding arrows will be shown on the screen with increasing signal.

Two-axis spatial digital level
It’s as simple as that. Select this function and use the rangefinder as a fairly accurate digital level.

The area of the circle
Using one diameter measurement, we calculate the area of the circle.

Cylinder volume
Measure the diameter and height of the cylinder and get its volume in the final line. Quick and convenient!

Digital Roulette
I don’t know how convenient it is, but there is such a function too. Personally, it raises only two questions for me: why and what for?
The thing is that when it is activated the rangefinder constantly measures, from what the red line on the screen periodically jumps by 1-3 millimeters, from what I put this function under doubt. Although it may be convenient in some situations.

Checking the stability and accuracy of measurements
The CIGMAN CD-120G Laser Distance Measure is characterized by high measurement stability. If you make a lot of identical measurements from the same point, the readings do not jump at all, but on the contrary, the same clear values are given.

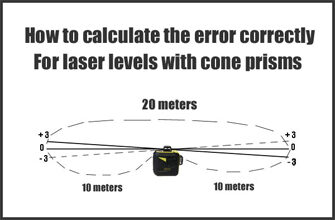
Rangefinders are quite accurate devices, and as a rule always meet the stated accuracy. But it is always necessary to remember and know that the error of such devices is directly proportional to the range of measurement.
In other words, the error can increase with the increase of the measured distance. This is logical, it is a physical aspect and we cannot influence it. All serious rangefinder manufacturers specify an extended error formula. So this model has a declared accuracy of ± (2mm+d *1/10000), where d is the length of the measured distance.
On a household scale, this rangefinder is quite accurate. In any case, if even your copy shows an error higher than the declared one, you can always make a calibration. Here it is done very simply and very quickly. How? See below.
How to calibrate the CIGMAN CD-120G
To do this, enter the menu by pressing the button of the same name. Then use the “-” button to scroll up to the sight icon and press the “MEAS” button – the up arrow will light up yellow.
Then use “+” and “-” buttons to set the required correction value. For example, if you set the value of +0,002, this correction will be taken into account during the next measurements and 2 mm will be added to the final value. If you set a negative value with the sign “-”, on the contrary it will be subtracted.

Possible laser distance meter errors
| Error | Value and solution |
| ERR 1 | Reflection signal is too weak, use a reflective plate. |
| ERR 2 | Reflection signal is too strong, check different reflective surfaces. |
| ERR 3 | Battery voltage is low, charge the battery. |
| ERR 4 | Memory error, contact the service center. |
| ERR 5 | Pythagoras error, do the measurement again. |
| ERR 6 | Select a distance within the measurement range. |
| ERR 7 | Camera error, contact the service center. |
| ERR 8 | Angle sensor error, contact the service center. |
Supply package
The CIGMAN CD-120G laser distance measure is delivered in a stylish, dense, branded box. Inside is a molded, perfectly sewn, high-quality carrying case for the rangefinder.
Also included are a hand strap, USB Type-C cable, a small sighting plate and a multilingual instruction manual.

Pros and cons
Highest build quality, built-in video camera (which allows you to work outdoors in any weather), very high IP68 dust and moisture protection, high precision biaxial tilt sensor, a large number of useful indirect calculations including P2P function and remote area measurement with the camera, cylinder volume calculation, measurement of inaccessible, inclined and curved sections, easy calibration, muted beep and vibration when confirming the measurement, digital spatial level, 3 reference points, tilt angle displays in degrees or percent and much more.
You cannot use the distance meter while it is on charge.
Controversial points. I didn’t quite like the navigation. It seems to be simple, but it’s a bit awkward, it’s hard to explain in words, you can understand it only after using the rangefinder. Though with time you get used to it, and the control does not cause such discomfort. In general, it’s a matter of habit.
