- Where to buy laser measure profitably and reliably?
- Technical specifications
- Instrument housing
- Functionality of the SNDWAY SW-70G laser distance meter
- Checking stability and accuracy of measurements
- How to calibrate the Sndway SW-70G laser distance meter
- Possible rangefinder errors
- Distance meter delivery set
- Pros and cons
New! Laser distance meter SNDWAY SW-70G with a green laser beam. This particular model counts distances up to 70 meters, but the line also includes modifications for 50 and 100 meters.
Rangefinder is made at a very high level of quality materials, and has a very good functionality, but first things first in this review.
Where to buy laser measure profitably and reliably?

Technical specifications
-
Accuracy: ± 2mm
-
Working distance: 0.05 – 70m
-
Electronic angle gauge: ± 90°
-
Quick calculation of S, V: yes
-
Painter function: yes
-
Pythagoras calculation: 4 variants
-
Min/max function (Tracking): yes
-
Timer: up to 60 seconds
-
Addition/subtraction: yes
-
Maximum memory: 99 cells
-
Three counting points: rear / front / from the thread
-
Audio: switchable
-
Backlight of the screen: yes
-
Calibration: -9mm to +9mm
-
Automatic switch-off: laser – 20 sec, full – 150 sec.
-
Units: meters / feet / inches
-
Laser: Class II, 500-535nm, <1mW
-
Batteries: 3* AAA 1.5V
-
Number of measurements per battery pack: 8 000
-
Permissible humidity: 20% … 80% RH
-
Working temperature: 0°C …+40°C
-
Storage temperature: -20°C … +60°C
-
Dimensions: 118*52*27mm
-
Weight with batteries: 148 g.
Instrument housing
It must definitely be said that the Sndway SW-70G laser distance meter has a nice design and just excellent build quality, this can be seen when you first get acquainted with the rangefinder.
All of the details, all of the inscriptions are clearly aligned. The main body has anti-slip coating, so the Meter sits perfectly in your hand at any measuring without any hint of slipping out, which by the way can not be said about another new model of the same company – distance meter Sndway H-D510A.

The return laser receiver has a large optical system, which allows the return signal to be processed quickly and confidently. As a consequence, measurements are taken at high speed.

I would like to mention finally made, high-quality battery compartment cover, which is very tightly, we can say almost hermetically closed, providing protection from dust and moisture in accordance with the code IP54 on the European classification.

If we talk about the buttons, about the keyboard controls in general, which we will consider in great detail below, here we can say that the engineers and designers also tried their best. Large buttons, located at a sufficiently large distance from each other are very comfortable when working not only with bare hands, but equally with gloves.
Button stiffness is well balanced, there is a clear understanding of when to press.
Another huge plus of Sndway SW-70G model is that it is equipped with a thread for mounting on a tripod, what can’t boast the cheaper distance meter from the new line Sndway SW-DS50, which by the way has identical functionality, but because of the lack of the notorious thread, there is no way to fully disclose it.

The point is that all indirect calculations, of which these rangefinders are not few, are best done from a tripod, if you want to get the result with the smallest error of course. As a rule, control measurements influencing the accuracy of the final result are made either at a strict observance of an angle of 90 degrees or from one point, and it is possible to do it at a proper level only when the distance meter is fixed on a tripod.
Functionality of the SNDWAY SW-70G laser distance meter
As stated earlier, the functionality in the entire new SNDWAY distance meter line is almost identical, except for small details. To find out, let’s walk through each button.

1. The green “READ” button turns on the rangefinder, makes a single measurement, and activates the “min/max” function when it is pressed for 2-3 seconds. This function is very convenient when calculating diagonals from angle to angle, and when calculating the shortest distance (perpendicular).
It is very easy to do: Just activate the function and scan the required area, for example a corner and measure somewhere near the corner, that’s all! The screen above will be displayed the highest value – this will be the corner (diagonal). The value below is respectively the shortest distance, it is not interesting now, because the diagonal is calculated. And in the final line is the value of the measurement that was made.
This button is also used to call the calibration menu. See below for more information.

2. The “with cube” button is a function key. Let’s talk about it in more detail.
The first click on this button causes a quick calculation of the area by two sides. You measure the length and then the width of the room – in the final line you get the area in meters square.

A second click on the same button activates a quick calculation of the volume by analogy with the area, only the height measurement is added. After three measurements: length, width, height in the final line you get the desired value of volume in cubic meters. Everything is very fast and simple.

The third press brings up a narrowly-defined function intended mainly for painters. It shortens the time needed to calculate the wall area. One calculation finds out the area of two adjacent walls.
You measure from the corner of the adjacent walls: a) measuring the height, b) measuring the length of one wall c) measuring the length of the second wall – in the final line shows the area of the two walls in meters square. In another way, after measuring the height, you can measure unlimited number of wall lengths and the total area will be displayed in the final line: H*(A+B+C+D…) = S(m2).
The same function is available for the Huepar LM120A inexpensive laser distance meter which is also equipped with a tripod mount thread.

The fourth press starts calculating the distance through an obstacle via a known hypotenuse and angle. Imagine that you want to know the distance to the house, but you are obstructed by a fence or other obstacle. You measure to the visible top of the house, and in the final line you get the horizontal distance to the house.

If you press this button 5 times in a row, the function of calculating the diagonals horizontally and vertically by two measurements, namely length and width or length and height to calculate the diagonal vertically, will appear.
In all functions in the form of hints on the screen at the top in the schematic designations blink lines of measurements to be made, so no difficulties should arise, everything is very simple.

The sixth press activates one of the most interesting functions, which is the calculation of the height of the inaccessible segment, which is both below and above the horizon. In this calculation it is very important to use a tripod, because the third measurement should be made at an angle of 90 degrees, at this point the built-in angle gauge, which will display the angle of installation, will also help a lot.
If you keep a strict angle, the error of measurement will be as minimal as possible!

Finally, the seventh press activates the inaccessible height calculation function with three measurements. Again a tripod is required for high accuracy here. The first measurement is made to the upper point of the segment, the second as perpendicular as possible, and the third to the lower point – in the final line you will get the height (length) of this segment.

3. Button “UNIT” with the sound icon. As can be seen from the designation, the key is responsible for switching the units of measurement (meters, feet, inches), for turning on or off the sound accompaniment when measuring.
4. The +/- button is responsible for adding or subtracting results. Here it is necessary to allocate some not quite convenient nuance. If we speak about addition or subtraction of simple rectilinear measurements, there are no questions here, in one session you can add the calculated values and immediately subtract another distance from the obtained result.
But to do the same with areas or volumes is not possible, that is, in one session, you can either only add areas (volumes) or only subtract from each other.

5. Button for timer and countdown point change. A short press on this button will switch the reference points alternately, which in turn will be displayed on the icon in the upper left corner. The Sndway SW-70G laser distance meter has three such reference points: rear, front, and thread.

The second purpose of this button is to activate the timer for delayed measurement. This thing is also very convenient for measuring from a tripod and other non-moving objects.
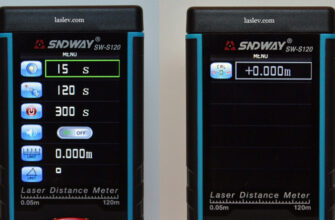
The timer is activated by pressing the button for a couple of seconds, after which the timer value of 5 seconds flashes on the screen, the maximum value that can be set is 60 seconds. The timer value is set with the “+/-” and “cube” buttons.
You can set the timer only for direct measurements, for any indirect calculations it is also activated, but only for 5 seconds.

6. The “OFF/CLEAR” button turns the Meter off when held down and clears the screen of the latest results when briefly pressed.
7. Button “with floppy disk”. Responsible for recording the results to be memorized and, accordingly, for recalling them for review. The internal memory of the rangefinder is designed for 99 recordings.
To record a result in the memory, you should measure and hold the button for 2 seconds until you hear a characteristic signal and the next recorded cell with the serial number will appear on the top of the screen.
Recalling the memory to view the recorded values is done by briefly pressing the floppy disk button, and to scroll through the cells use the “+/-“ and “cube” keys.

If you want to delete a single value from the memory, you must go to that cell and briefly press the “OFF/CLEAR” button to delete that value. If it is necessary to clear the entire memory, the “OFF/CLEAR” button should be pressed for a few seconds until the characteristic sound signal.
Checking stability and accuracy of measurements
The Sndway SW-70G laser distance meter showed just perfect stability of values at several consecutive measurements from the same distance.

As for accuracy, everything is also fine here, because even if out of the box rangefinder gives an error greater than the stated it can quickly and independently, which is not unimportant, immediately correct.
How to calibrate the Sndway SW-70G laser distance meter
The laser rangefinder has a measurement calibration available from – 9mm to +9mm. The special menu is called up as follows.
- With the Meter turned off, press the two green “Read” and “Off/Clear” buttons simultaneously for 3-4 seconds until “CAL” blinks on the screen.
- Using buttons “+/-“ and “cube” enter the correction value, let’s say + 2
- Be sure to press the “READ” button after making the correction so that the new settings are memorized by the instrument.
This is all you need to know about calibrating the Sndway SW-70G laser distance meter.

Possible rangefinder errors
| Error code | Cause | How to fix it |
|---|---|---|
| Err | Distance exceeded | Measure again within the permissible measuring range |
| Err1 | Signal is too weak | Aim beam at target with better reflectivity |
| Err2 | Signal too strong | Aim beam at a target with a weaker reflectivity |
| Err3 | Batteries are too low | Insert new batteries |
| Err4 | Out of operating temperature range | Perform measurement at an appropriate temperature |
| Err5 | Incorrect measurement or error in Pythagoras equations | Measure again or make sure that the hypotenuse is longer than the second known side of the triangle |
| Err6 | Angle sensor error | Contact the service center |
Distance meter delivery set
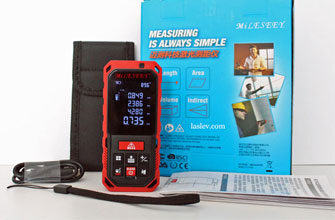
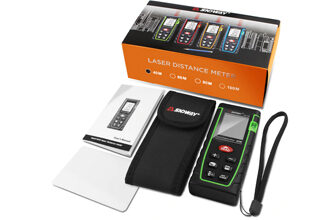
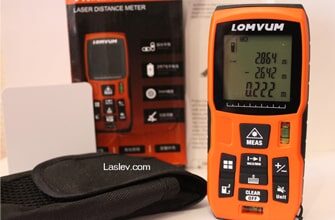
The Sndway SW-70G laser distance meter is delivered in a compact colorful branded cardboard box in which in addition to the rangefinder fits:
- Device
- Quality case with logo
- Hand strap
- Small reflective double sided plate
- English manual

Pros and cons
Excellent build quality, fast and stable measurements, bright green dot, built-in inclinometer, rare functions – obstacle calculation, inaccessible segment height calculation, painter function, large screen, tripod mount thread, high-quality battery compartment cover, three counting points, timer and built-in memory for 99 cells, self-calibration.
You cannot add and subtract areas (volumes) in the same session, you can either only add or only subtract.
