Many users initially incorrectly consider the stated error. From what then get very upset, and blame the manufacturer. Let’s get this issue straight once and for all.
That’s the way people work. He wants everything to be perfect, including that the error of the laser level is zero. But this is a very difficult task. To get closer to this value, you need to do a lot of work. And the user himself.
The manufacturer does not need to spend huge resources on setting each unit “to zero”. Since the accuracy of ± 0.5 mm per 1 meter is sufficient for most finishing and construction works. For a second – this is the accuracy of ANY construction bubble level.
Moreover, if measurements are made above the head (when the flask with the bubble looks down), the error increases to ± 0.75 mm per 1 meter. Yes, that’s exactly it. And this is honestly indicated by only one manufacturer (Stabila) on its construction levels. Everyone else is just silent.
We already know how to check and calculate the error for laser levels that project a line through a cylindrical prism for one horizontal segment (see here). But how is the error correctly calculated for levels with conical prisms or four cylindrical ones that project a horizontal plane around the entire perimeter? Now let’s look at it.
Error calculation
The accuracy is always indicated with the sign ( ± ) and this is not accidental! For example, you buy a high-quality and inexpensive laser level Helper 603CG. The stated error is ± 0.3 mm per 1 meter, or if converted to 10 meters, it is ± 3 mm.
That is, most users think that when running all sides of the horizon through a point at 10 meters, the run-up should be no more than 3 mm, but this is not the case! The maximum run-up in the permissible declared values at 10 meters will be 6 mm. And now you will understand why.
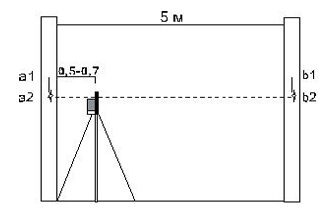
The error is measured in two directions, pay attention to the figure below.
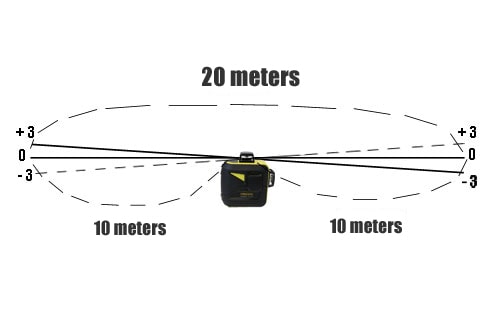
Calculation of the laser level error by steps
- You set the device and marked the first point in the center of the line at 10 meters.
- We turned the device 90 degrees and marked the second point, which is higher than the first point by 3 mm (+).
- We turned the device 90°again. And marked the third point. Let’s say it coincides with point 1, or runs in a corridor from – 3 to + 3 mm relative to the first point.
- Turn 90 degrees again. And see how the last sector of the horizon passes relative to the first point. It passes below the first point by the same 3 mm ( -).
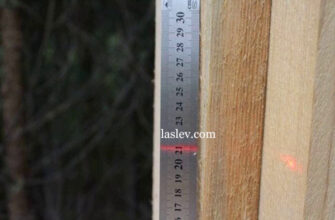
When turning, do not move the laser level to the side and do not change the height! It is important. It is best to do this on a rotary base.
Thus, the maximum run-up is obtained between 2 and 3 points = 6 mm. But as you remember, the level is at a distance of 10 meters from the wall. And when you turn 180 degrees, you get a marking of 20 meters.
Thus, an error of 6 mm corresponds to the declared accuracy of ± 0.3 mm per 1 meter (0.3*20 = 6).
This calculation is applied at other distances and a different stated error. So do not forget about the standing in front of the sign (±).
Examples of maximum errors
| The stated error | Maximum run – up of 5 m | Maximum run – up of 10 m |
| ± 0.1 mm/1 m | 1 mm | 2 mm |
| ± 0.2 mm/1 m | 2 mm | 4 mm |
| ± 0.4 mm/1 m | 4 mm | 8 mm |
| ± 0.5 mm/1 m | 5 mm | 10 mm |
| ± 0.15 mm/1m (±1mm/7m) | 1.5 mm | 3 mm |
Yes, you still need to remember and know. All laser levels, of any brand, are initially adjusted at the manufacturer’s factory in accordance with the declared characteristics. However, many factors can affect the accuracy of the device. Including delivery, which can happen anything.
That is why you can get or buy a laser level in the store with an error that goes beyond the stated one. But even if this happened, you should not worry.
Making a level adjustment is not so difficult at home. And if you try to adjust the device much more accurately than it was originally done at the factory.
Hi Sergei,
I have got one of these 4D 16 Line lasers. My aim is to use the lasers for smoke pattern visualization within a clean room environment in pharmaceutical filling lines, as well as room HVAC airflow patterns.
These filling machines are supplied with either unidirectional or laminar filtered air. Air flow visualization studies are performed using an auto atomized fog/smoke using water to introduce the smoke/fog into spots to demonstrate there is no risk to the products; it is essential for finding slow airflows, stagnant spots, etc. as well as process understanding and mitigating the risk of contamination to medicines being processed
I have used a small dewalt laser level, i think this one will give better results.
what are your thoughts in developing a specific laser to meet these needs? I don’t know if anything is in the market for this.
I honestly don’t know. That’s a creative idea.